Vue2项目[基于vue-cli]工程化
【一】环境搭建
安装node
使用npm/cnpm
npm换源:npm config set registry https://registry.npmmirror.com
安装vue-cli
cnpm install -g @vue/cli
# 安装脚手架
cnpm install -g @vue/cli
# 切换目录,创建项目
cd '指定目录下'
vue create 项目名
# 选择配置
# 使用 【方向键】选择 回车键进入下一步
# 选择插件时,使用【空格键选中/取消】


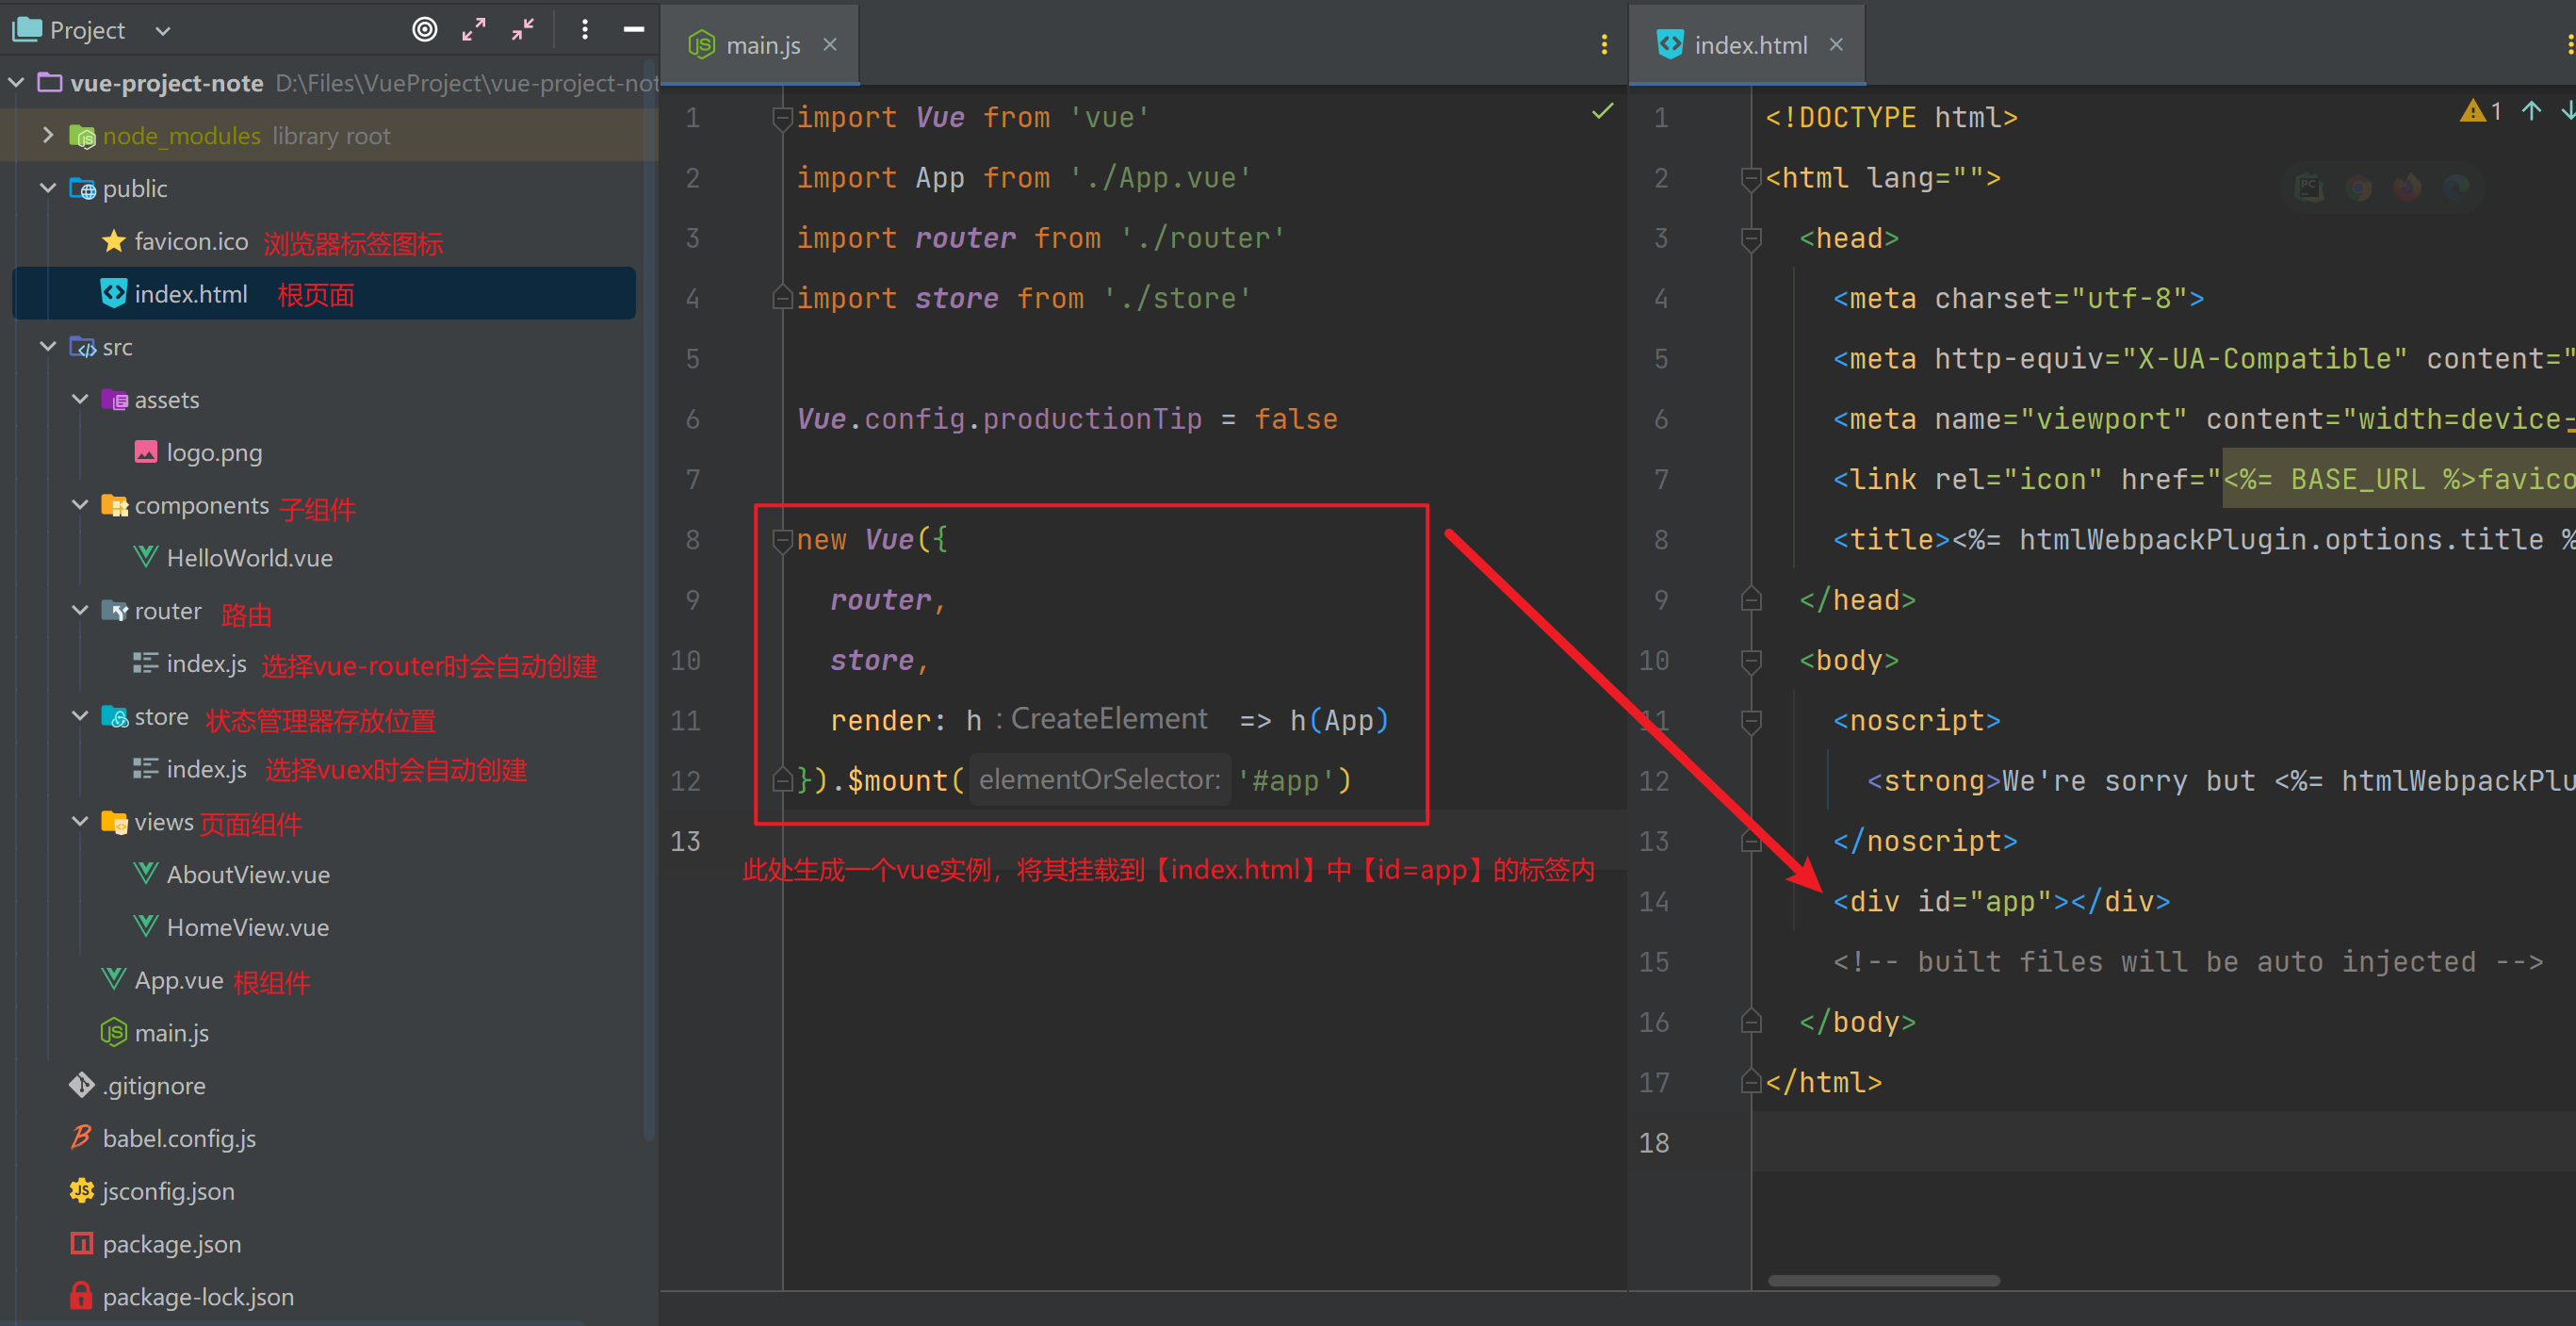
【二】文件夹目录
|- vue-project 				# 项目文件名
	|- node_modules				# 项目环境
    |- public					# 存放公共资源
    	|- favicon.ico				# 网站的图标文件
        |- index.html				# 项目的入口 HTML 文件
    |- src						# 项目的源代码文件夹
    	|- assets					# 存放静态资源文件
        |- components				# 存放vue组件文件
        	|- HelloWorld.vue
        |- router					# 存放 Vue Router相关的配置文件
        	|- index.js					# 定义路由映射关系
        |- views					# 存放视图组件文件
        	|- HomeView.vue				# 默认首页内容
			|- AboutView.vue			# 默认关于页面内容
        |- App.vue					# 项目的根组件
        |- main.js					# 项目的入口
    |- package.json				# 项目配置文件  # npm install 时会根据这个
    |- package-lock.json		# 用来确保安装的依赖包与开发版本一致
    |- vue.config.js			# vue cli 项目的配置文件

【三】项目运行机制
【1】main.js
// 导入  与 from xxx import xxx 一样
import Vue from 'vue'
import App from './App.vue'
import router from './router'

Vue.config.productionTip = false

// new 一个Vue实例
new Vue({
  router,  // router对象  // 相当于router:router对象
  render: h => h(App)  // 以App作为根组件创建虚拟dom
  `render: h => h(App) 定义根组件的渲染方法  # 接收createElement函数作为参数 创建虚拟dom
  等价于:
  render: function (createElement) {
            return createElement(App);}
  `
}).$mount('#app') // 将该实例挂载到【index.html】中【id=app】的标签上
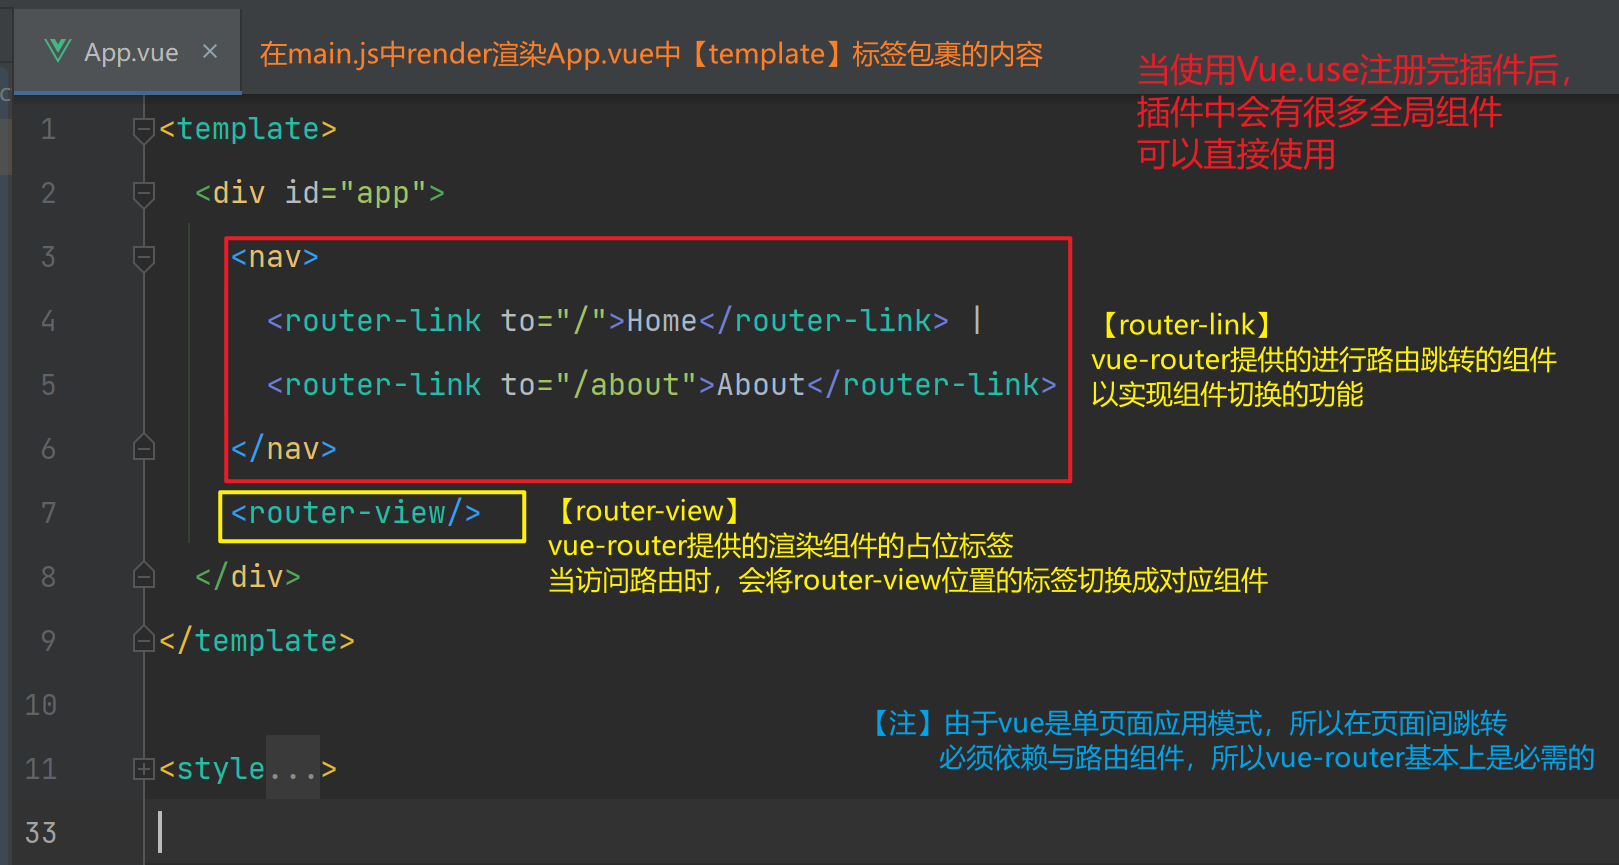
【2】App.vue
- 【注意】在vue2中,template标签中的内容,只能有单个标签,也就是template下只能有一个子标签
<template>
    <!-- vue2,在template标签下,只能有一个标签 -->
	<div>
    	<p>其他代码</p>
    </div>
    <!-- 如果有其他标签,将会抛出异常 -->
    <div></div>
</template>

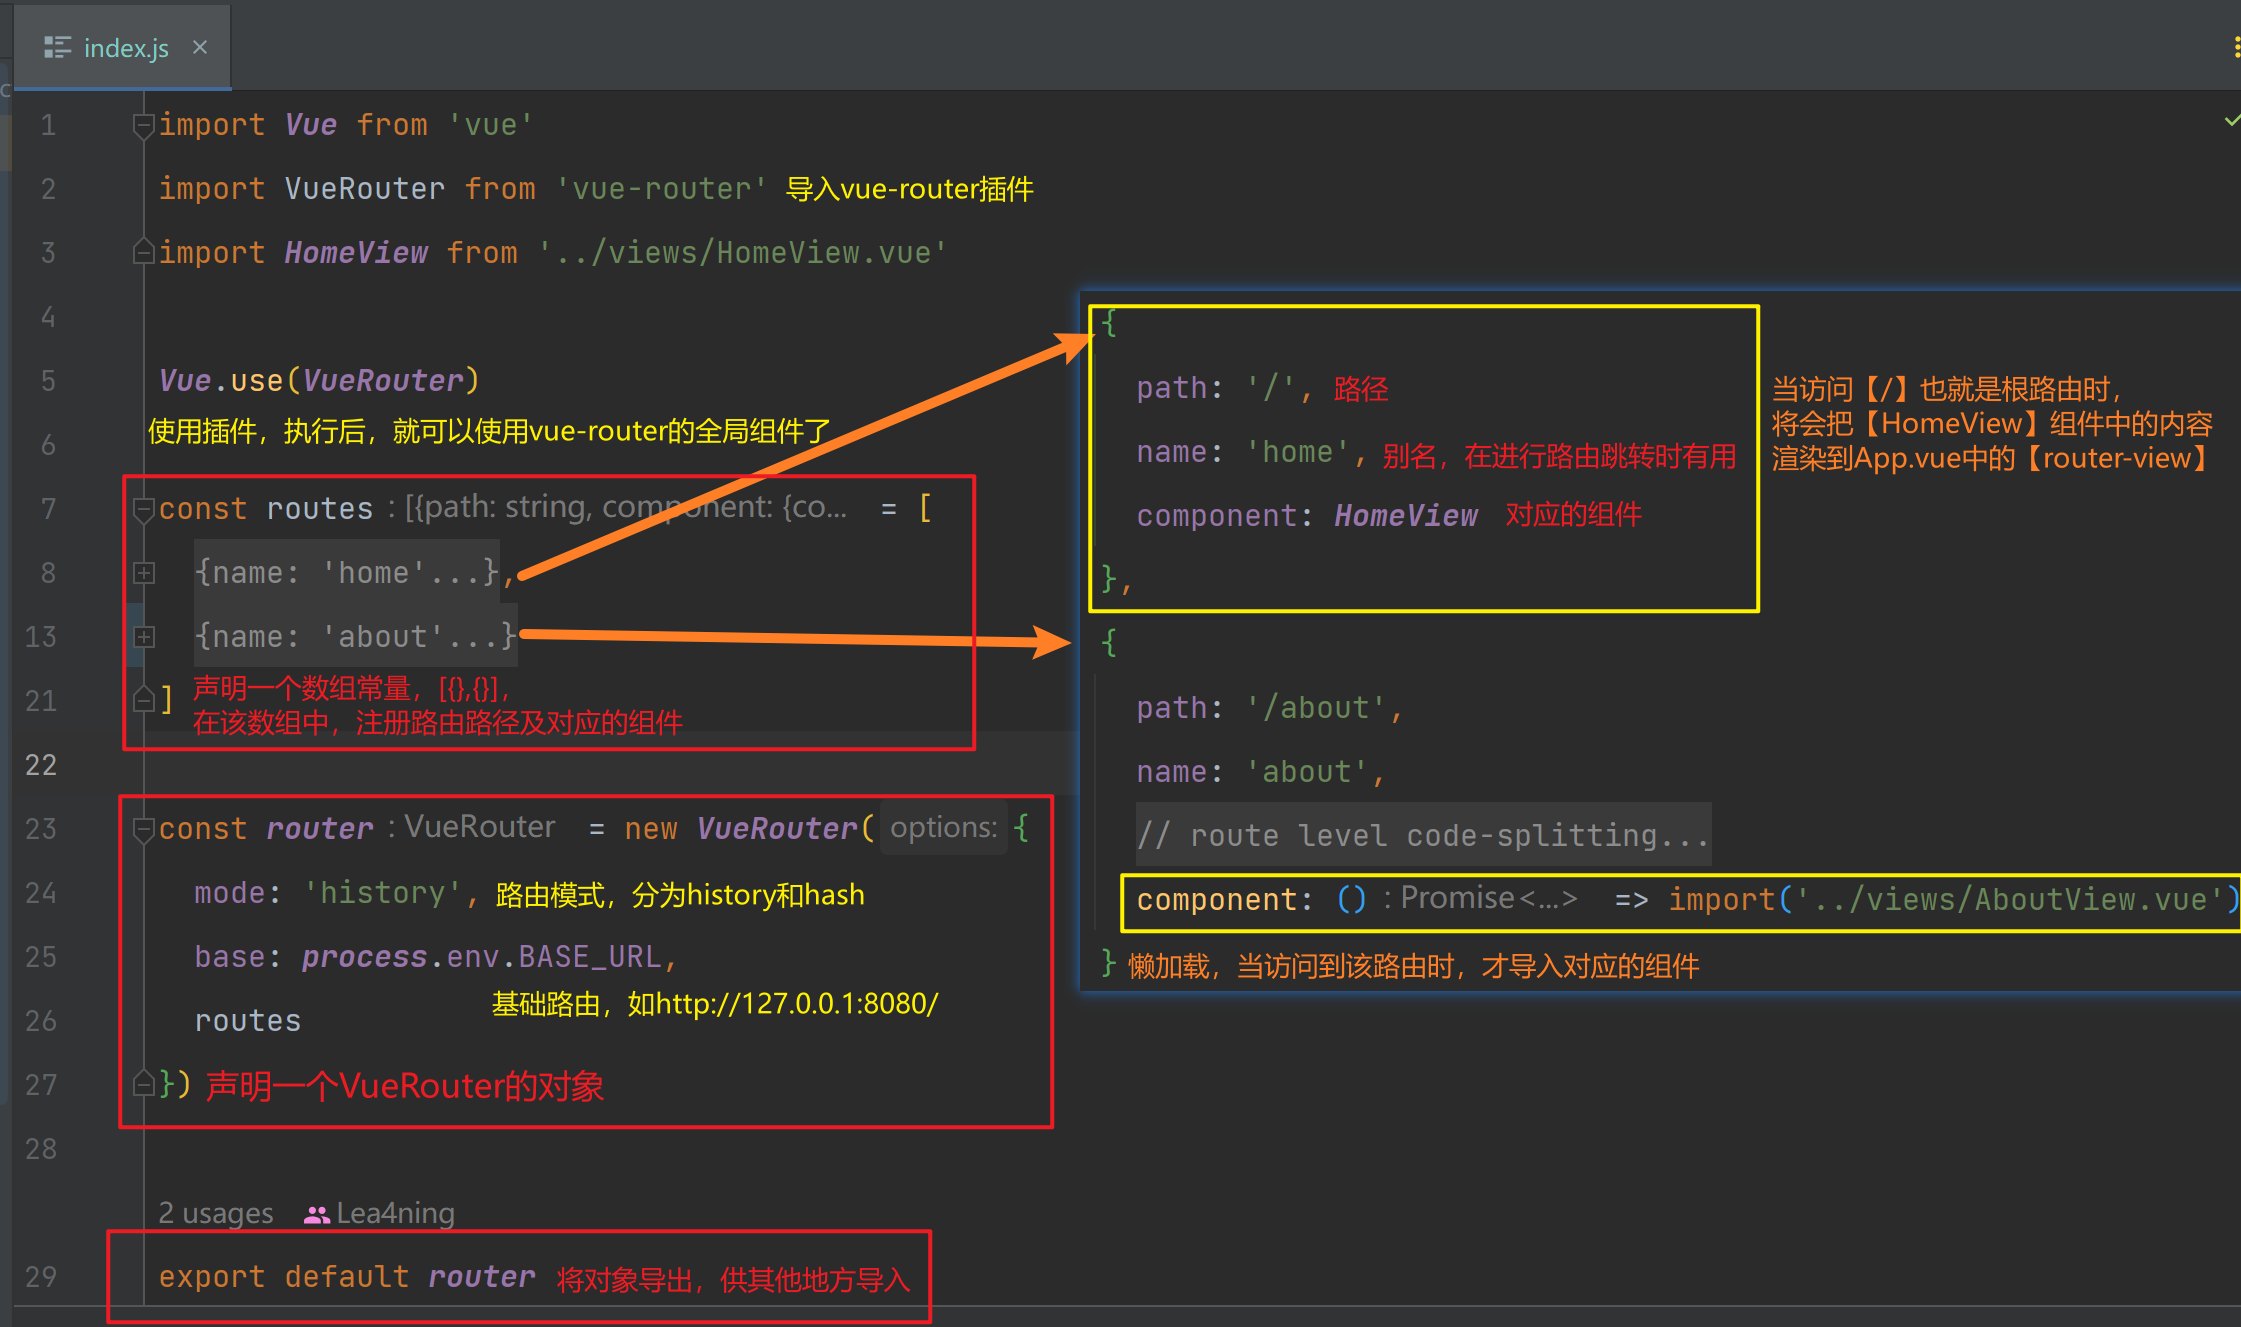
【3】router/index.js
- 在文件夹下的index.js,与python包的
__init__类似,当导入时,会先执行index.js,如果写在index.js中的代码,可以导入到文件夹那层即可

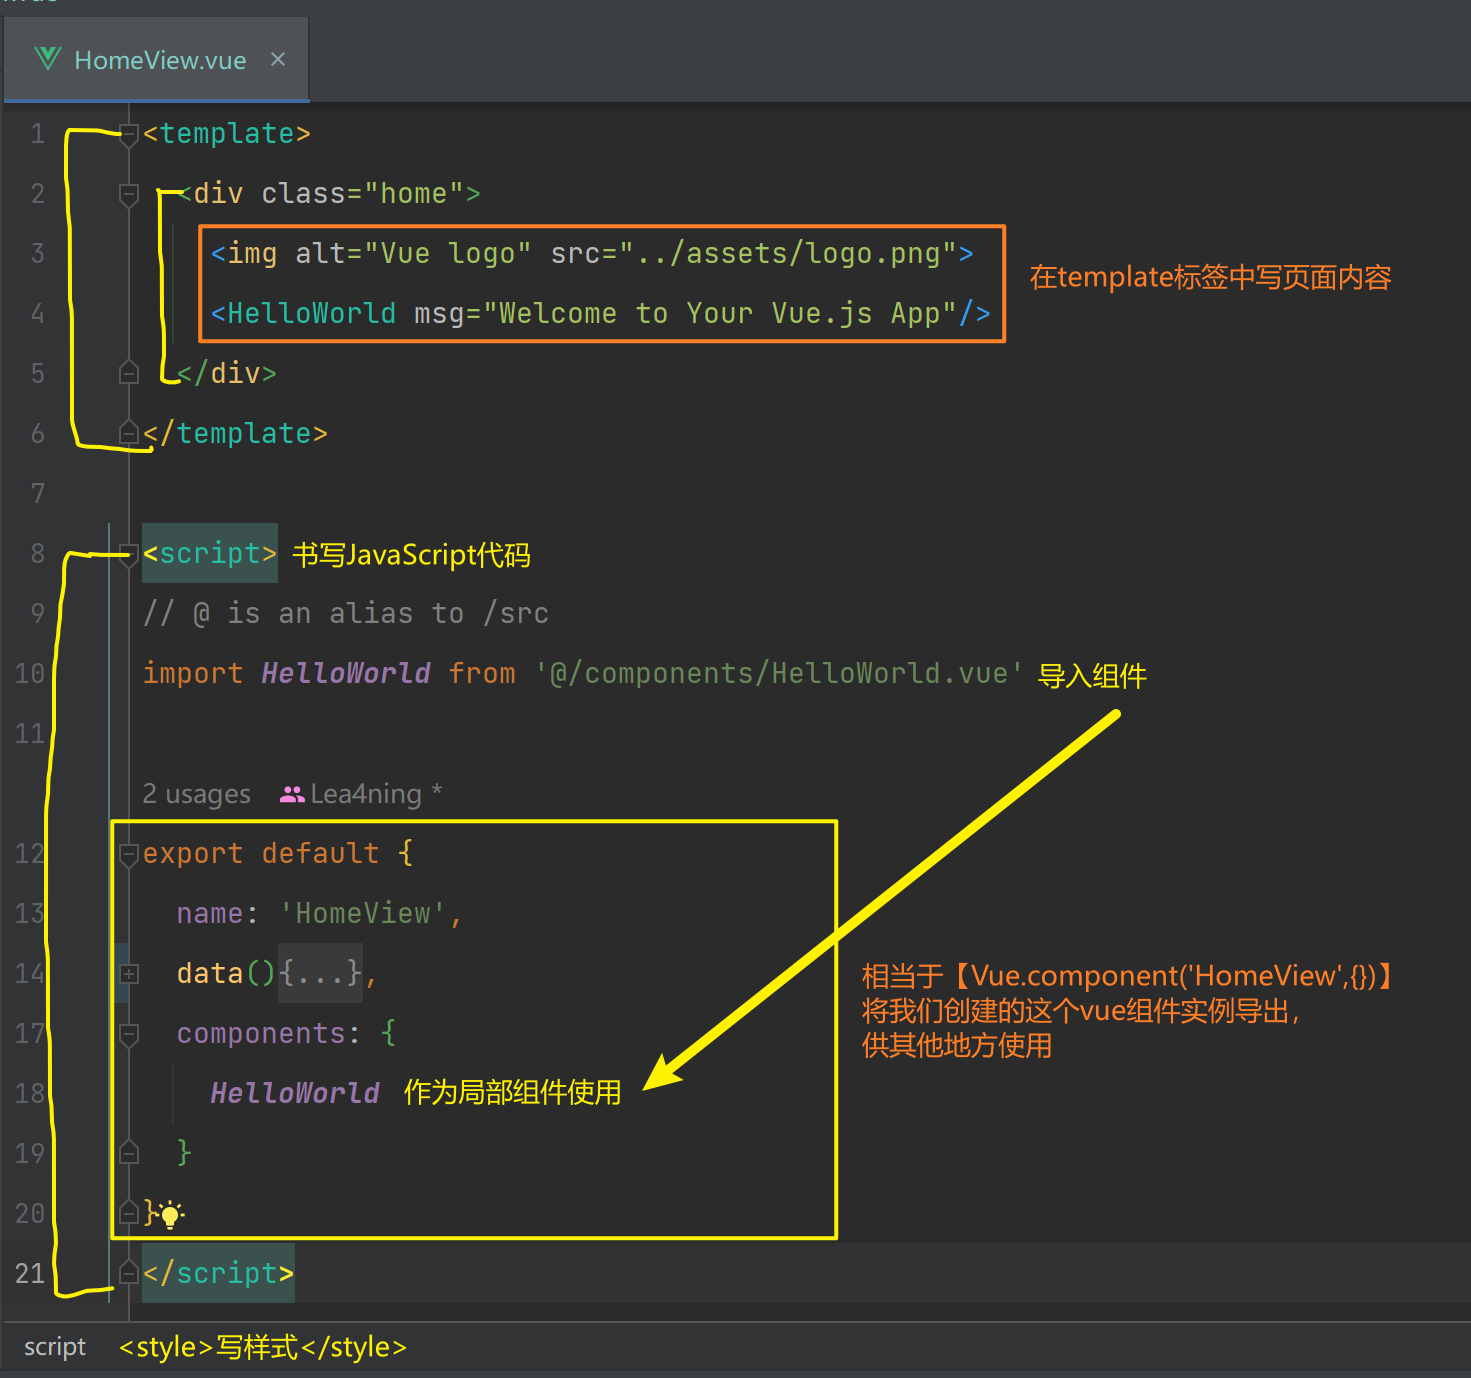
【4】HomeView.vue(组件基本结构)
- 在vue2中,基本结构为
<template>
    <div>

    </div>
</template>

<script>
</script>

<style>
</style>
