Spring基于注解的IOC
1. 构建注解环境
在beans.xml中加入context名称空间和约束
<?xml version="1.0" encoding="UTF-8"?>
<beans xmlns="http://www.springframework.org/schema/beans"
       xmlns:xsi="http://www.w3.org/2001/XMLSchema-instance"
       xmlns:context="http://www.springframework.org/schema/context"
       xsi:schemaLocation="http://www.springframework.org/schema/beans
        http://www.springframework.org/schema/beans/spring-beans.xsd
        http://www.springframework.org/schema/context
        http://www.springframework.org/schema/context/spring-context.xsd">
配置包扫描,保证Spring可以扫描到注解,从而使用注解

这样,com.itheima下的所有包及其子包下的注解都能够被扫描到
2. 常用IOC注解按作用分类
2.1 用于创建对象
这些注解的作用与XML中bean标签的功能相同
@Component:把当前类对象存入Spring容器中
属性:
- value:指定Bean的id,默认值是当前类名
注:不属于Web应用三层架构(表现层、业务层、持久层)的类,如果需要创建对象就使用@Component
@Controller
@Service
@Repository
注:上述三个注解功能与@Component完全相同,仅用于Web应用表现层、业务层、持久层对象的创建
2.2 用于注入数据
这些注解的作用与XML中bean标签中<property>标签的功能相同
注:@Autowired、@Qualifier、@Resource用于注入其他bean类型的数据;@Value用于注入基本类型和String类型的数据;集合类型的数据注入只能通过XML来实现
2.2.1 @Autowired
功能:自动按照类型注入,只要容器中有一个唯一的bean对象的类型和要注入的变量类型匹配,就可以注入成功;如果容器中没有任何bean类型和要注入的变量类型匹配,报错;如果有多个类型匹配,那么首先根据变量类型找出容器中的所有类型匹配的bean对象,然后根据变量的名称匹配这些bean对象的id,匹配到即可进行注入。
出现位置:常用的是变量或方法上
细节:在使用注解注入时,set方法就不是必须的了

容器内存在多个数据类型相同Bean的情况

2.2.2 @Qualifier
功能:在@Autowired的基础上,按照容器中bean对象的id注入,在给类成员注入时不能单独使用,但是在方法上可以单独使用
属性:
- value:指定bean对象的id
2.2.3 @Resource
功能:直接按照bean对象的id注入,可以独立使用
属性:
- name:指定bean对象的id
2.2.4 @Value
功能:用于注入基本类型和String类型的数据
属性:
- value:用于指定数据的值,可以使用Spring中的SpEL(Spring的EL表达式:${表达式})
2.3 用于改变作用范围
这些注解的作用与XML中bean标签中scope属性的功能相同
@Scope
功能:指定bean对象的作用范围
属性:
- value:指定范围的取值,常用取值:singleton prototype
2.4 和生命周期相关
这些注解的作用与XML中bean标签中init-method和destroy-method属性的功能相同
@PreDestroy
功能:指定bean对象的销毁方法
@PostConstruct
功能:指定bean对象的初始化方法
3. Spring基于注解和XML的IOC的CRUD实例
3.1 导入坐标
包括Spring核心框架、mysql、DButils持久层框架、Junit测试框架、C3P0连接池
<?xml version="1.0" encoding="UTF-8"?>
<project xmlns="http://maven.apache.org/POM/4.0.0"
         xmlns:xsi="http://www.w3.org/2001/XMLSchema-instance"
         xsi:schemaLocation="http://maven.apache.org/POM/4.0.0 http://maven.apache.org/xsd/maven-4.0.0.xsd">
    <modelVersion>4.0.0</modelVersion>

    <groupId>com.itheima</groupId>
    <artifactId>day06_eesy_03springannocrud</artifactId>
    <version>1.0-SNAPSHOT</version>
    <packaging>jar</packaging>

    <dependencies>
        <dependency>
            <groupId>org.springframework</groupId>
            <artifactId>spring-context</artifactId>
            <version>5.2.11.RELEASE</version>
        </dependency>
        <dependency>
            <groupId>mysql</groupId>
            <artifactId>mysql-connector-java</artifactId>
            <version>8.0.19</version>
        </dependency>
        <dependency>
            <groupId>junit</groupId>
            <artifactId>junit</artifactId>
            <version>4.10</version>
        </dependency>
        <dependency>
            <groupId>c3p0</groupId>
            <artifactId>c3p0</artifactId>
            <version>0.9.1.2</version>
        </dependency>
        <dependency>
            <groupId>commons-dbutils</groupId>
            <artifactId>commons-dbutils</artifactId>
            <version>1.4</version>
        </dependency>
    </dependencies>
</project>
如果在导入坐标时发现爆红或者提示的版本中没有需要的版本
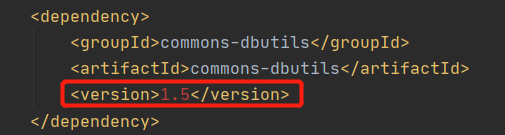
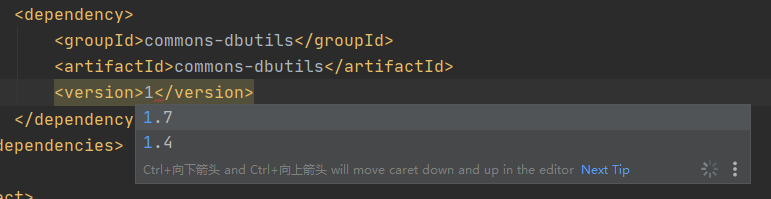
仅表示本地仓库中没有这个源,重新加载即可从配置的源仓库自动下载

如果已经配置了阿里云的仓库,查找需要的源可以通过如下网址
阿里云云效maven
3.2 创建表及实体类
表结构,数据随便插几条就可以

实体类

3.3 创建配置文件并配置注解IOC环境
bean.xml
<?xml version="1.0" encoding="UTF-8"?>
<beans xmlns="http://www.springframework.org/schema/beans"
       xmlns:xsi="http://www.w3.org/2001/XMLSchema-instance"
       xmlns:context="http://www.springframework.org/schema/context"
       xsi:schemaLocation="http://www.springframework.org/schema/beans
        http://www.springframework.org/schema/beans/spring-beans.xsd
        http://www.springframework.org/schema/context
        http://www.springframework.org/schema/context/spring-context.xsd">

    <context:component-scan base-package="com.itheima"></context:component-scan>
</beans>
3.4 Dao接口及实现类
IAccountDao
package com.itheima.dao;

import com.itheima.domain.Account;

import java.util.List;

public interface IAccountDao {
    /**
     * Retrieve
     * 查询所有
     * @return
     */
    List<Account> findAllUser();

    /**
     * Retrieve
     * 根据ID查询
     * @param id
     * @return
     */
    Account findUserById(Integer id);

    /**
     * Create
     * 保存账户
     * @param account
     */
    void saveUser(Account account);

    /**
     * Update
     * 更新账户
     * @param account
     */
    void updateUser(Account account);

    /**
     * Delete
     * 根据ID删除账户
     * @param id
     */
    void deleteUserById(Integer id);
}
AccountDao
package com.itheima.dao.impl;

import com.itheima.dao.IAccountDao;
import com.itheima.domain.Account;
import org.apache.commons.dbutils.QueryRunner;
import org.apache.commons.dbutils.handlers.BeanHandler;
import org.apache.commons.dbutils.handlers.BeanListHandler;
import org.springframework.beans.factory.annotation.Autowired;
import org.springframework.stereotype.Component;

import javax.swing.plaf.basic.BasicListUI;
import java.util.List;

@Component("accountDao")
public class AccountDao implements IAccountDao {

    @Autowired
    private QueryRunner queryRunner;


    public List<Account> findAllUser() {
        try {
            return queryRunner.query("select * from account", new BeanListHandler<Account>(Account.class));
        }catch (Exception e){
            throw new RuntimeException();
        }
    }

    public Account findUserById(Integer id) {
        try {
            return queryRunner.query("select * from account where id = ?", new BeanHandler<Account>(Account.class), id);
        }catch (Exception e){
            throw new RuntimeException();
        }
    }

    public void saveUser(Account account) {
        try {
            queryRunner.update("insert into account(id, uid, money) values(?,?,?)",account.getId(), account.getUid(), account.getMoney());
        }catch (Exception e){
            throw new RuntimeException();
        }
    }

    public void updateUser(Account account) {
        try {
            queryRunner.update("update account set uid = ?, money = ? where id = ?",account.getUid(), account.getMoney(), account.getId());
        }catch (Exception e){
            throw new RuntimeException();
        }
    }

    public void deleteUserById(Integer id) {
        try {
            queryRunner.update("delete from account where id = ?",id);
        }catch (Exception e){
            throw new RuntimeException();
        }
    }
}
首先Dao是需要创建的Bean,所以通过@Component("accountDao")进行创建,另外需要注入一个QueryRunner,由于QueryRunner是第三方的jar,我们不能直接在QueryRunner上加注解,所以QueryRunner的创建需要在XML中配置,同时保证容器中有唯一的QueryRunner,字段上通过@Autowired注解设置自动按类型注入即可。
bean.xml
<?xml version="1.0" encoding="UTF-8"?>
<beans xmlns="http://www.springframework.org/schema/beans"
       xmlns:xsi="http://www.w3.org/2001/XMLSchema-instance"
       xmlns:context="http://www.springframework.org/schema/context"
       xsi:schemaLocation="http://www.springframework.org/schema/beans
        http://www.springframework.org/schema/beans/spring-beans.xsd
        http://www.springframework.org/schema/context
        http://www.springframework.org/schema/context/spring-context.xsd">

    <context:component-scan base-package="com.itheima"></context:component-scan>
    <bean id="queryRunner" class="org.apache.commons.dbutils.QueryRunner">
        <constructor-arg name="ds" ref="ds"></constructor-arg>
    </bean>
    <bean id="ds" class="com.mchange.v2.c3p0.ComboPooledDataSource">
        <property name="driverClass" value="com.mysql.jdbc.Driver"></property>
        <property name="jdbcUrl" value="jdbc:mysql://localhost:3306/eesy_mybatis?serverTimezone=GMT"></property>
        <property name="user" value="root"></property>
        <property name="password" value="123456"></property>
    </bean>

</beans>
3.5 Service接口及实现类
IAccountService
package com.itheima.service;

import com.itheima.domain.Account;

import java.util.List;

public interface IAccountService {

    List<Account> findAllUser();

    Account findUserById(Integer id);

    void saveUser(Account account);

    void updateUser(Account account);

    void deleteUserById(Integer id);
}
AccountServiceImpl
package com.itheima.service.impl;

import com.itheima.dao.impl.AccountDao;
import com.itheima.domain.Account;
import com.itheima.service.IAccountService;
import org.springframework.beans.factory.annotation.Autowired;
import org.springframework.context.annotation.ComponentScan;
import org.springframework.context.annotation.Configuration;
import org.springframework.stereotype.Component;

import java.util.List;

@Component("accountService")
public class AccountServiceImpl implements IAccountService {

    @Autowired
    private AccountDao accountDao;


    public List<Account> findAllUser() {
        return accountDao.findAllUser();
    }

    public Account findUserById(Integer id) {
        return accountDao.findUserById(id);
    }

    public void saveUser(Account account) {
        accountDao.saveUser(account);
    }

    public void updateUser(Account account) {
        accountDao.updateUser(account);
    }

    public void deleteUserById(Integer id) {
        accountDao.deleteUserById(id);
    }
}
Service也是需要创建的Bean,通过注解创建即可,此时容器中已有Dao,通过注解自动通过类型进行注入即可
3.6 测试
import com.itheima.domain.Account;
import com.itheima.service.IAccountService;
import com.itheima.service.impl.AccountServiceImpl;
import org.junit.Test;
import org.springframework.context.ApplicationContext;
import org.springframework.context.support.ClassPathXmlApplicationContext;

import java.util.List;

public class TestSerice {
    @Test
    public void testFindAll() {
        ApplicationContext applicationContext = new ClassPathXmlApplicationContext("bean.xml");
        IAccountService accountService = applicationContext.getBean("accountService", AccountServiceImpl.class);
        List<Account> allUser = accountService.findAllUser();

        for (Account account: allUser){
            System.out.println(account);
        }
    }
    @Test
    public void testFindOne() {
        ApplicationContext applicationContext = new ClassPathXmlApplicationContext("bean.xml");
        IAccountService accountService = applicationContext.getBean("accountService", AccountServiceImpl.class);
        Account userById = accountService.findUserById(1);

        System.out.println(userById);
    }
    @Test
    public void testSave() {
        Account account = new Account();
        account.setId(5);
        account.setUid(5);
        account.setMoney(5000d);
        ApplicationContext applicationContext = new ClassPathXmlApplicationContext("bean.xml");
        IAccountService accountService = applicationContext.getBean("accountService", AccountServiceImpl.class);
        accountService.saveUser(account);

    }
    @Test
    public void testUpdate() {
        Account account = new Account();
        account.setId(5);
        account.setUid(5);
        account.setMoney(6000d);
        ApplicationContext applicationContext = new ClassPathXmlApplicationContext("bean.xml");
        IAccountService accountService = applicationContext.getBean("accountService", AccountServiceImpl.class);
        accountService.updateUser(account);


    }
    @Test
    public void testDelete() {
        ApplicationContext applicationContext = new ClassPathXmlApplicationContext("bean.xml");
        IAccountService accountService = applicationContext.getBean("accountService", AccountServiceImpl.class);
        accountService.deleteUserById(5);


    }
}
3.7 CRUD实例中存在的两个问题
- bean.xml依然存在,能不能通过其他方式实现配置

- 测试代码开发和测试部分耦合度高,图中标红部分一般测试人员无法完成

如何解决上述两个问题,继续往下看
4. 配置类相关的注解
用于解决第一个问题(bean.xml依然存在,能不能通过其他方式实现配置)
4.1 @Configuration
表明当前类是一个配置类,作用和bean.xml是一样的
@Configuration标注的类(配置类)本身也是容器中的一个组件
配置类内部通过@Bean注册组件,默认是单实例的
Spring 5.2以后,@Configuration中有一个新属性boolean proxyBeanMethods() default true
proxyBeanMethods:是否为代理Bean的方法
proxyBeanMethods = true(Full模式):保证每个@Bean方法被调用多少次返回的组件都是单实例的
-
配置类对象为代理对象com.atguigu.springboot.config.MyConfig$$EnhancerBySpringCGLIB$$89386c4e@1da6ee17
-
外部(配置类中的其他组件注册方法之间的调用也是外部调用,参考Full模式的应用场景)无论对配置类中的组件注册方法调用多少次获取的都是之前注册到容器中的单实例对象,SpringBoot总会检查这个组件是否在容器中,如果在容器中,就直接从容器中取。从而保证组件单实例
//        ConfigurableApplicationContext context:拿到IOC容器
        ConfigurableApplicationContext context = SpringApplication.run(HelloApplication.class, args);

//        拿到容器中的pet对象
//        context.getBean(组件name, 组件类型):精确获取指定类型指定name的组件
        Pet tomcat = context.getBean("tomcat", Pet.class);
//        拿到容器中的配置类对象
        MyConfig config = context.getBean(MyConfig.class);

//        调用配置类的组件注册方法拿到的对象
        Pet tomcat1 = config.tomcat();

//		 com.atguigu.springboot.config.MyConfig$$EnhancerBySpringCGLIB$$89386c4e@1da6ee17
        System.out.println(config);
        System.out.println(tomcat == tomcat1);//true
proxyBeanMethods = false(Lite模式):每个@Bean方法被调用多少次返回的组件都是新创建的
-
配置类对象不是代理对象
com.atguigu.springboot.config.MyConfig@15fc442
-
外部每次调用都会产生一个新的对象
Full模式的应用场景:解决组件依赖
比如User对象是持有一个Pet对象的,即User组件依赖了Pet组件,定义如下
public class User {

    private String name;
    private Integer age;

    private Pet tomcat;

    //set、get、toString方法省略
}
public class Pet {
    private String name;
    //set、get、toString方法省略
}
配置类如下
@Configuration(proxyBeanMethods = true)
public class MyConfig {

    @Bean
    public User user01(){
        User zhangsan = new User("zhangsan", 18);
//	    Full模式下调用配置类中的组件注册方法会先检查容器中是否存在指定的组件,这样就能拿到容器中的组件
//	    如果换成Lite模式,每次调用组件注册方法都会生成一个新的Pet对象,新的Pet对象就不是容器中的Pet对象
        zhangsan.setTomcat(tomcat());
        return zhangsan;
    }

    @Bean
    public Pet tomcat(){
        return new Pet("tomcat");
    }
}
测试方法的部分内容如下
//        ConfigurableApplicationContext context:拿到IOC容器
        ConfigurableApplicationContext context = SpringApplication.run(HelloApplication.class, args);
//        拿到容器中的Pet对象
        Pet tomcat = context.getBean("tomcat", Pet.class);
//        拿到容器中的User对象
        User user01 = context.getBean("user01", User.class);
//        判断User对象持有的Pet对象和容器中的Pet对象是不是同一个
        System.out.println(user01.getTomcat() == tomcat);//true
如何选择使用Full模式还是Lite模式:
- 配置类组件之间无依赖关系,用Lite模式,加速容器启动过程,减少判断
- 配置类组件之间有依赖关系,方法会被调用从而得到之前单实例组件,用FulI模式
扩展:如何查看IOC容器中的所有组件
//        ConfigurableApplicationContext context:拿到IOC容器
        ConfigurableApplicationContext context = SpringApplication.run(HelloApplication.class, args);

//        查看容器中的组件
//        context.getBeanDefinitionNames():获取到的是所有组件的name
        String[] names = context.getBeanDefinitionNames();
        for (String name : names) {
            System.out.println(name);
        }
4.2 @ComponentScan
指定Spring在创建容器时要扫描的包,功能跟bean.xml中的
<context:component-scan base-package="com.itheima"></context:component-scan>
属性:
- value/basePackages:指定Spring在创建容器时要扫描的包
4.3 @Bean
@Bean用在配置类中(@Configuration标注的类)
配置类只有一个有参构造器的情况下,每一个参数的值会从容器中取
由上述两个注解,就解决了bean.xml文件本身和<context:component-scan>标签的内容

而bean标签的内容就要通过@Bean注解来解决,代替XML中bean标签的思路是这样的
在使用bean.xml中的bean标签时,创建对象、注入数据及存入容器三个动作都是由Spring完成的,而使用@Bean标签后,创建对象、注入数据的动作是我们自己提供的方法来完成的,只是通过指定@Bean标签让Spring替我们完成了将对象存入容器的动作。
@Bean
作用:用于把当前方法的返回值作为Bean对象存入Spring的IOC容器中,通俗的说就是给容器中添加组件,以方法名作为组件的id,返回值类型就是组件类型,返回值就是组件在容器中的实例。注册的组件默认是单实例的
属性:
- name:指定创建后Bean的id,作用相当于bean标签的id属性,默认是当前方法的名称


经过上述的改造,bean.xml中bean标签的部分就可以去掉了

4.4 读取注解配置---这个没有新注解
测试类中,目前仍然是通过读取XML配置的方法读取的bean.xml,而我们改造之后,就可以读取配置类了,也就是读取注解配置。

Tip1:当配置类作为AnnotationConfigApplicationContext的参数时,配置类中的@Configuration是可以不写的
Tip2:当AnnotationConfigApplicationContext传入多个类时,传入的类之间就是兄弟关系
4.5 @Import---多个配置类的读取注解配置
多个配置类的读取注解配置,保证有一个父配置类,在父配置类中使用@Import注解导入其他的子配置类
属性:
- value:指定子配置类的列表
父配置类

子配置类

Tip:通过@Import导入的子配置类的@Configuration注解也是可以不写的
还可以用于给容器中导入指定类型的组件
写在什么位置
容器中的组件的类上(@Configuration、@Component、@Controller、@Service、@Repository标注的类)
可以导入哪些类型
自定义的类,第三方jar包中的类
如:@Import({User.class, DBHelper.class})
自动的给容器中创建User, DBHelper的无参构造器,从而创建出这两个类型的对象放到容器中,默认组件的名字就是全类名
//        根据类型获取所有的组件名字
	String[] beans = context.getBeanNamesForType(DBHelper.class);
    for (String bean : beans) {
        System.out.println(bean);//ch.qos.logback.core.db.DBHelper
    }
4.6 @PropertySource---“最后”一个注解
在8.4.3节通过Bean改造之后又出现了硬编码的问题,通过@PropertySource注解可以得到避免

@PropertySource
功能:指定Spring需要读取的properties配置文件
属性:
- value:指定properties配置文件的名称和路径
可以使用的关键字:classpath,表示类路径下
首先,建立一个properties文件
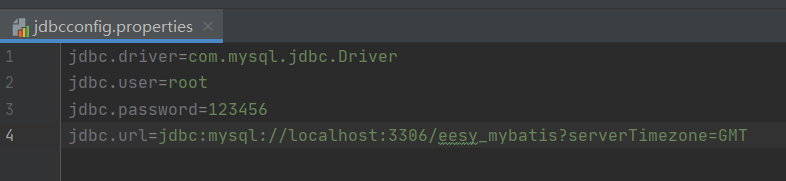
然后在主配置文件中设置读取的路径和名称

Spring读取了properties文件后就拿到了内部的数据,下一步就是将数据注入到使用这些数据的配置类中

在方法中调用定义的属性即可

4.7 @Conditional
条件装配:满足Conditional指定的条件,则进行组件注入,不满足条件,组件不会注入,标注在当前配置类上的其他注解也不会生效
@ConditionalOnResource:当项目的类路径下存在某个资源时才导入
@ConditionalOnJava:当运行环境的Java版本号为指定的版本号时才导入
@ConditionalOnSingleCandidate:当容器中指定的组件只存在一个实例或者有多个实例但只有一个主实例(主实例被@Primary标注)才导入
@ConditionalOnProperty:当配置文件中配置了某个配置项才导入
@ConditionalOn***:可以标注在配置类的组件注册方法(@Bean标注的方法)上,也可以标注在配置类上
标注在方法上:当条件成立以后,方法返回的组件才会被注册到容器中
标注在类上:当条件成立以后,配置类内部的所有组件注册方法返回的组件才会被注册到容器中
//@ConditionalOnBean(name = "tom"):容器中存在名称为tom的组件时内部的组件注册方法才会生效
@Import({Pet.class, DBHelper.class})
@Configuration(proxyBeanMethods = true)
@ConditionalOnBean(name = "tom")
public class MyConfig {

    @Bean
    public User user01(){
        User zhangsan = new User("zhangsan", 18);
        zhangsan.setTomcat(tomcat());
        return zhangsan;
    }

    @Bean
    public Pet tomcat(){
        return new Pet("tomcat");
    }
}
@SpringBootApplication
public class HelloApplication {

    public static void main(String[] args) {
//        ConfigurableApplicationContext context:拿到IOC容器
        ConfigurableApplicationContext context = SpringApplication.run(HelloApplication.class, args);
//        context.containsBean("user01"):判断容器中是否包含指定名称的组件
        boolean user01 = context.containsBean("user01");

        //容器中存在tom才会向容器中注册user01和tomcat
        System.out.println(user01);//false
    }
}
4.8 @ImportResource
标注在任意一个配置类上
导入Spring的配置文件,使配置文件中的配置生效,属于基于注解配置对基于XML配置的支持
标签:容器,account,Spring,bean,import,组件,注解,IOC,public From: https://www.cnblogs.com/wzzzj/p/18038226