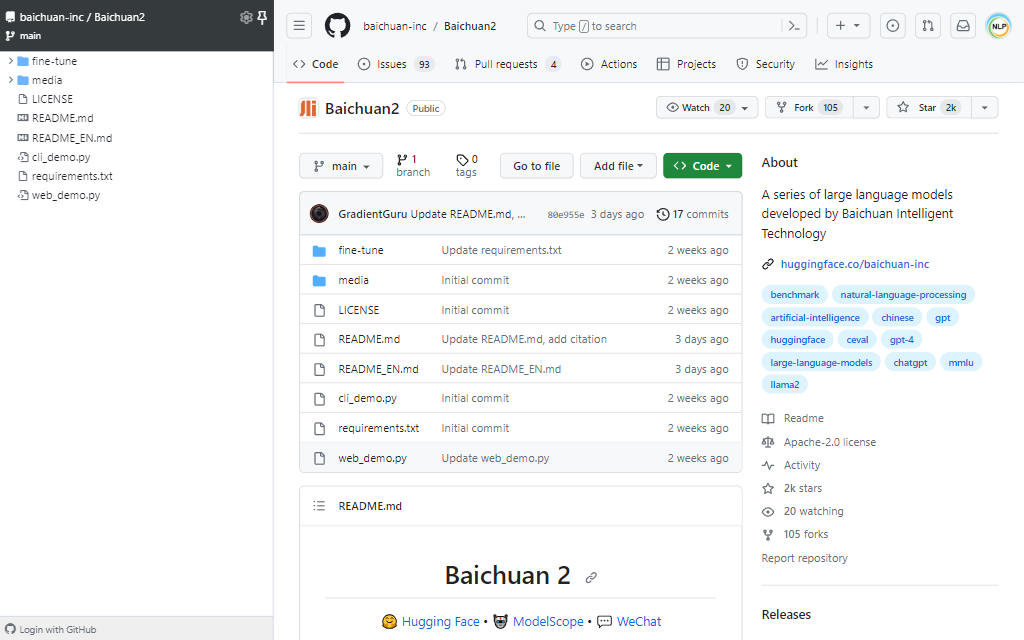
由百川智能推出的新一代开源大语言模型,采用2.6万亿Tokens的高质量语料训练,在多个权威的中文、英文和多语言的通用、领域benchmark上取得同尺寸最佳的效果,发布包含有7B、13B的Base和经过PPO训练的Chat版本,并提供了Chat版本的4bits量化。 一.Baichuan2模型 二.模型推理 2.Base模型 3.命令行工具方式和网页demo方式 三.模型微调 2.单机训练 3.多机训练 其中,hostfile内容如下所示: 4.轻量化微调 四.其它 2.中间Checkpoints 参考文献:
Baichuan2模型在通用、法律、医疗、数学、代码和多语言翻译六个领域的中英文和多语言权威数据集上对模型进行了广泛测试。


1.Chat模型>>> import torch
>>> from transformers import AutoModelForCausalLM, AutoTokenizer
>>> from transformers.generation.utils import GenerationConfig
>>> tokenizer = AutoTokenizer.from_pretrained("baichuan-inc/Baichuan2-13B-Chat", use_fast=False, trust_remote_code=True)
>>> model = AutoModelForCausalLM.from_pretrained("baichuan-inc/Baichuan2-13B-Chat", device_map="auto", torch_dtype=torch.bfloat16, trust_remote_code=True)
>>> model.generation_config = GenerationConfig.from_pretrained("baichuan-inc/Baichuan2-13B-Chat")
>>> messages = []
>>> messages.append({"role": "user", "content": "解释一下“温故而知新”"})
>>> response = model.chat(tokenizer, messages)
>>> print(response)
"温故而知新"是一句中国古代的成语,出自《论语·为政》篇。这句话的意思是:通过回顾过去,我们可以发现新的知识和理解。换句话说,学习历史和经验可以让我们更好地理解现在和未来。
这句话鼓励我们在学习和生活中不断地回顾和反思过去的经验,从而获得新的启示和成长。通过重温旧的知识和经历,我们可以发现新的观点和理解,从而更好地应对不断变化的世界和挑战。>>> from transformers import AutoModelForCausalLM, AutoTokenizer
>>> tokenizer = AutoTokenizer.from_pretrained("baichuan-inc/Baichuan2-13B-Base", trust_remote_code=True)
>>> model = AutoModelForCausalLM.from_pretrained("baichuan-inc/Baichuan2-13B-Base", device_map="auto", trust_remote_code=True)
>>> inputs = tokenizer('登鹳雀楼->王之涣\n夜雨寄北->', return_tensors='pt')
>>> inputs = inputs.to('cuda:0')
>>> pred = model.generate(**inputs, max_new_tokens=64, repetition_penalty=1.1)
>>> print(tokenizer.decode(pred.cpu()[0], skip_special_tokens=True))
登鹳雀楼->王之涣
夜雨寄北->李商隐python cli_demo.py
streamlit run web_demo.py
1.依赖安装
如需使用LoRA等轻量级微调方法需额外安装peft,如需使用xFormers进行训练加速需额外安装xFormers,如下所示:git clone https://github.com/baichuan-inc/Baichuan2.git
cd Baichuan2/fine-tune
pip install -r requirements.txt
下面是一个微调Baichuan2-7B-Base的单机训练例子,训练数据data/belle_chat_ramdon_10k.json来自multiturn_chat_0.8M采样出的1万条,如下所示:hostfile=""
deepspeed --hostfile=$hostfile fine-tune.py \
--report_to "none" \
--data_path "data/belle_chat_ramdon_10k.json" \
--model_name_or_path "baichuan-inc/Baichuan2-7B-Base" \
--output_dir "output" \
--model_max_length 512 \
--num_train_epochs 4 \
--per_device_train_batch_size 16 \
--gradient_accumulation_steps 1 \
--save_strategy epoch \
--learning_rate 2e-5 \
--lr_scheduler_type constant \
--adam_beta1 0.9 \
--adam_beta2 0.98 \
--adam_epsilon 1e-8 \
--max_grad_norm 1.0 \
--weight_decay 1e-4 \
--warmup_ratio 0.0 \
--logging_steps 1 \
--gradient_checkpointing True \
--deepspeed ds_config.json \
--bf16 True \
--tf32 True
多机训练只需要给一下hostfile,同时在训练脚本里面指定hosftfile的路径:hostfile="/path/to/hostfile"
deepspeed --hostfile=$hostfile fine-tune.py \
--report_to "none" \
--data_path "data/belle_chat_ramdon_10k.json" \
--model_name_or_path "baichuan-inc/Baichuan2-7B-Base" \
--output_dir "output" \
--model_max_length 512 \
--num_train_epochs 4 \
--per_device_train_batch_size 16 \
--gradient_accumulation_steps 1 \
--save_strategy epoch \
--learning_rate 2e-5 \
--lr_scheduler_type constant \
--adam_beta1 0.9 \
--adam_beta2 0.98 \
--adam_epsilon 1e-8 \
--max_grad_norm 1.0 \
--weight_decay 1e-4 \
--warmup_ratio 0.0 \
--logging_steps 1 \
--gradient_checkpointing True \
--deepspeed ds_config.json \
--bf16 True \
--tf32 Trueip1 slots=8
ip2 slots=8
ip3 slots=8
ip4 slots=8
....
如需使用仅需在上面的脚本中加入参数--use_lora True,LoRA具体的配置可见fine-tune.py脚本。使用LoRA微调后可以使用下面的命令加载模型:from peft import AutoPeftModelForCausalLM
model = AutoPeftModelForCausalLM.from_pretrained("output", trust_remote_code=True)
1.对Baichuan1的推理优化迁移到Baichuan2
用户只需要利用以下脚本离线对Baichuan2模型的最后一层lm_head做归一化,并替换掉lm_head.weight即可。替换完后,就可以像对Baichuan1模型一样对转换后的模型做编译优化等工作:import torch
import os
ori_model_dir = 'your Baichuan 2 model directory'
# To avoid overwriting the original model, it's best to save the converted model to another directory before replacing it
new_model_dir = 'your normalized lm_head weight Baichuan 2 model directory'
model = torch.load(os.path.join(ori_model_dir, 'pytorch_model.bin'))
lm_head_w = model['lm_head.weight']
lm_head_w = torch.nn.functional.normalize(lm_head_w)
model['lm_head.weight'] = lm_head_w
torch.save(model, os.path.join(new_model_dir, 'pytorch_model.bin'))
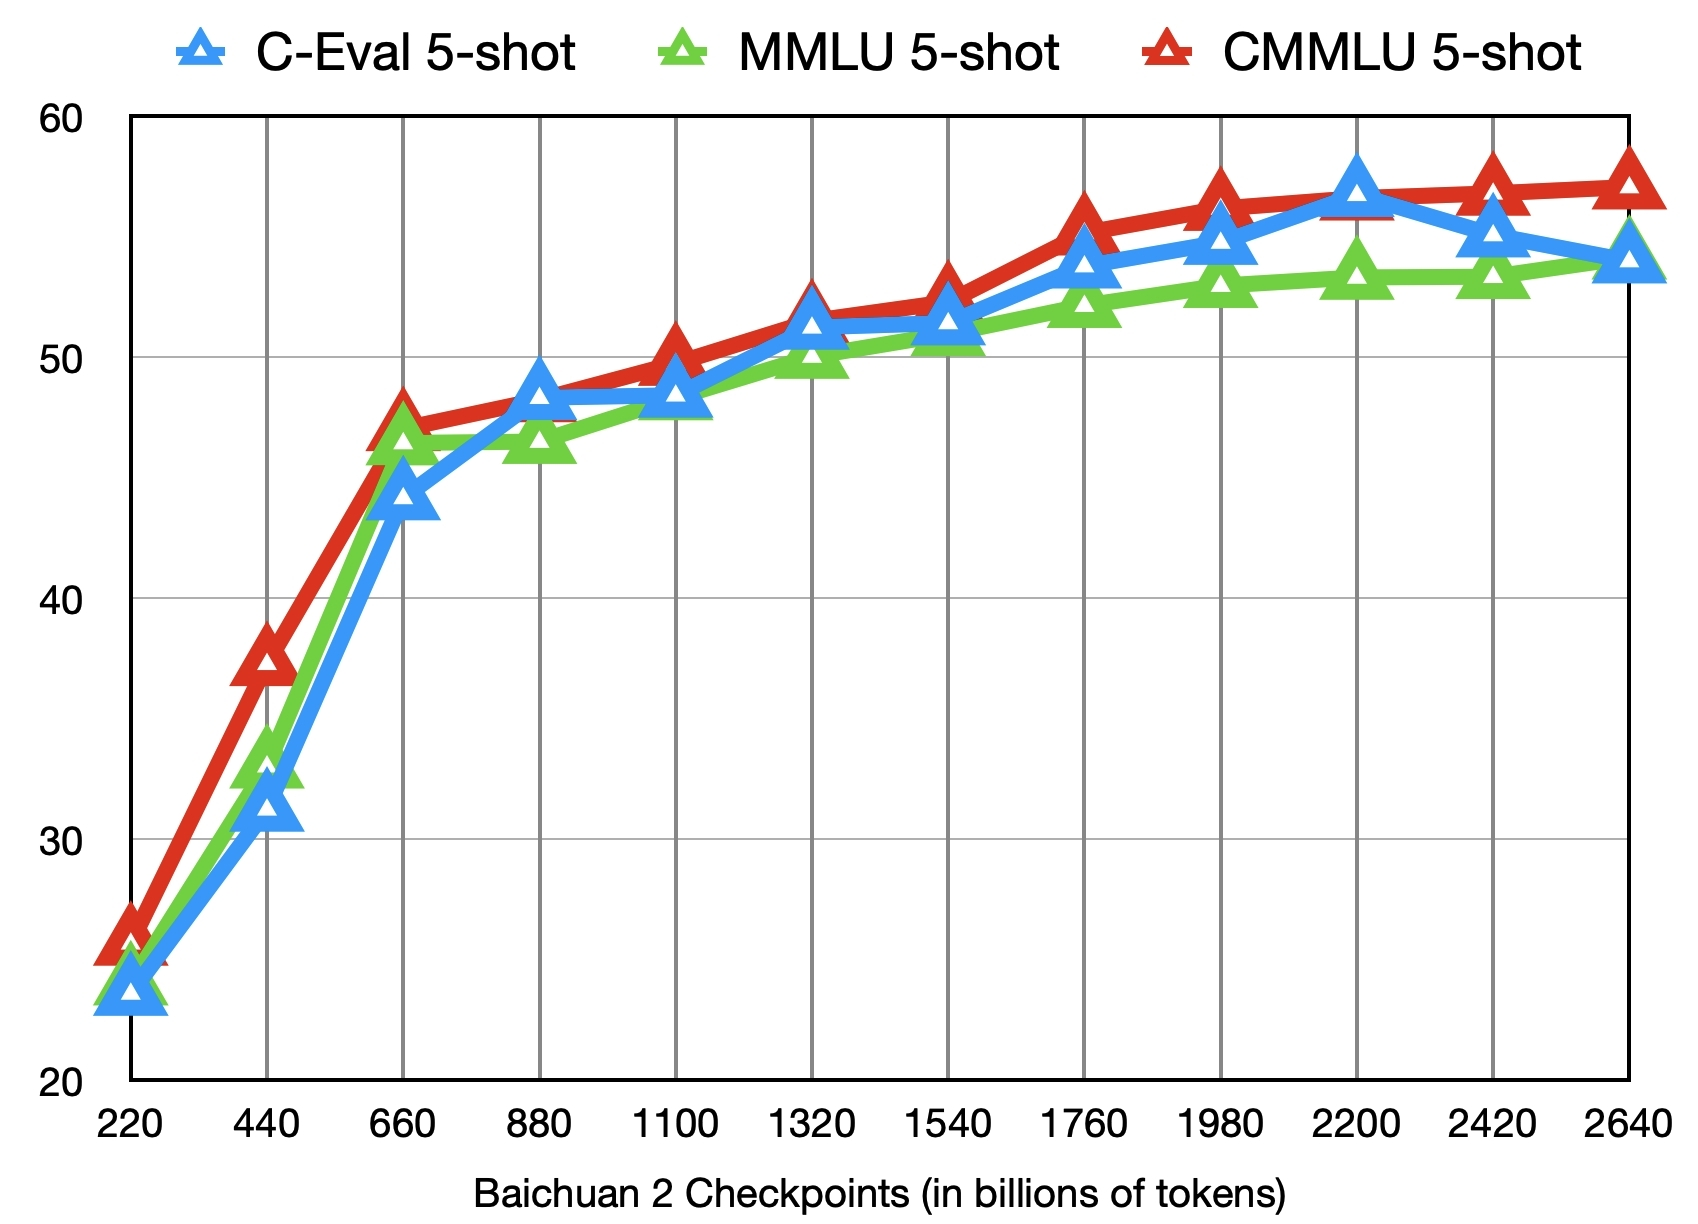
下图给出了这些checkpoints在C-Eval、MMLU、CMMLU三个benchmark上的效果变化:

[1]https://github.com/baichuan-inc/Baichuan2
[2]baichuan-inc:https://huggingface.co/baichuan-inc
[3]https://huggingface.co/baichuan-inc/Baichuan2-7B-Intermediate-Checkpoints
[4]Baichuan 2: Open Large-scale Language Models:https://arxiv.org/abs/2309.10305