2023-09-20:用go语言,保证一定是n*n的正方形,实现从里到外转圈打印的功能
如果n是奇数,中心点唯一,比如
a b c
d e f
g h i
e是中心点,依次打印 : e f i h g d a b c
如果n是偶数,中心点为最里层2*2的右下点
比如
a b c d e f
g h i j k l
m n o p q r
s t u v w x
y z 0 1 2 3
4 5 6 7 8 9
最里层是
o p
u v
v是中心点,依次打印 : v u o p q w ....
来自左程云。
答案2023-09-20:
大体步骤如下:
1.定义一个函数print,接收一个二维字节切片m作为参数。
2.获取二维切片m的长度n。
3.设置四个变量a, b, c, d为(n-1)/2, (n-1)/2, n/2, n/2,分别表示每一层的起始点和终止点。
4.使用循环,从最外层到最内层逐层打印。
4.a.在每一层中,调用函数loop打印当前层的内容。
5.在循环结束后,打印换行符。
函数loop的过程如下:
1.判断如果a和c相等,表示只有一个元素,直接打印该元素并返回。
2.对于其他情况,依次打印当前层的四个边。
2.a. 从起始点的下一行开始,按列打印边界元素,即从上到下。
2.b. 从终止点的左侧列开始,按行打印边界元素,即从右到左。
2.c. 从终止点的上一行开始,按列打印边界元素,即从下到上。
2.d. 从起始点的右侧列开始,按行打印边界元素,即从左到右。
在主函数main中,定义了几个测试用例,分别为不同大小的二维字节切片m,然后调用print函数进行打印。
总的时间复杂度为O(n^2),其中n为输入二维切片m的大小。
总的额外空间复杂度为O(1),没有使用额外空间。
go完整代码如下:
package main
import "fmt"
func print(m [][]byte) {
n := len(m)
for a, b, c, d := (n-1)/2, (n-1)/2, n/2, n/2; a >= 0; a, b, c, d = a-1, b-1, c+1, d+1 {
loop(m, a, b, c, d)
}
fmt.Println()
}
func loop(m [][]byte, a, b, c, d int) {
if a == c {
fmt.Printf("%c ", m[a][b])
} else {
for row := a + 1; row <= c; row++ {
fmt.Printf("%c ", m[row][d])
}
for col := d - 1; col >= b; col-- {
fmt.Printf("%c ", m[c][col])
}
for row := c - 1; row >= a; row-- {
fmt.Printf("%c ", m[row][b])
}
for col := b + 1; col <= d; col++ {
fmt.Printf("%c ", m[a][col])
}
}
}
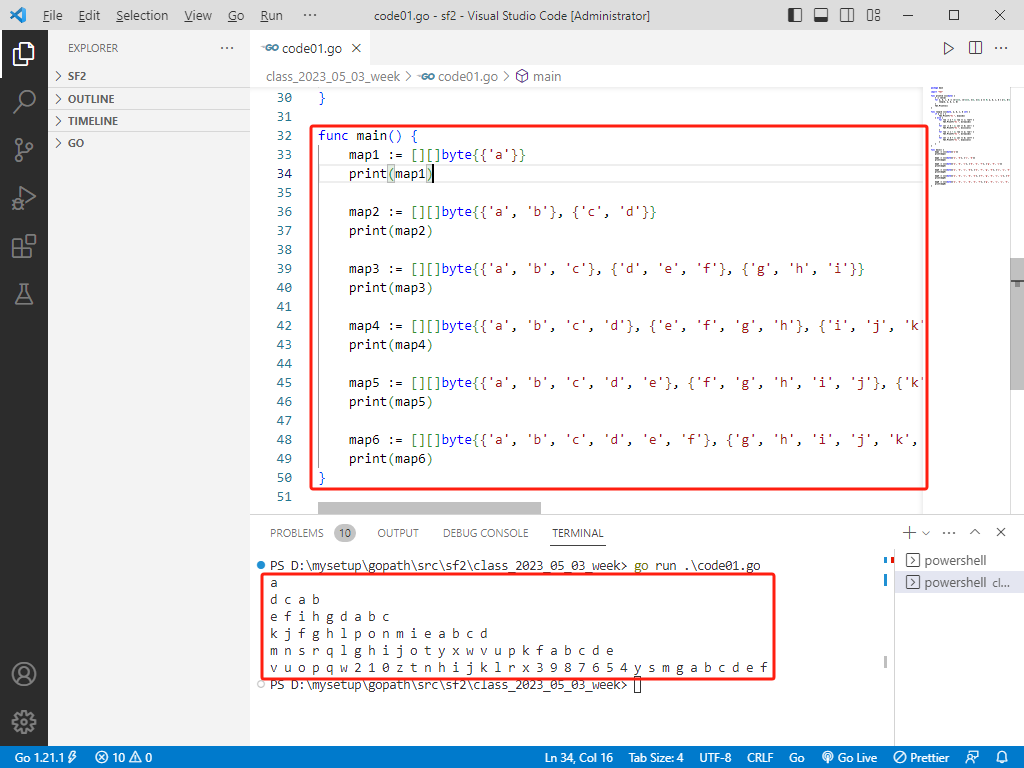
func main() {
map1 := [][]byte{{'a'}}
print(map1)
map2 := [][]byte{{'a', 'b'}, {'c', 'd'}}
print(map2)
map3 := [][]byte{{'a', 'b', 'c'}, {'d', 'e', 'f'}, {'g', 'h', 'i'}}
print(map3)
map4 := [][]byte{{'a', 'b', 'c', 'd'}, {'e', 'f', 'g', 'h'}, {'i', 'j', 'k', 'l'}, {'m', 'n', 'o', 'p'}}
print(map4)
map5 := [][]byte{{'a', 'b', 'c', 'd', 'e'}, {'f', 'g', 'h', 'i', 'j'}, {'k', 'l', 'm', 'n', 'o'}, {'p', 'q', 'r', 's', 't'}, {'u', 'v', 'w', 'x', 'y'}}
print(map5)
map6 := [][]byte{{'a', 'b', 'c', 'd', 'e', 'f'}, {'g', 'h', 'i', 'j', 'k', 'l'}, {'m', 'n', 'o', 'p', 'q', 'r'}, {'s', 't', 'u', 'v', 'w', 'x'}, {'y', 'z', '0', '1', '2', '3'}, {'4', '5', '6', '7', '8', '9'}}
print(map6)
}
rust完整代码如下:
fn print(m: &[Vec<char>]) {
let n = m.len() as i32;
let mut a = (n - 1) / 2;
let mut b = (n - 1) / 2;
let mut c = n / 2;
let mut d = n / 2;
while a >= 0 {
loop2(&m, a, b, c, d);
a -= 1;
b -= 1;
c += 1;
d += 1;
}
println!();
}
fn loop2(m: &[Vec<char>], a: i32, b: i32, c: i32, d: i32) {
if a == c {
print!("{} ", m[a as usize][b as usize]);
} else {
for row in a + 1..=c {
print!("{} ", m[row as usize][d as usize]);
}
for col in (b..=d - 1).rev() {
print!("{} ", m[c as usize][col as usize]);
}
for row in (a..=c - 1).rev() {
print!("{} ", m[row as usize][b as usize]);
}
for col in b + 1..=d {
print!("{} ", m[a as usize][col as usize]);
}
}
}
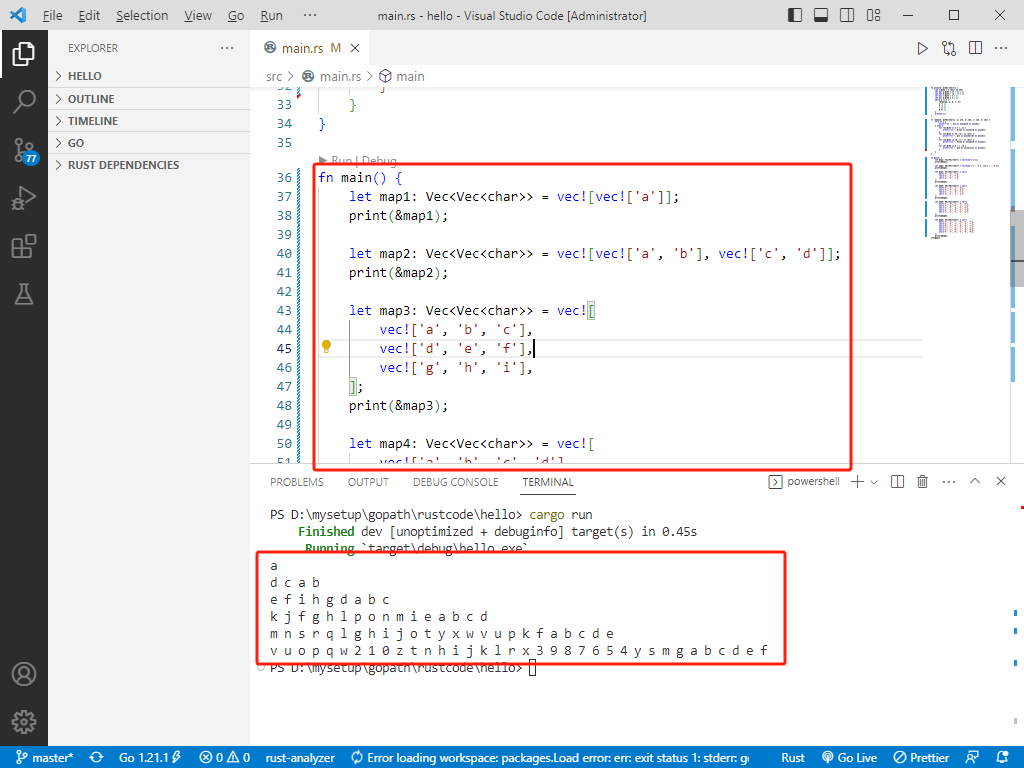
fn main() {
let map1: Vec<Vec<char>> = vec![vec!['a']];
print(&map1);
let map2: Vec<Vec<char>> = vec![vec!['a', 'b'], vec!['c', 'd']];
print(&map2);
let map3: Vec<Vec<char>> = vec![
vec!['a', 'b', 'c'],
vec!['d', 'e', 'f'],
vec!['g', 'h', 'i'],
];
print(&map3);
let map4: Vec<Vec<char>> = vec![
vec!['a', 'b', 'c', 'd'],
vec!['e', 'f', 'g', 'h'],
vec!['i', 'j', 'k', 'l'],
vec!['m', 'n', 'o', 'p'],
];
print(&map4);
let map5: Vec<Vec<char>> = vec![
vec!['a', 'b', 'c', 'd', 'e'],
vec!['f', 'g', 'h', 'i', 'j'],
vec!['k', 'l', 'm', 'n', 'o'],
vec!['p', 'q', 'r', 's', 't'],
vec!['u', 'v', 'w', 'x', 'y'],
];
print(&map5);
let map6: Vec<Vec<char>> = vec![
vec!['a', 'b', 'c', 'd', 'e', 'f'],
vec!['g', 'h', 'i', 'j', 'k', 'l'],
vec!['m', 'n', 'o', 'p', 'q', 'r'],
vec!['s', 't', 'u', 'v', 'w', 'x'],
vec!['y', 'z', '0', '1', '2', '3'],
vec!['4', '5', '6', '7', '8', '9'],
];
print(&map6);
}
c++完整代码如下:
#include<iostream>
#include<vector>
using namespace std;
void loop(vector<vector<char>> m, int a, int b, int c, int d);
void print(vector<vector<char>> m) {
int n = m.size();
for (int a = (n - 1) / 2, b = (n - 1) / 2, c = n / 2, d = n / 2; a >= 0; a--, b--, c++, d++) {
loop(m, a, b, c, d);
}
cout << endl;
}
void loop(vector<vector<char>> m, int a, int b, int c, int d) {
if (a == c) {
cout << m[a][b] << " ";
}
else {
for (int row = a + 1; row <= c; row++) {
cout << m[row][d] << " ";
}
for (int col = d - 1; col >= b; col--) {
cout << m[c][col] << " ";
}
for (int row = c - 1; row >= a; row--) {
cout << m[row][b] << " ";
}
for (int col = b + 1; col <= d; col++) {
cout << m[a][col] << " ";
}
}
}
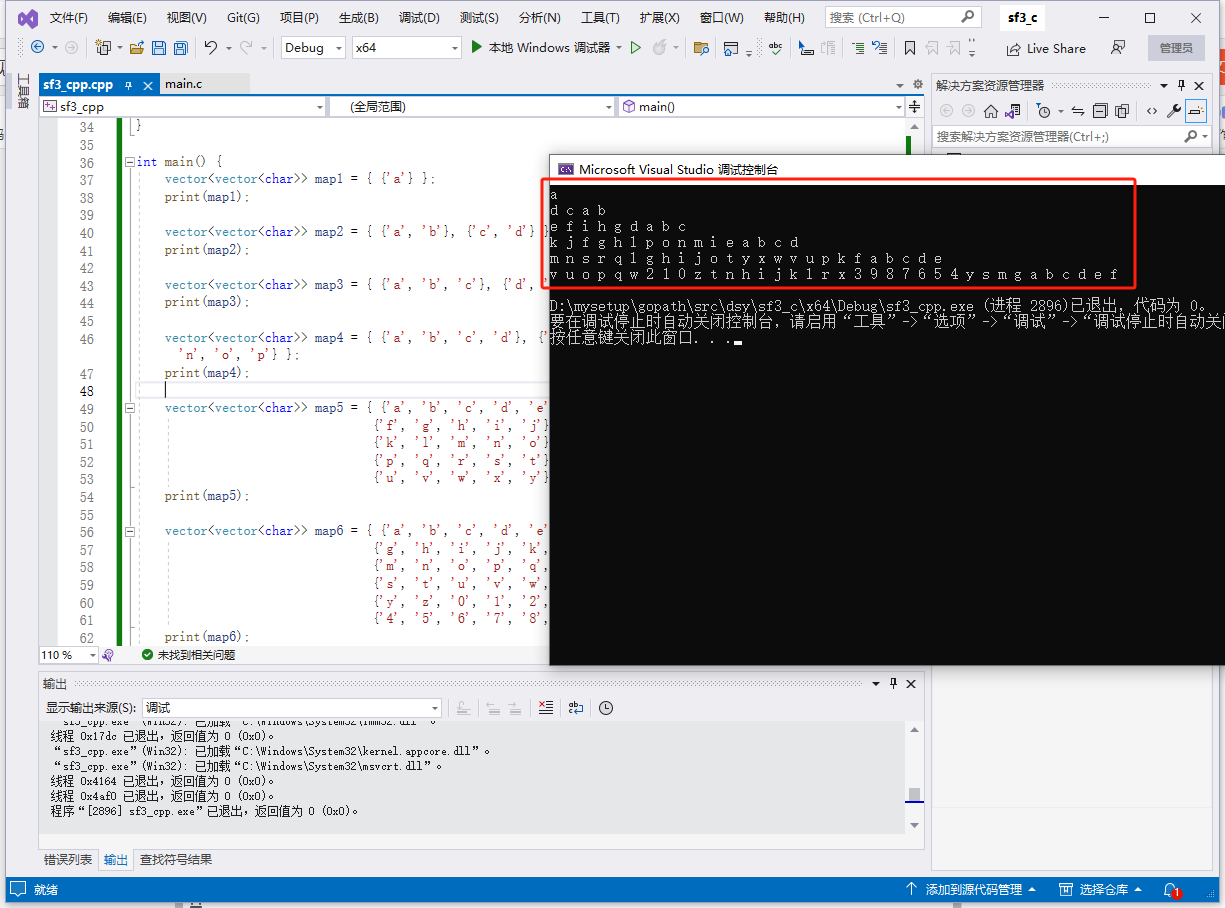
int main() {
vector<vector<char>> map1 = { {'a'} };
print(map1);
vector<vector<char>> map2 = { {'a', 'b'}, {'c', 'd'} };
print(map2);
vector<vector<char>> map3 = { {'a', 'b', 'c'}, {'d', 'e', 'f'}, {'g', 'h', 'i'} };
print(map3);
vector<vector<char>> map4 = { {'a', 'b', 'c', 'd'}, {'e', 'f', 'g', 'h'}, {'i', 'j', 'k', 'l'}, {'m', 'n', 'o', 'p'} };
print(map4);
vector<vector<char>> map5 = { {'a', 'b', 'c', 'd', 'e'},
{'f', 'g', 'h', 'i', 'j'},
{'k', 'l', 'm', 'n', 'o'},
{'p', 'q', 'r', 's', 't'},
{'u', 'v', 'w', 'x', 'y'} };
print(map5);
vector<vector<char>> map6 = { {'a', 'b', 'c', 'd', 'e', 'f'},
{'g', 'h', 'i', 'j', 'k', 'l'},
{'m', 'n', 'o', 'p', 'q', 'r'},
{'s', 't', 'u', 'v', 'w', 'x'},
{'y', 'z', '0', '1', '2', '3'},
{'4', '5', '6', '7', '8', '9'} };
print(map6);
return 0;
}
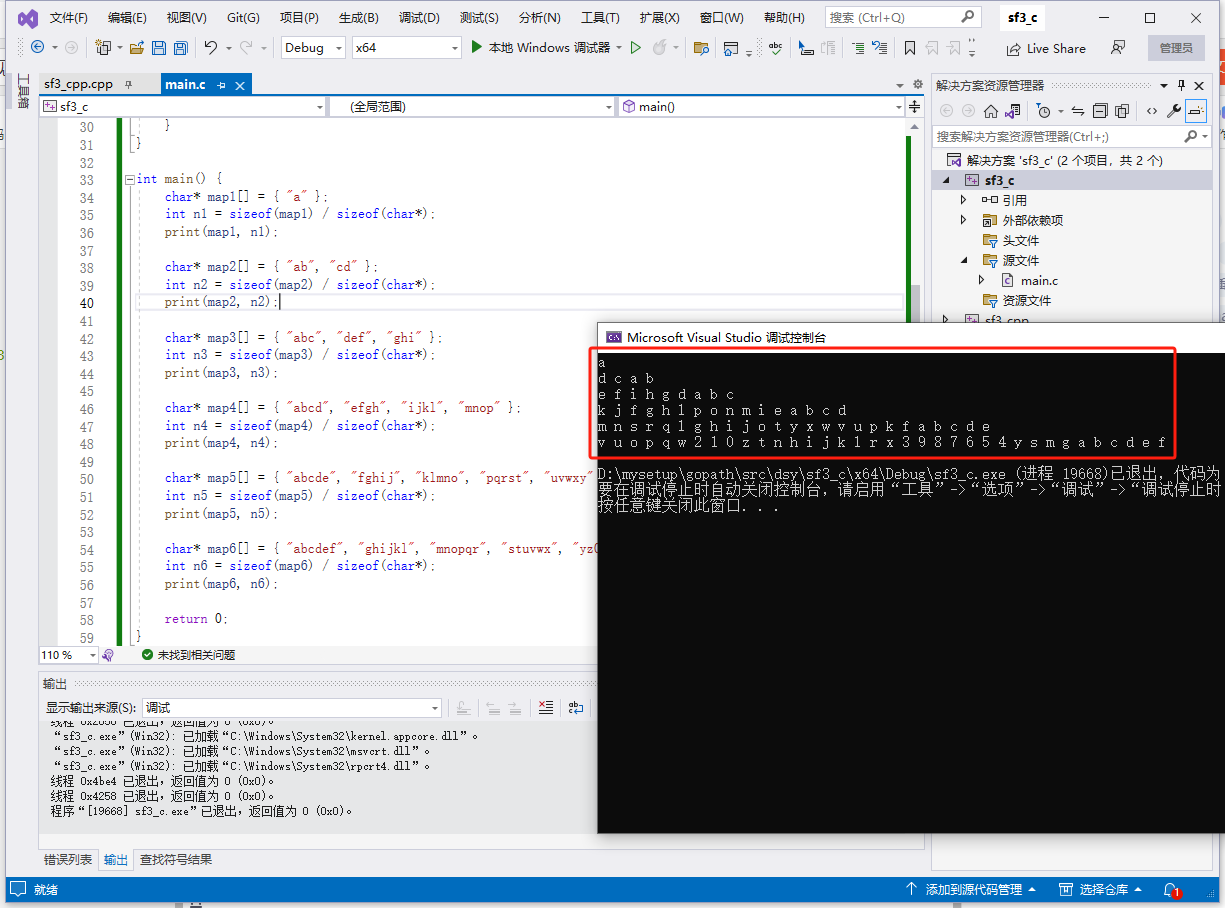
c完整代码如下:
#include <stdio.h>


void loop(char** m, int a, int b, int c, int d);

void print(char** m, int n) {
    for (int a = (n - 1) / 2, b = (n - 1) / 2, c = n / 2, d = n / 2; a >= 0; a--, b--, c++, d++) {
        loop(m, a, b, c, d);
    }
    printf("\n");
}

void loop(char** m, int a, int b, int c, int d) {
    if (a == c) {
        printf("%c ", m[a][b]);
    }
    else {
        for (int row = a + 1; row <= c; row++) {
            printf("%c ", m[row][d]);
        }
        for (int col = d - 1; col >= b; col--) {
            printf("%c ", m[c][col]);
        }
        for (int row = c - 1; row >= a; row--) {
            printf("%c ", m[row][b]);
        }
        for (int col = b + 1; col <= d; col++) {
            printf("%c ", m[a][col]);
        }
    }
}

int main() {
    char* map1[] = { "a" };
    int n1 = sizeof(map1) / sizeof(char*);
    print(map1, n1);

    char* map2[] = { "ab", "cd" };
    int n2 = sizeof(map2) / sizeof(char*);
    print(map2, n2);

    char* map3[] = { "abc", "def", "ghi" };
    int n3 = sizeof(map3) / sizeof(char*);
    print(map3, n3);

    char* map4[] = { "abcd", "efgh", "ijkl", "mnop" };
    int n4 = sizeof(map4) / sizeof(char*);
    print(map4, n4);

    char* map5[] = { "abcde", "fghij", "klmno", "pqrst", "uvwxy" };
    int n5 = sizeof(map5) / sizeof(char*);
    print(map5, n5);

    char* map6[] = { "abcdef", "ghijkl", "mnopqr", "stuvwx", "yz0123", "456789" };
    int n6 = sizeof(map6) / sizeof(char*);
    print(map6, n6);

    return 0;
}