初创建于: 2022-08-13 17:57
GTK NOTES
Generate compile_commands.json
在编写 gtk 程序时, 需要使用到:
#include <gtk/gtk.h>
/// ...
但实际上, 这个库的路径是 /usr/include/gtk-4.0/gtk/gtk.h, 因此需要在 compile_commands.json 中设置includePath.
为了生成 compile_commands.json, 需要使用 cmake 构建项目.
创建 cmake 项目结构
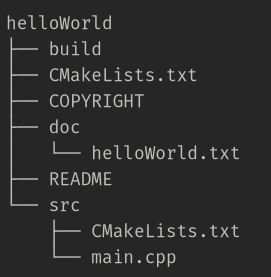
假设项目名为helloWorld, 则应有如下的目录结构:

其中 COPYRIGH, README与doc/helloWorld.txt是非必需的, src/main.cpp是项目的主要源文件.
编写 CMakeLists.txt
首先编辑项目根目录下的CMakeLists.txt:
PROJECT(HELLOWORLD) # 项目名称
ADD_SUBDIRECTORY(src bin) # 指定两个子文件夹, src 是源代码目录, bin 是生成的二进制文件所在目录
SET(CMAKE_INSTALL_PREFIX /home/corona/Downloads/projects/) # 更改安装路径
INSTALL(FILES COPYRIGHT README DESTINATION doc/helloWorld/) # 指定文件安装路径
INSTALL(DIRECTORY doc/ DESTINATION doc/helloWorld/) # 将 doc/ 目录下的所有文件安装到指定路径
然后编辑src/CMakeLists.txt:
SET (SRC_LIST main.cpp)
SET(EXECUTABLE_OUTPUT_PATH ${PROJECT_BINARY_DIR}/bin) # 指定生成的二进制文件路径
SET(LIBRARY_OUTPUT_PATH ${PROJECT_BINARY_DIR}/lib)
ADD_EXECUTABLE (hello ${SRC_LIST}) # hello 是生成的可执行文件名, SRC_LIST 是其依赖
指定 includePath 与添加链接参数
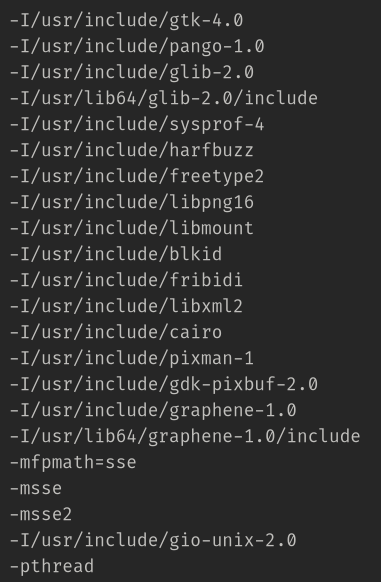
首先, 使用 pkg-config --cflags gtk4 命令获取需要添加的路径与链接参数:

在src/CMakeLists.txt中添加如下内容:
INCLUDE_DIRECTORIES(
	/usr/include/gtk-4.0
	/usr/include/pango-1.0
	/usr/include/glib-2.0
	/usr/lib64/glib-2.0/include
	/usr/include/sysprof-4
	/usr/include/harfbuzz
	/usr/include/freetype2
	/usr/include/libpng16
	/usr/include/libmount
	/usr/include/blkid
	/usr/include/fribidi
	/usr/include/libxml2
	/usr/include/cairo
	/usr/include/pixman-1
	/usr/include/gdk-pixbuf-2.0
	/usr/include/graphene-1.0
	/usr/lib64/graphene-1.0/include
	/usr/include/gio-unix-2.0
)
ADD_EXECUTABLE(main ${SRC_LIST})
# TARGET_LINK_LIBRARIES 需要在 ADD_EXECUTABLE 之后
TARGET_LINK_LIBRARIES(main
	pthread
	gtk-4
	pangocairo-1.0
	pango-1.0
	harfbuzz
	gdk_pixbuf-2.0
	cairo-gobject
	cairo
	graphene-1.0
	gio-2.0
	gobject-2.0
	glib-2.0
)
生成 compile_commands.json
cd build/
rm -rf *
cmake -DCMAKE_EXPORT_COMPILE_COMMANDS=1 ..
然后在build/目录下就能找到 compile_commands.json文件了
[
    {
      "directory": "/home/corona/Documents/projects/gtk-learning/build/bin",
      "command": "/usr/bin/cc  -I/usr/include/gtk-4.0 -I/usr/include/pango-1.0 -I/usr/include/glib-2.0 -I/usr/lib64/glib-2.0/include -I/usr/include/sysprof-4 -I/usr/include/harfbuzz -I/usr/include/freetype2 -I/usr/include/libpng16 -I/usr/include/libmount -I/usr/include/blkid -I/usr/include/fribidi -I/usr/include/libxml2 -I/usr/include/cairo -I/usr/include/pixman-1 -I/usr/include/gdk-pixbuf-2.0 -I/usr/include/graphene-1.0 -I/usr/lib64/graphene-1.0/include -I/usr/include/gio-unix-2.0  -o CMakeFiles/main.dir/main.o -c /home/corona/Documents/projects/gtk-learning/src/main.c",
      "file": "/home/corona/Documents/projects/gtk-learning/src/main.c"
    }
]
只需要这个文件就可以使coc能够正确地显示补全, 因此之后可以手动创建该文件, 将文件中的路径与文件名更改一下即可(不改也行, 因为只是用来让 coc.nvim 正确地显示补全的).
以上命令同时生成了 Makefile 文件, 如果需要的话, 可以直接在 build/ 目录下执行 make install 等命令构建项目.
Getting Started
创建一个空的窗口
#include <gtk/gtk.h>

static void
activate (GtkApplication* app,
          gpointer        user_data)
{
  GtkWidget *window;

  window = gtk_application_window_new (app);
  gtk_window_set_title (GTK_WINDOW (window), "Window");
  gtk_window_set_default_size (GTK_WINDOW (window), 200, 200);
  gtk_widget_show (window);
}

int
main (int    argc,
      char **argv)
{
  GtkApplication *app;
  int status;

  app = gtk_application_new ("org.gtk.example", G_APPLICATION_FLAGS_NONE);
  g_signal_connect (app, "activate", G_CALLBACK (activate), NULL);
  status = g_application_run (G_APPLICATION (app), argc, argv);
  g_object_unref (app);

  return status;
}
如果不使用 cmake, 也可以直接使用以下命令编译运行:
gcc $( pkg-config --cflags gtk4 ) -o main main.c $( pkg-config --libs gtk4 )
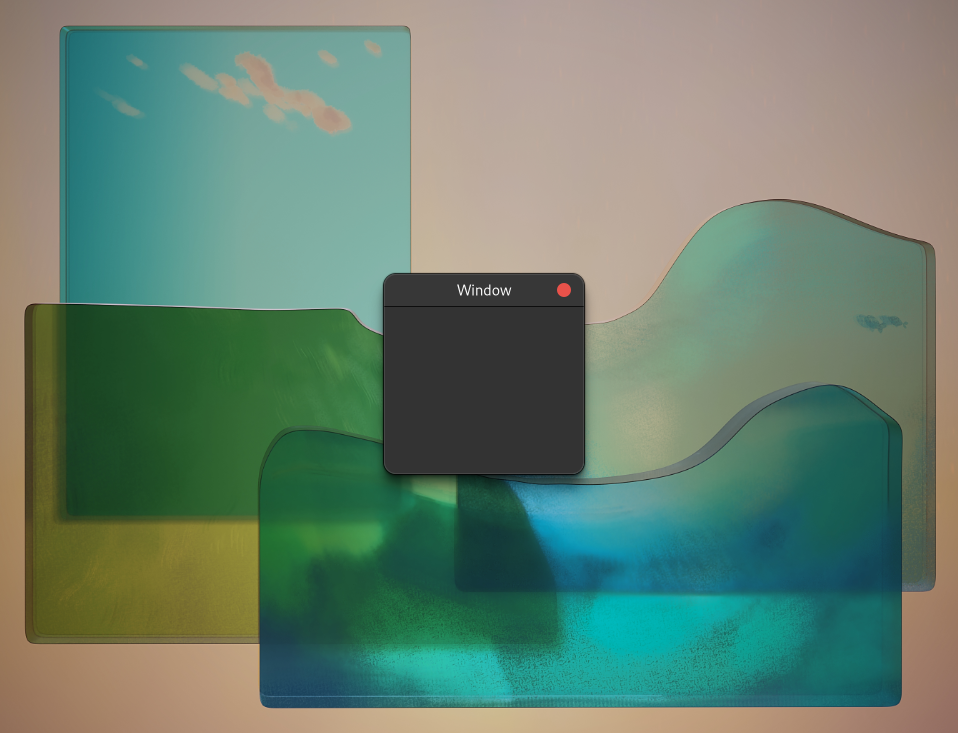
运行程序, 可以看到弹出了一个空白窗口:

在 GTK 程序中, main 函数中需要创建一个GtkApplication类型的变量, 以上代码声明了GtkApplication类型的指针app并用gtk_application_new这一函数来初始化它. 其中参数 org.gnome.example 是其唯一标识