这篇文章给大家分享的是用TP5怎样编写上传多张图片的功能。小编觉得挺实用的,因此分享给大家做个参考,实现效果及代码如下,文中示例代码介绍的非常详细,感兴趣的朋友接下来一起跟随小编看看吧。
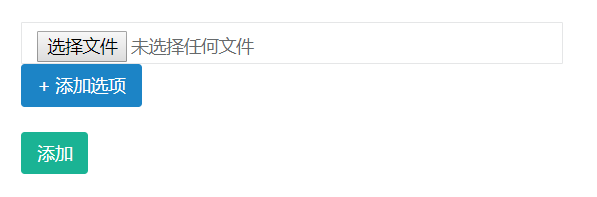
1、效果图(每点击一次‘添加选项',就会有一个新的 file 框来添加新的图片)
2、view
<!--不要忘了引入jquery文件-->
<!-- post传值方式和文件传输协议一定要加上 -->
<input type="file" name="image[]">
<input type="button" id="add" name="add" value="+ 添加选项">
<button type="submit" name="submit">添加</button>

<script type="text/javascript">
  $("#add").click(function(){
    $(this).before('<input type="file" name="image[]">');
  });
</script>
3、controller
//接收从view来的图片数组
$image=request()->file('image');

//实例化模型,并调用里面的添加图片的方法
$details = new Details();
$info = $details->add($image);
if($info === 1)
{
  return '操作成功';
}
else
{
  return '操作失败';
}
4、model
//将接收到的 $image foreach遍历添加
foreach($image as $image)
{
  //实例化模型
  $details = new Details();
  $time=date('Ymd',time());
  //将当前的时间戳定义为文件名
  $filename=time();
  //检测是否存在存放图片的文件夹
  if(!file_exists(ROOT_PATH . 'public' . DS .'static'. DS .'img'))
  {
    //创建文件
    mkdir(ROOT_PATH . 'public' . DS .'static'. DS .'img');
  }
  //上传图片
  $info=$image->move(ROOT_PATH . 'public' . DS .'static'. DS .'img'.DS.$time,$filename);
  //将图片路径存放在数据库中
  $details->url = $time.DS.$info->getFileName();
  $details->allowField(true)->save();
}
return 1;
5、over over over
以上就是关于用TP5怎样编写上传多张图片的功能介绍,本文只是提供了一种实现思路,代码仅供参考,需要的朋友可以了解看看,希望对大家学习TP5框架的使用有帮助,想要了解更多可以继续浏览群英网络其他相关的文章。
标签:image,TP5,details,time,编写,上传,DS,图片 From: https://www.cnblogs.com/suducn/p/18262840