title: 玩转树莓派[04:pi-dashboard实时监控]
excerpt: 先搞一个本地树莓派监控网页
tags: [raspberry, 基地2.0, 系统, mariadb, myadmin, mysql mysql, nginx nginx, php, pi-dashboard]
categories:
- [学习, raspberry]
index_img: https://picture-store-repository.oss-cn-hangzhou.aliyuncs.com/PicGo/20201122205117.png
banner_img: https://api.ixiaowai.cn/mcapi/mcapi.php
date: 2020-07-11 11:11:11
comment: true
前言
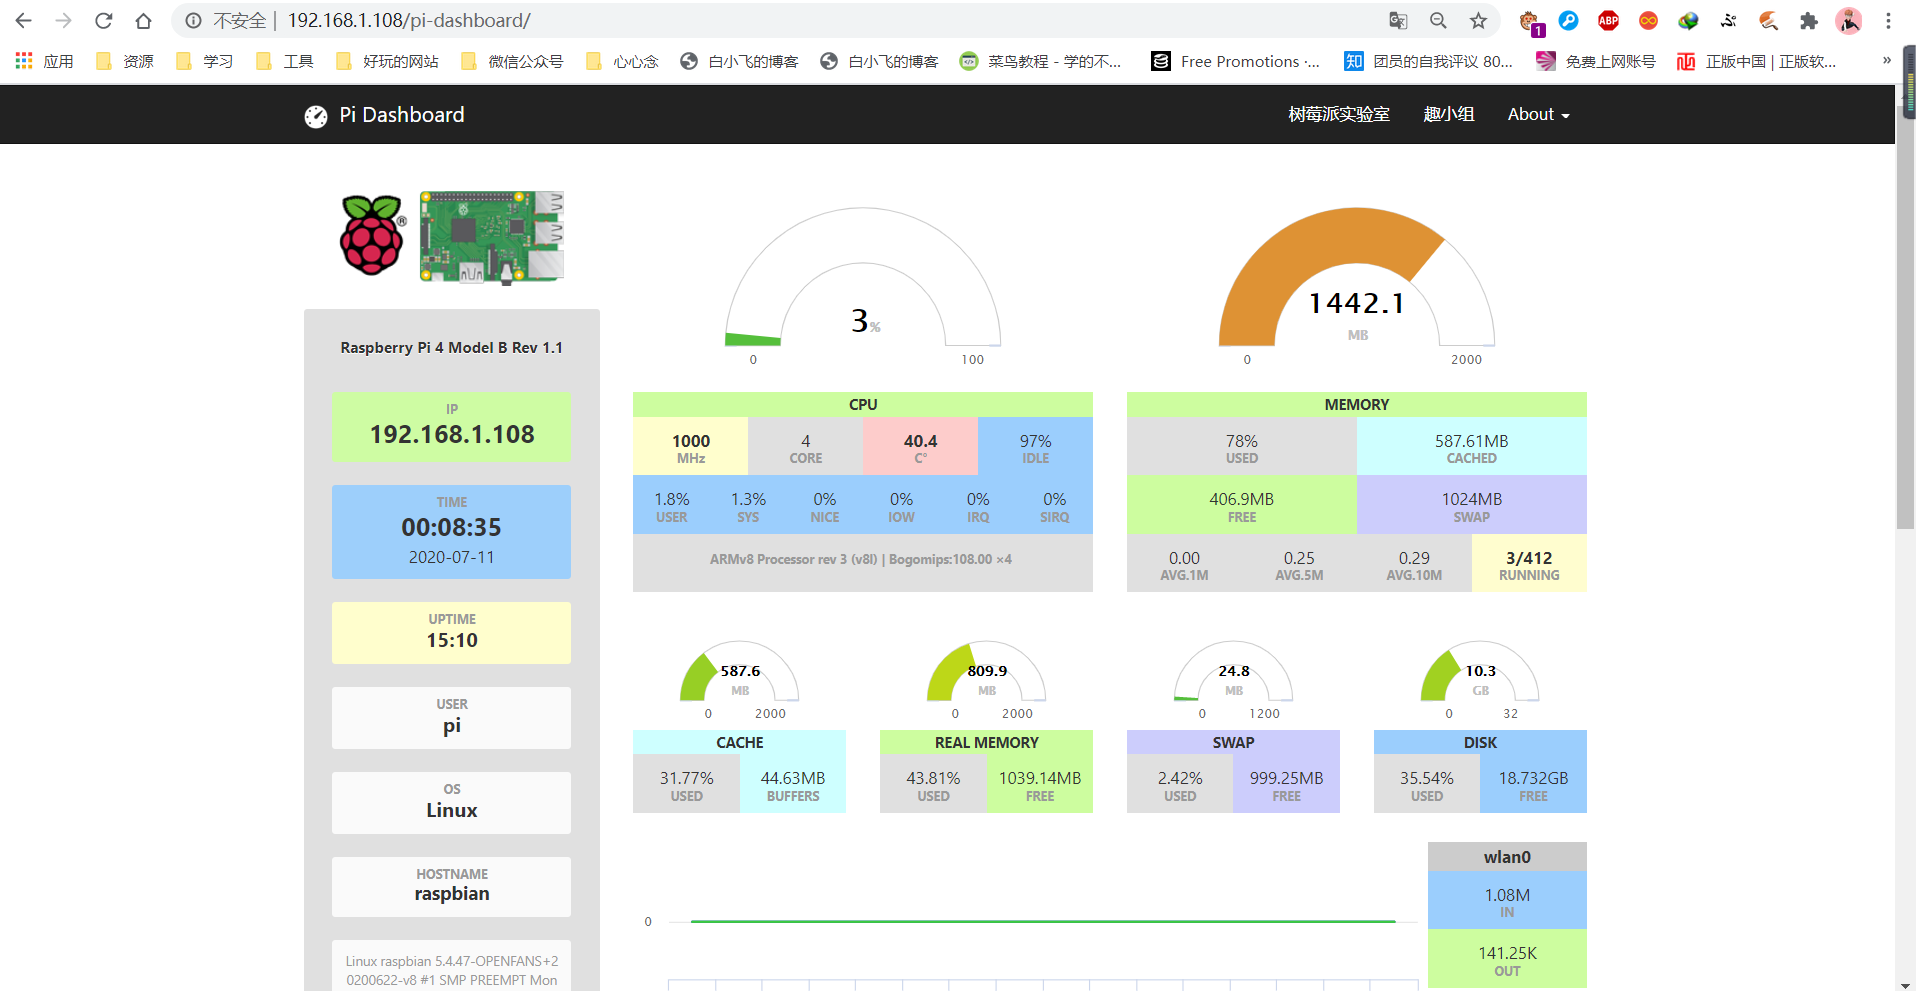
树莓派作为一台Linux主机,要是有一个可视化界面能实时显示树莓派的状态信息那该有多棒啊。 最近找到一个有趣的项目,我们只需要给树莓派配置好lnmp环境后,就可以装上一个类似于仪表盘的状态监控的工具。 通过炫酷的WebUI的界面显示当前树莓派的各种数据: CPU的基本信息,状态和使用率树莓派当前IP地址、使用的时间、操作系统内存、缓存、SWAP分区的实时数据TF卡磁盘的占用情况网络接口实时数据以下是在树莓派上安装pi-dashboard的详细过程:
安装方法
1. 安装Nginx
ssh登录树莓派,输入:
sudo apt-get update
sudo apt-get install nginx
2. 安装php
sudo apt-get install php7.3-fpm
3. 配置Nginx
安装好Nginx后,为了让Nginx能够处理PHP网页,需要修改/etc/nginx/sites-available/default文件
sudo vim /etc/nginx/sites-available/default
将default文件修改为以下内容:
# Default server configuration
#
server {
        listen 80 default_server;
        listen [::]:80 default_server;
        root /var/www/html;
        # Add index.php to the list if you are using PHP
        index index.html index.htm index.nginx-debian.html index.php;
        server_name _;
        location / {
                # First attempt to serve request as file, then
                # as directory, then fall back to displaying a 404.
                try_files $uri $uri/ =404;
        }
        # pass PHP scripts to FastCGI server
        #
        location ~ \.php$ {
        #       include snippets/fastcgi-php.conf;
        #
        #       # With php-fpm (or other unix sockets):
                fastcgi_pass unix:/run/php/php7.3-fpm.sock;
        #       # With php-cgi (or other tcp sockets):
        #       fastcgi_pass 127.0.0.1:9000;
        # 设置脚本文件请求的路径
                fastcgi_param SCRIPT_FILENAME $document_root$fastcgi_script_name;
        # 引入fastcgi的配置文件
                include fastcgi_params;
        }
}
4. 重启Nginx
sudo nginx -s reload
这时我们可以查看Nginx与PHP是否配置成功,我们可以在网站根目录下 /var/www/html创建一个index.php文件,内容如下:
<?php phpinfo(); ?>
保存后退出,在局域网下浏览器地址栏输入:http://你的树莓派ip/index.php,查看PHPinfo信息,如果显示说明PHP与Nginx配置成功。
5. 树莓派安装MariaDB和phpMyAdmin
sudo apt-get install mariadb-server-10.3 phpmyadmin
error:
pi@raspbian:~$ sudo apt-get install mariadb-server-10.3 phpmyadmin
Reading package lists... Done
Building dependency tree
Reading state information... Done
Some packages could not be installed. This may mean that you have
requested an impossible situation or if you are using the unstable
distribution that some required packages have not yet been created
or been moved out of Incoming.
The following information may help to resolve the situation:

The following packages have unmet dependencies:
 phpmyadmin : Depends: php-twig (>= 2.9) but 2.6.2-2 is to be installed
              Recommends: php-curl
              Recommends: php-gd
              Recommends: php-bz2
              Recommends: php-zip
              Recommends: php-tcpdf but it is not going to be installed
E: Unable to correct problems, you have held broken packages.
解决办法:
sudo apt-get install aptitude
sudo aptitude install xxxxx
第一选项no
第二个选项yes
控制台安装phpMyAdmin过程中会出现配置phpMyAdmin的选项

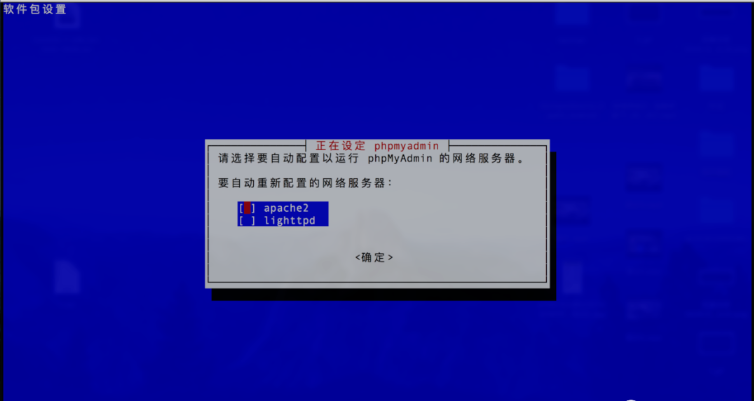
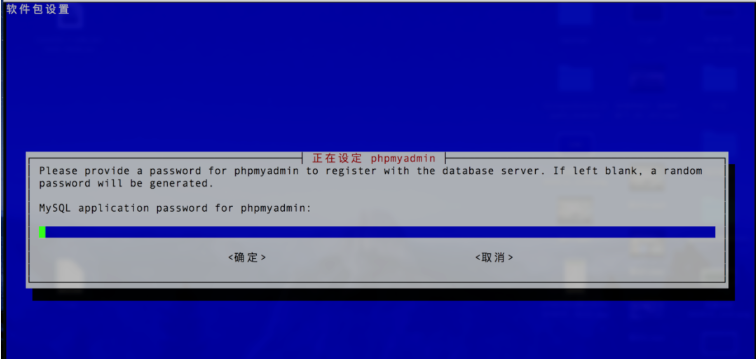
它让我们自动重新配置网络服务器Apache或者lighttpd,因为我们用的是Nginx所以按 esc键取消选择,安装结束时会出现一个配置选项,点击 yes进行配置,之后要求输入一个密码,注册到MySQL服务器上

6. 建立软链接:
sudo ln -s /usr/share/phpmyadmin /var/www/html
7.pi-dashboard项目部署
我们先在本地下载pi-dashboard项目,下载地址:https://github.com/spoonysonny/pi
解压后用xftp软件传送到树莓派上,然后运行命令
sudo mv pi-dashboard /var/www/html
8.重启后浏览器输入http://你的树莓派ip/pi-dashboard/
