Introduction
The Netcat (nc) command is a command-line utility for reading and writing data between two computer networks. The communication happens using either TCP or UDP. The command differs depending on the system (netcat, nc, ncat, and others).
Netcat is a crucial tool to master for network and system administrators due to the rich connection troubleshooting features and scripting usability.
Prerequisites
- Two machines in the same network. The examples use two Ubuntu 18.04 virtual machines.
- Access to the command line/terminal on both devices.
- The IP address of each device.
- Access to a browser or the curl command.
nc Command Syntax
The basic syntax for the nc command is:
nc [<options>] <host> <port>The command consists of the following elements:
- On Ubuntu, the commands
ncandnetcatboth work as symbolic links for the OpenBSD version of Netcat. On CentOS, Debian, and RHEL, the command isncat. - The
<host>is either a numeric IP address or a symbolic hostname. - The
<port>is either a numeric port or service name.
Netcat has two working modes:
- Connect mode. In connect mode, Netcat works as a client. The utility requires the
<host>and<port>parameters. - Listen mode. In listen mode, Netcat works as a server. When
<host>is omitted, Netcat listens on all available addresses for the specified port.
The command attempts to start a TCP connection at the provided host and port without any options.
Netcat (nc) Command Options
The table below outlines common nc command options:
| Option | Type | Description |
|---|---|---|
-4 |
Protocol | Use IPv4 only. |
-6 |
Protocol | Use IPv6 only. |
-U--unixsock |
Protocol | Use Unix domain sockets. |
-u--udp |
Protocol | Use UDP connection. |
-g <hop1, hop2,...> |
Connect mode | Set hops for loose source routing in IPv4. Hops are IP addresses or hostnames. |
-p <port>--source-port <port> |
Connect mode | Binds the Netcat source port to <port>. |
-s <host>--source <host> |
Connect mode | Binds the Netcat host to <host>. |
-l--listen |
Listen mode | Listens for connections instead of using connect mode. |
-k--keep-open |
Listen mode | Keeps the connection open for multiple simultaneous connections. |
-v--verbose |
Output | Sets verbosity level. Use multiple times to increase verbosity. |
-z |
Output | Report connection status without establishing a connection. |
The list is not comprehensive. Check the manual page for a complete list of options using the man command:
man netcatUse arrow keys to navigate and press q to exit.
nc Command Examples
The following nc command examples assume two devices with unique IP addresses. The two devices in the examples are:
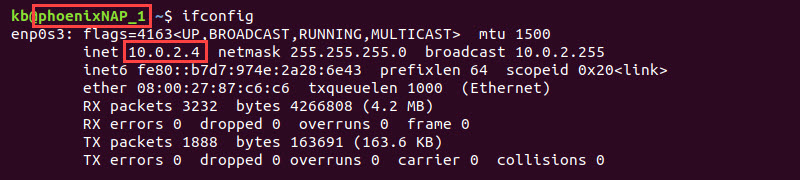
1. phoenixNAP_1 (device 1) with IP 10.0.2.4.
2. phoenixNAP_2 (device 2) with IP 10.0.2.5.

Both devices run as virtual machines with Ubuntu 18.04, but other setups are possible. Note that the commands vary for different operating systems.
Client/Server Connection
A simple client/server connection is between two devices. One device acts as a server (listens) while the other acts as a client (connects).
1. On device 1, run the nc command in listen mode and provide a port:
nc -lv 1234
The -l option activates listen mode, making device 1 the server. The output shows the device listening for connections due to the -v option.
2. On device 2, run the nc command with the IP address of device 1 and the port:
nc -v 10.0.2.4 1234
The output shows the connection is successful. Device 1 confirms the link and prints the IP address of device 2.

The client/server connection establishes successfully.
3. Send a message from either device, and the same message shows up on the other device. The client and server behave the same after the connection establishes.
To end the connection, press CTRL+C on either machine.
Ping Specific Port on Website
Use Netcat as an alternative to the ping command to test a specific port to a website. For example:
nc -zv google.com 443
If the ping succeeds, the output shows the successful connection message. The -z option ensures the connection does not persist.
Netcat does not give any specific information, and there are other methods to ping a specific port.
Scanning Ports
Use the nc command to scan for open ports.
1. Run nc on device 2 to listen on port 1234:
nc -lkv 1234
The -k option ensures the connection stays open after a disconnect.
2. Run the following command on device 2 to check whether port 1234 is open:
nc -zv 10.0.2.4 1234
If the port is open, the output shows a successful connection message.
3. Alternatively, scan multiple ports on device 2 by adding a port range. For example:
nc -zv 10.0.2.4 1230-1235
The output shows whether the connection is successful or not for each port.
4. When scanning for port ranges, filter the results using grep:
nc -zv 10.0.2.4 1230-1235 2>&1 | grep 'succeeded'
For example, grepping for the word succeeded only shows open ports in the output.
Transfer Files
Netcat allows transferring files through established connections. To see how file transfers work, do the following:
1. Create a sample file on device 1 using the touch command:
touch file.txtThe command creates an empty text file.
2. Create a listening connection on device 1 and redirect the file to the nc command:
nc -lv 1234 < file.txt
3. On device 2, connect to device 1 and redirect the file:
nc -zv 10.0.2.4 1234 > file.txt
Confirm the file transfer is complete using the ls command.
The output shows the file name, indicating the transfer was succesful.
Transfer Directory
Netcat does not allow transferring directories in the same way as files. Use the tar command to send multiple files or directories and pipe the command to Netcat.
1. Create a directory on either device and add multiple files:
mkdir files; touch files/file{1..5}.txtThe command creates a files directory with five text files.
2. Navigate to the directory using the cd command:
cd files3. On the other device, create and enter the destination directory:
mkdir files_destination && cd files_destination4. Create a listening connection on port 1234 and pipe the tar command:
nc -lv 1234 | tar xfv -
The listening connection expects a file that tar extracts.
5. On the other device, send the directory with:
tar -cf - . | nc -v 10.0.2.5 1234
The connection establishes and sends the tar file.
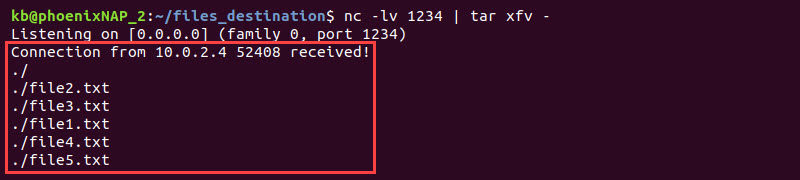
The receiving end extracts the files immediately, and the transfer is complete.
Create Web Server
To create a web server with Netcat, do the following:
1. Run the web server on device 1 and listen for connections on port 1234:
nc -lv 10.0.2.4 1234
Omitting the address runs the web server on localhost.
2. On device 2, run the address and port in a browser. Alternatively, use the curl command:
curl 10.0.2.4:1234The page does not display anything for now.
3. On device 1 where the web server is listening, the request sent by the browser or curl is visible.

The message shows the request information, such as the request type, host, and user agent.
4. To send a response to the client (device 2), paste the following code on device 1:
HTTP/1.1 200 Everything OK
Server: netcat
Content-Type: text/html; charset=UTF-8

<!DOCTYPE html>
<html>

<head>
<title>
Netcat
</title>
</head>
<body>
<h1>A webpage served with nc</h1>
</body>
</html>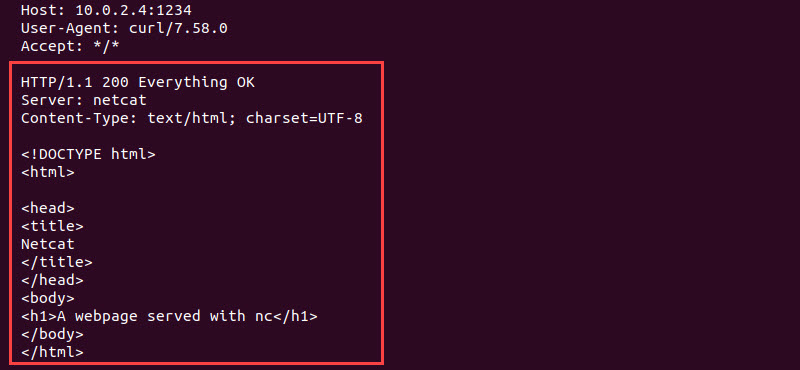
The response updates the information immediately.

If accessing the web server from a browser, the browser page fetches the updates live.
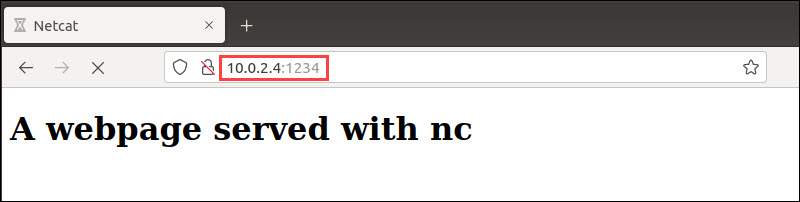
The web server is running successfully. Shut off the server with CTRL+C.
Simple Chat Server
Take advantage of the Netcat communication functionality to create a simple chat server.
1. On device 1, run the following command:
awk -W interactive '$0="Bob: "$0' | nc -lv 1234
The awk command helps add Bob's username to the messages sent through the server.
2. On device 2, add a different username and connect to the chat server:
awk -W interactive '$0="Alice: "$0' | nc 10.0.2.4 1234Send messages back and forth to test the chat. Bob (device 1) sees messages sent from Alice (device 2) with prefixed names and vice versa.
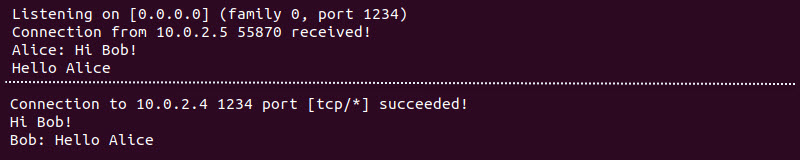
Their own usernames do not show up in their chat windows.
Send HTTP Request
Use Netcat with printf to send a HTTP request to a website. For example, to send a request to google.com on port 80 (for TCP/IP connections), run the following:
printf "GET / HTTP/1.0\r\n\r\n" | nc -v google.com 80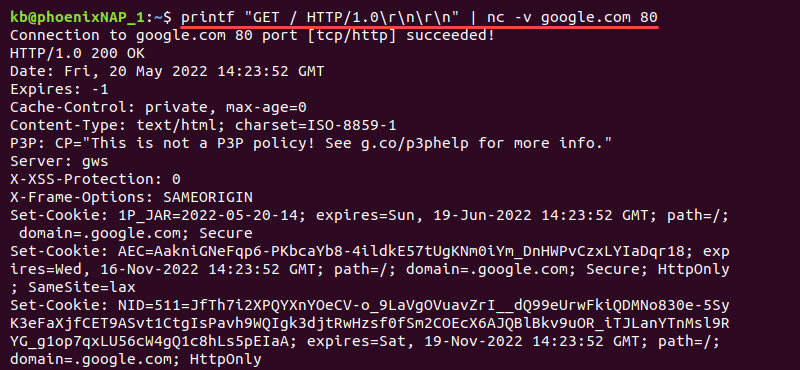
The output prints the page header and contents. Most pages disable a TCP connection and fetch the 404 error page.
Conclusion
After following the examples from this tutorial, you know how to use the nc command. Netcat is a powerful tool for network administrators.
For more networking tools, check out the netstat command.
标签:nc,connection,command,device,Netcat,port From: https://www.cnblogs.com/saaspeter/p/17781360.html