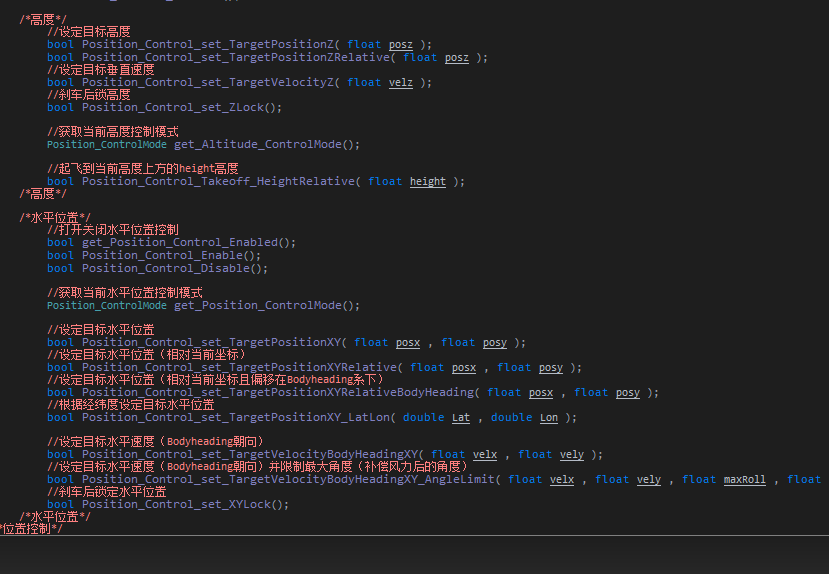
仍然是纯笔记
默认飞完一个定点飞行后会进入位置锁定模式
位置移动有多个模式
单位全部是cm厘米
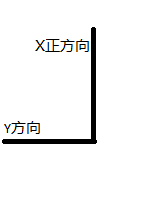
BodyHeading才是机头方向
XY方向如下所示
设置速度单位是cm/s
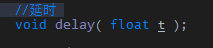
延时也是老延时了
但是不能这么写,会导致全系统暂停
任务模式执行有个频率
为了延时2s,应该写
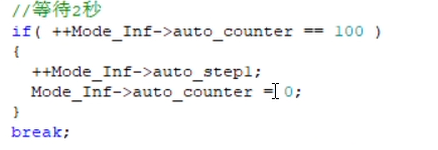
Mode_Inf->auto_counter仅计时用,默认无功能且++也需要自己写
if (++Mode_Inf->auto_counter == 100)

 {

	Mode_Inf->auto_step1 = 301;

	Mode_Inf->auto_counter = 0;

}

break;
在M01_Ground.c中有模式进入模式选择代码

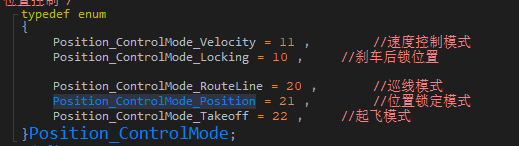
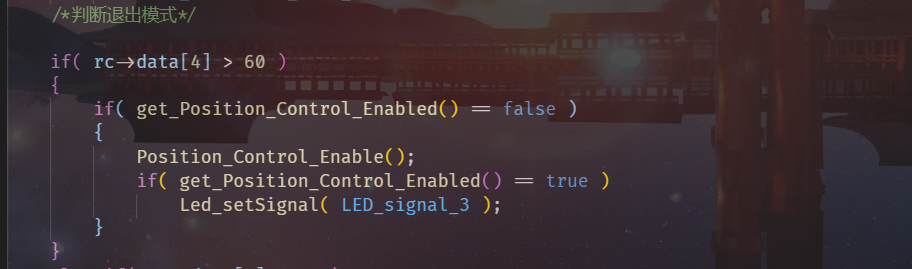
M30 姿态模式
M32 位置模式
等待起飞完成:
if (get_Altitude_ControlMode() == Position_ControlMode_Position)
等待任何工作完成:
if (get_Position_ControlMode() == Position_ControlMode_Position)
记住break写if外面
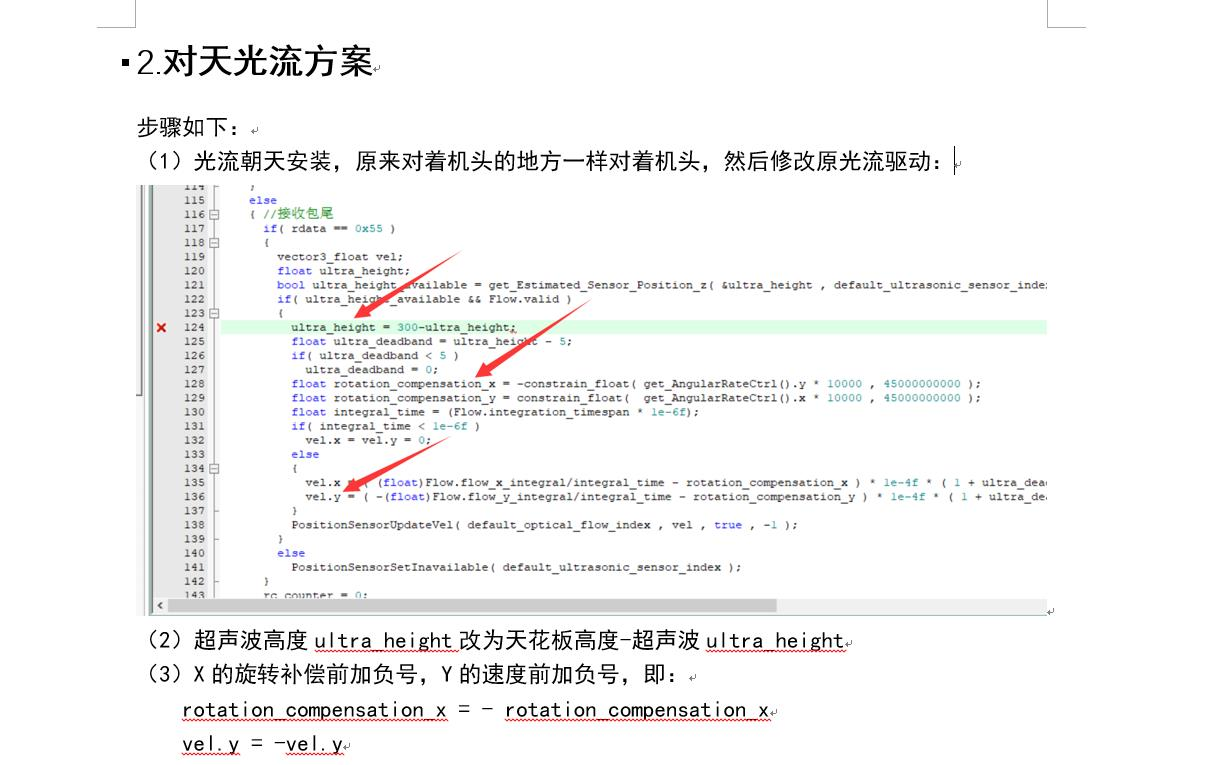
向上光流
RCdata表示
rc->data[0];//油门
rc->data[1];//偏航(左右)
rc->data[2];//倾斜(前后)
rc->data[3];//横滚
rc->data[4];//模式杆,最上面为0
rc->data[5];//开关杆
解析巡线例程,看串口实现
首先是Uart读取和数据点的解析
在Drivers\drv_SDI.c中实现
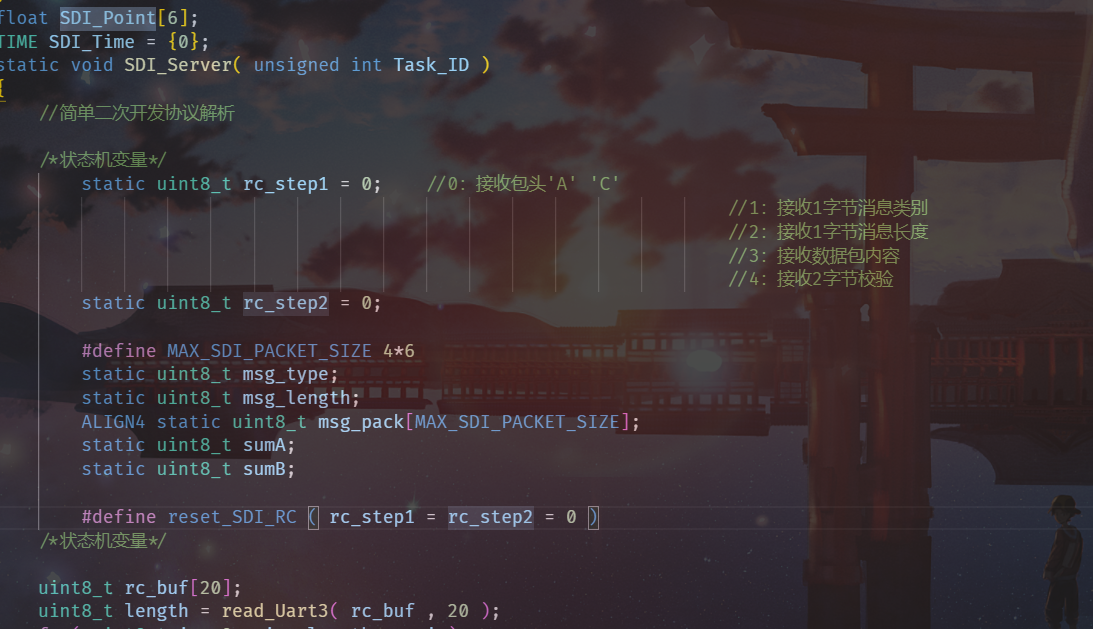
(图片最下面一行开始读入uart原始数据,检查uart3的定义可知是给openmv用的)
然后M35使用了SDI数据
直接使用时转换为了角度和速度

那接下来就是要分析一下openmv是怎么发送的了
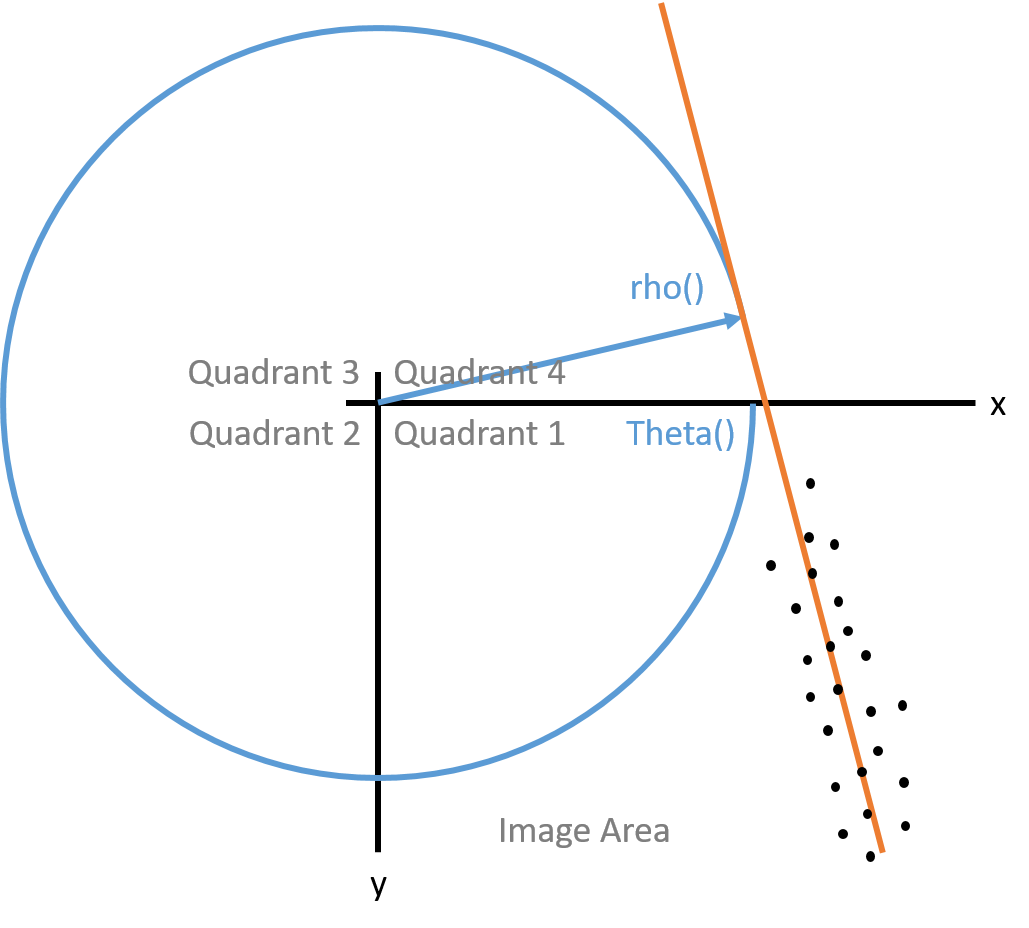
https://book.openmv.cc/example/09-Feature-Detection/linear-regression-fast.html 这个是车巡线,其实原理基本一致
https://openmv.io/blogs/news/linear-regression-line-following 各个参数定义
然后发现自己对题目的理解有误?!
。。。。
但是串口的方案也算是确认下来了
任务队列
//添加任务函数,返回任务ID

//如任务模式为时间触发,t为触发时间间隔

//如任务模式为自定义函数触发,trigger_func为自定义函数

//mainfunc为任务主函数

unsigned int STS_Add_Task( STS_Task_Trigger_Mode mode , float t , bool (*trigger_func)( unsigned int Task_ID ) , void (*mainfunc)( unsigned int Task_ID ) )
此时再看
void init_drv_SDI2()

{

  STS_Add_Task( STS_Task_Trigger_Mode_Custom , 0 , SDI_RCTrigger , SDI_Server );
	//名为STS_Task_Trigger_Mode_Custom,不是使用时间触发(0),使用SDI_RCTrigger函数触发SDI_Server
}
static bool SDI_RCTrigger( unsigned int Task_ID )//触发函数,该函数似乎会自动触发执行,然后再尝试调用SDI_Server
{
	if( UART2_DataAvailable() )
		return true;
	return false;
}
那我只需要思考如何编写SDI_Server即可了
%5.1f是什么意思
表示保留1位小数总长度为5个字节的的浮点数
%f表示输出为单精度浮点数
5表示总长度为5,包括小数点
小数点后面是1表示保留一位小数,如果是%5.2f则保留两位小数
Undefined symbol

最终解决办法是在对应的.h文件再extern一遍
逻辑如下:
A.c:int num=0;
A.h: extern int num;
B.h: #include 'A.h'
extern int num;
B.c num=。。。
或者看看是不是忘记加入编译目标里了
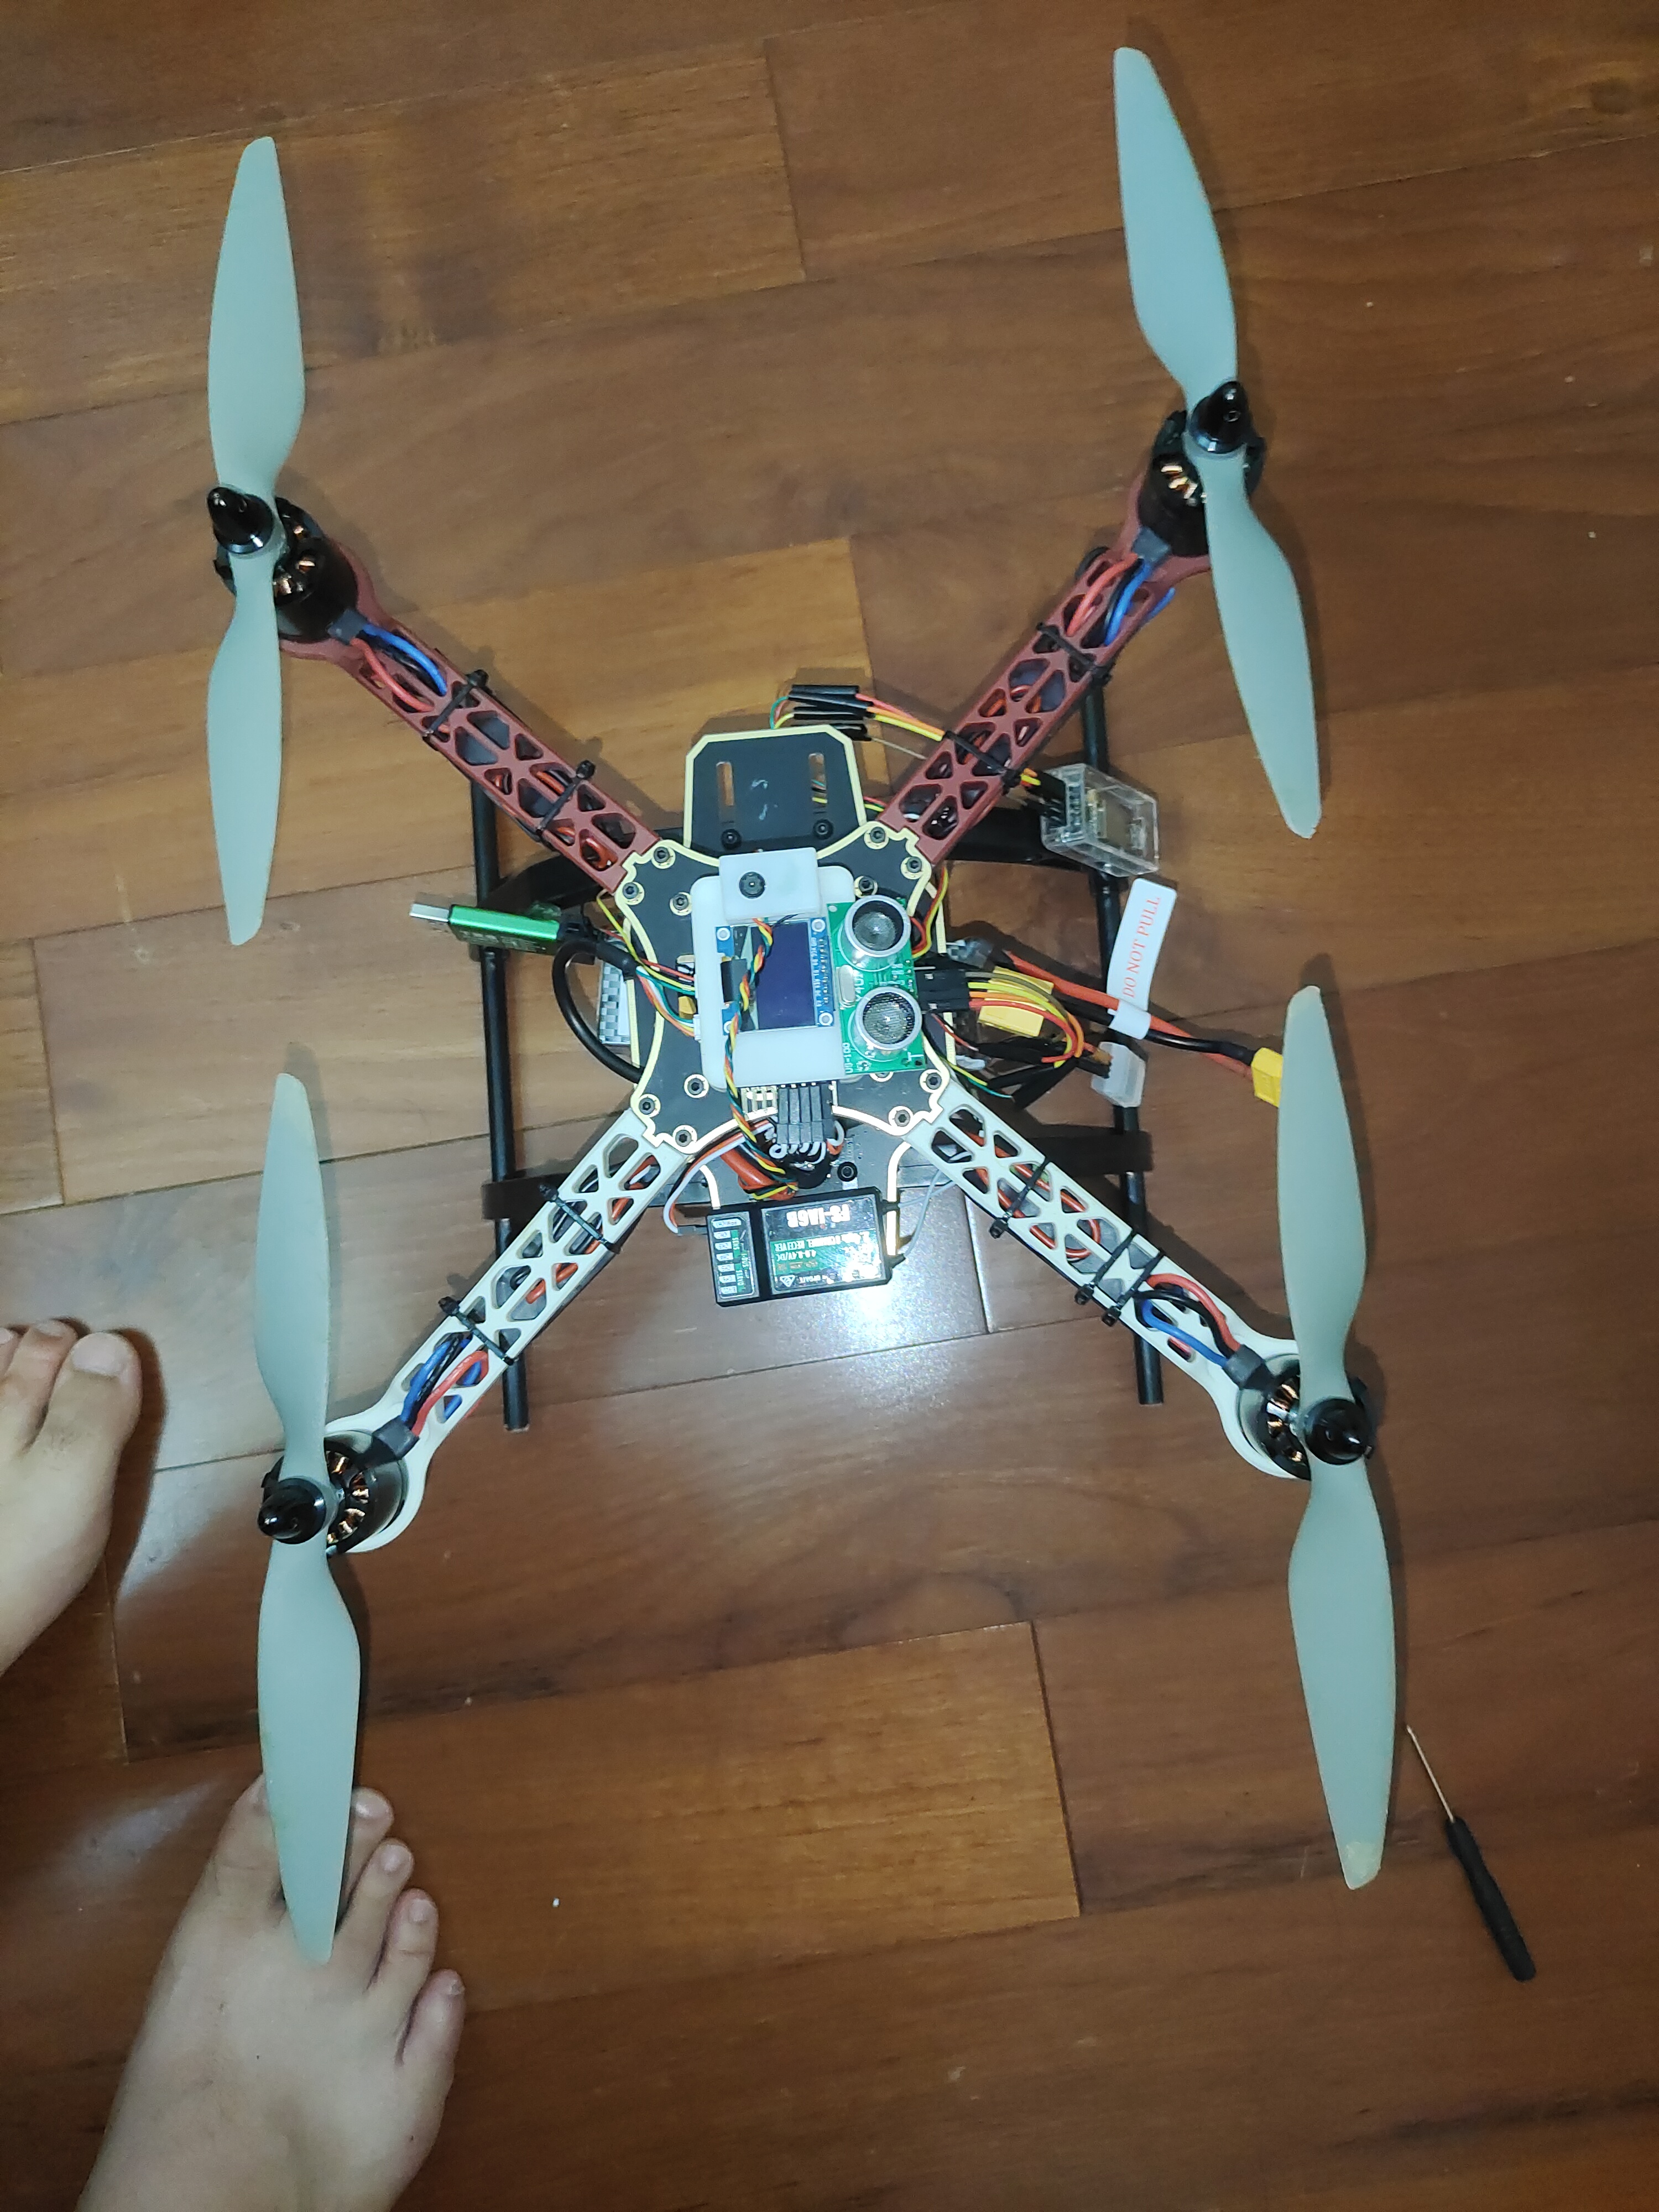
正反桨
先不装桨看电机转向,然后装桨
不是字朝上也装对了!
增添Uart7的驱动
先把uart2.c.h SDI2.c.h复制
然后把文件里所有UART2改为UART7
除了!
SysCtlPeripheralEnable(SYSCTL_PERIPH_GPIOE);
//检查数据手册看看pin脚在哪个区

uDMAChannelAssign(UDMA_CH21_UART7TX );
//DMA通道,查宏定义
IntPrioritySet( INT_UART7 , INT_PRIO_7 );//中断线,好像无意间选对了
基本都是查改宏定义的事情
	GPIOA->LOCK = GPIO_LOCK_KEY;
	GPIOA->CR |= (1<<7);
	GPIOA->LOCK = 0;
最后再加入SDI初始化

init_drv_Uart7();

//分类放好
init_drv_SDI7();
Uart发送数字,数字转字符串,Float浮点数转字符串
以前就老想知道怎么写比较好
感觉写转换不是个很好的办法
现在知道了
char num_str[8];

sprintf( num_str , "%5.1f" ,ultra_height);

Uart7_Send(&num_str,sizeof(num_str));

Uart7_Send("\r\n",2);
PWM输出
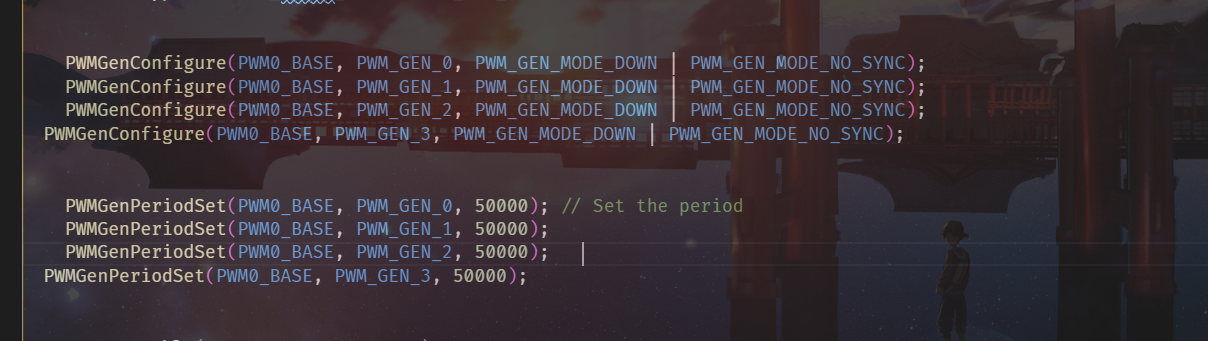
注意此时的pwmgen应该是类似于tim123的样子,不是pwm通道
所以没有PWM_GEN_4的定义

最后三句:启动PWM,全部拉低,开启高电平
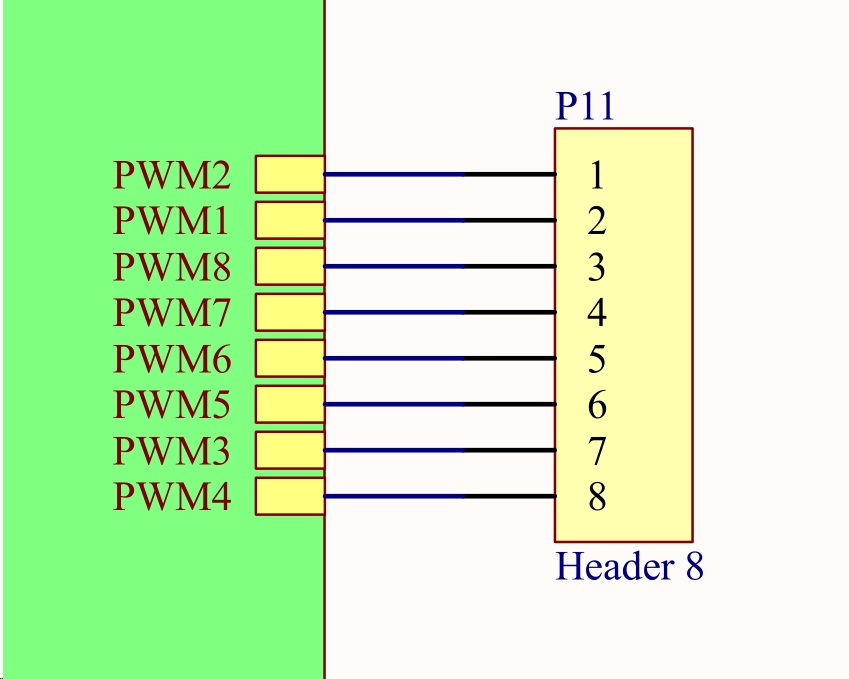
但是
PWM_OUT_4和PWM4不是一个接口。
程序中的PWM定义最终反映到以这个图为准
(左边是程序定义的pwm,右边是飞控手册上定义的pwm)
所以PWM_OUT_4实际对应是手册上的PWM8
飞控openmv串口通信
uart = UART(3, 115200)
from struct import pack, unpack
sumA = 0
sumB = 0
data = bytearray([0x41,0x43])#包头AC
uart.write(data)
data = bytearray([0x02,8])#消息类别2,数据长度为8(两个Float大小为8),注意随着数据点增加而改变,建议最大4个数据点否则飞控侧需要改代码
for b in data:
sumB = sumB + b
sumA = sumA + sumB
uart.write(data)
float_value = theta_err
float_bytes = pack('f', float_value)
for b in float_bytes:
sumB = sumB + b
sumA = sumA + sumB
uart.write(float_bytes)#角度偏差
float_value = rho_err*0.1
float_bytes = pack('f', float_value)
for b in float_bytes:
sumB = sumB + b
sumA = sumA + sumB
uart.write(float_bytes)#距离偏差
data = bytearray([sumB, sumA])#校验
#该校验不是一般的奇偶校验!!!
uart.write(data)
print(float_value,theta_err)
让OLED屏幕显示数字
sprintf( num_str , "%5.1f" ,rc->data[4]);
	OLED_Draw_Str8x6( num_str, 0 , 0);
	OLED_Update();
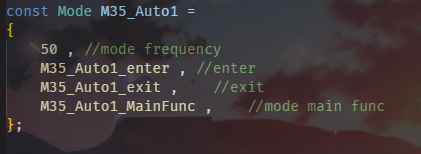
M32
位置锁定模式
需要进入该模式后同时把任务杆打到最低
M35
对所有的API,X轴是前后,Y轴是左右
完成一段飞行后会自动回到Position_ControlMode_Position位置锁定模式
所以在状态机处只需要写
if( get_Position_ControlMode() == Position_ControlMode_Position )
{

}
即可用于确定上一个飞行命令执行结束
串口驱动文件架构
Openmv相关
SDI 使用Uart3 包含串口驱动底层,波特率,解析层,包含数据点获取和数据传入响应
无线调试器相关Uart7
Uart7 串口驱动底层,包含波特率
SDI7 解析层
超声波(向上,Uart2)
Uart2串口驱动底层,包含波特率
SDI2 解析层,包含数据传入响应
超声波没数据
US-100模块上丝印上的TX口直接接飞控TX口

超声波和向上光流程序
超声波向上装
但是超声波在楼下似乎不太好用,会显示11m距离,所以设置了最大化4m
drv_OpticalFlow.c
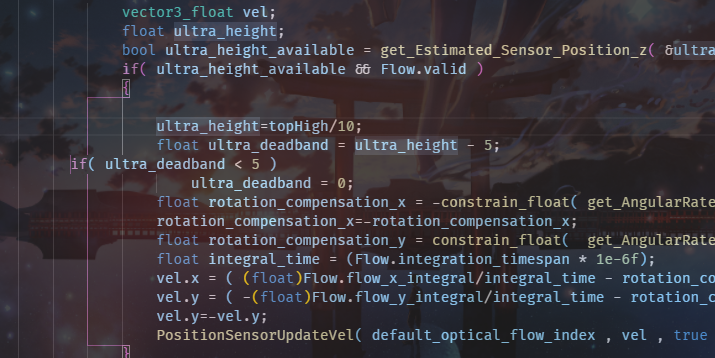
ultra_height=topHigh/10;//ultra_height等于从天花板到飞机的距离,这里是厘米为单位
//之前有400-ultra_height意思是屋顶高400,由此测算出飞机距离天花板距离
灯,蜂鸣器
LED_Red(0);
LED_Green(true);
LED_Blue(false);
Buzzer( true );