SpringBoot
HelloWorld
1.创建Meven工程
2.引入依赖
pom.xml
<parent>
    <groupId>org.springframework.boot</groupId>
    <artifactId>spring-boot-starter-parent</artifactId>
    <version>2.3.4.RELEASE</version>
</parent>

<dependencies>
    <dependency>
        <groupId>org.springframework.boot</groupId>
        <artifactId>spring-boot-starter-web</artifactId>
    </dependency>
</dependencies>
3 .创建主程序
/**
 * 主程序类
 * @SpringBootApplication:一个springboot应用
 */
@SpringBootApplication
public class MainApplication {
    public static void main(String[] args) {
        SpringApplication.run(MainApplication.class,args);
    }
}
4.写业务
@RestController
public class HelloController {
    @RequestMapping("/hello")
    public String handle01(){
        return "Hello SpringBoot2!";
    }
}
5.运行main,浏览器打开localhost:8080/hello
6.简化配置
application.properties
server.port=8888
7.简化部署
打包方式jar
把项目打成jar包,直接在目标服务器执行即可
<build>
    <plugins>
        <plugin>
            <groupId>org.springframework.boot</groupId>
            <artifactId>spring-boot-maven-plugin</artifactId>
        </plugin>
    </plugins>
</build>
自动配置原理
1.依赖管理
- 父项目做依赖管理
依赖管理
<parent>
    <groupId>org.springframework.boot</groupId>
    <artifactId>spring-boot-starter-parent</artifactId>
    <version>2.3.4.RELEASE</version>
</parent>

他的父项目
<parent>
    <groupId>org.springframework.boot</groupId>
    <artifactId>spring-boot-dependencies</artifactId>
    <version>2.3.4.RELEASE</version>
</parent>
- 开发导入starter场景启动器
1、见到很多 spring-boot-starter-* : *就某种场景
2、只要引入starter,这个场景的所有常规需要的依赖我们都自动引入
3、SpringBoot所有支持的场景
https://docs.spring.io/spring-boot/docs/current/reference/html/using-spring-boot.html#using-boot-starter
4、见到的  *-spring-boot-starter: 第三方为我们提供的简化开发的场景启动器。
5、所有场景启动器最底层的依赖
<dependency>
    <groupId>org.springframework.boot</groupId>
    <artifactId>spring-boot-starter</artifactId>
    <version>2.3.4.RELEASE</version>
    <scope>compile</scope>
</dependency>
- 无需关注版本号,自动版本仲裁
1、引入依赖默认都可以不写版本
2、引入非版本仲裁的jar,要写版本号。
- 可以修改版本号
1、查看spring-boot-dependencies里面规定当前依赖的版本用的key。
2、在当前项目里面重写配置
<properties>
    <mysql.version>5.1.43</mysql.version>
</properties>
2.自动配置
- 自动配好Tomcat
- 引入Tomcat依赖
- 配置Tomcat
- 自动配好SpringMVC
- 引入SpringMVC全套组件
- 自动配好SpringMVC常用组件(功能)
- 自动配好Web常见功能,如字符编码问题
- SpringBoot帮我们配置好了web开发常见场景
- 默认的包结构
- 主程序所在包及其子包中的组件默认会被扫描
- 无需配置包扫描
- 改变扫描路径@SpringBootApplication(scanBasePackages="com.xust")或@ComponentScan 指定扫描路径
- 各种配置拥有默认值
- 默认配置最终都是映射到某个类上,如:MultipartProperties
- 配置文件的值最终会绑定每个类上,这个类会在容器中创建对象
- 按需加载所有默认配置项
配置文件
1.文件类型
yaml
适合做以数据为中心的配置文件
基本语法
- key: value,value前有空格
- 大小写敏感
- 使用缩进表示层级关系
- 缩进不允许用tab,只能用空格
- 缩进的空格数不重要,只要同层级元素左对齐就行
-
表示注释
- 字符串不需要加引号,‘ ’和“ ”表示转义/不转义,'\n'不换行,"\n"换行
数据类型
- 字面量:单个的、不可再分的值。date、boolean、string、number、null
k: v
- 对象:键值对的集合。map、hash、set、object
行内写法:k: {k1:v1,k2:v2,k3:v3}
#或
k:
	k1: v1
	k2: v2
	k3: v3
- 数组:一组按次序排列的值。array、list、queue
行内写法:  k: [v1,v2,v3]
#或者
k:
 - v1
 - v2
 - v3
举例
@ConfigurationProperties(prefix = "person")
@Component
@ToString
@Data
public class Person {
    private String userName;
    private Boolean boss;
    private Date birth;
    private Integer age;
    private Pet pet;
    private String[] interests;
    private List<String> animal;
    private Map<String, Object> score;
    private Set<Double> salarys;
    private Map<String, List<Pet>> allPets;

    public Person() {
    }
}

@Data
@ToString
public class Pet {
    private String name;
    private Double weight;
}
application.yaml
person:
  userName: zhangsan
  boss: false
  birth: 2019/12/12 20:12:33
  age: 18
  pet:
    name: tomcat
    weight: 23.4
  interests: [篮球,游泳]
  animal:
    - jerry
    - mario
  score:
    english:
      first: 30
      second: 40
      third: 50
    math: [131,140,148]
    chinese: {first: 128,second: 136}
  salarys: [3999,4999.98,5999.99]
  allPets:
    sick:
      - {name: tom}
      - {name: jerry,weight: 47}
    health: [{name: mario,weight: 47}]
2.自定义绑定的配置提示
<dependency>
    <groupId>org.springframework.boot</groupId>
    <artifactId>spring-boot-configuration-processor</artifactId>
    <optional>true</optional>
</dependency>

<build>
    <plugins>
        <plugin>
            <groupId>org.springframework.boot</groupId>
            <artifactId>spring-boot-maven-plugin</artifactId>
            <configuration>
                <excludes>
                    <exclude>
                        <groupId>org.springframework.boot</groupId>
                        <artifactId>spring-boot-configuration-processor</artifactId>
                    </exclude>
                </excludes>
            </configuration>
        </plugin>
    </plugins>
</build>
Web开发
简单功能分析
静态资源
(1)静态资源目录
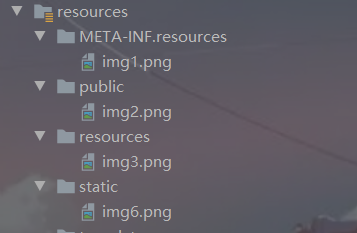
将静态资源放在/static,/public,/resources,/META-INF/resources
访问:当前项目根路径/+静态资源名
优先级:resources>static>public
原理:静态映射/**
请求进来,先去找Controller看能不能处理。不能处理的所有请求又去交给静态资源处理器。如果静态资源也找不到则响应404页面
(2)静态资源访问前缀
默认无前缀
application.yaml中配置访问前缀为res,改变默认静态资源路径
spring:
  mvc:
    static-path-pattern: /res/**
  web:
    resources:
      static-locations: [classpath:/hehe/]
欢迎页支持
- 静态资源路径下index.html
- 可以修改静态资源默认访问路径,但是不能配置访问前缀,否则会导致index.html文件不能被默认访问
- controller处理index.html
favicon图标
将图标图片名称改为favicon.ico置于静态资源目录下即可
配置访问前缀会使该功能失效
模板引擎
SpringBoot不支持jsp,需要引入第三方模板引擎进行页面渲染
模板引擎-Thymeleaf
Thymeleaf的使用
1.引入starter
<dependency>
    <groupId>org.springframework.boot</groupId>
    <artifactId>spring-boot-starter-thymeleaf</artifactId>
</dependency>
2.自动配置好了Thymeleaf
默认前后缀
将html页面置于resources/templates目录下即可自动渲染
public static final String DEFAULT_PREFIX = "classpath:/templates/";

public static final String DEFAULT_SUFFIX = ".html";  //xxx.html
3.页面开发
引入名称空间xmlns:th="http://www.thymeleaf.org"
<!DOCTYPE html>
<html lang="en" xmlns:th="http://www.thymeleaf.org">
<head>
    <meta charset="UTF-8">
    <title>Title</title>
</head>
<body>
<h1 th:text="${msg}">哈哈</h1>
<h2>
    <a href="www.test.com" th:href="${link}">去百度1</a><br>
    <a href="www.test.com" th:href="@{link}">去百度2</a>
</h2>
</body>
</html>
@Controller
public class ViewTestController {
    @GetMapping("/xust")
    public String xust(Model model){
        //model中的数据会被放在请求域中,相当于request.setAttribute("a",aa)
        model.addAttribute("msg","你好,xust");
        model.addAttribute("link","http://www.baidu.com");
        return "success.html";
    }
}
构建后台管理系统
拦截器
文件上传
数据访问
数据源的自动配置-HikariDataSource
导入jdbc场景
<dependency>
    <groupId>org.springframework.boot</groupId>
    <artifactId>spring-boot-starter-data-jdbc</artifactId>
</dependency>
数据库驱动(默认8.0.22)
<dependency>
    <groupId>mysql</groupId>
    <artifactId>mysql-connector-java</artifactId>
</dependency>
修改配置项
application.yaml
spring:
  datasource:
    url: jdbc:mysql://localhost:3306/db_account
    username: root
    password: xpx24167830
    driver-class-name: com.mysql.cj.jdbc.Driver
Test
@Slf4j
@SpringBootTest
class Boot03WebAdminApplicationTests {

    @Autowired
    JdbcTemplate jdbcTemplate;


    @Test
    void contextLoads() {
        Long aLong = jdbcTemplate.queryForObject("select count(*) from t_emp", Long.class);
        log.info("记录总数:{}",aLong);
    }
}
Druid数据源
自定义方式
依赖
<dependency>
    <groupId>com.alibaba</groupId>
    <artifactId>druid</artifactId>
    <version>1.1.17</version>
</dependency>
整合MyBatis
pom.xml
<!--第三方-->
<dependency>
    <groupId>org.mybatis.spring.boot</groupId>
    <artifactId>mybatis-spring-boot-starter</artifactId>
    <version>2.2.2</version>
</dependency>
application.yaml
server:
  port: 8888

spring:
  datasource:
    username: root
    password: xpx24167830
    #?serverTimezone=UTC解决时区的报错
    url: jdbc:mysql://localhost:3306/mybatis?serverTimezone=UTC&useUnicode=true&characterEncoding=utf-8
    driver-class-name: com.mysql.cj.jdbc.Driver
mybatis:
  type-aliases-package: com.xust.pojo
  mapper-locations: classpath:mybatis/mapper/*.xml
UserMapper.java
@Mapper
@Repository
public interface UserMapper {
    List<User> queryUserList();
}
UserMapper.xml
<mapper namespace="com.xust.mapper.UserMapper">
    <select id="queryUserList" resultType="User">
        select * from t_emp
    </select>
</mapper>
UserController.java
@RestController
public class UserController {
    @Autowired
    private UserMapper userMapper;

    @GetMapping("/queryUserList")
    private List<User> queryUserList(){
        List<User> userList = userMapper.queryUserList();

        for (User user:userList){
            System.out.println(user);
        }
        return userList;
    }
}