@
目录1.前言
你是不是一直不敢用ConstraintLayout,是以为属性太多太复杂?你心理上的惰性,畏惧它。它其实很好用很强大,如果要用就需要一个入门的敲门砖
2.了解ConstraintLayout
特点:简化操作、解决布局嵌套、自适应布局、可百分比布局、可同时替代线性布局LinearLayout和相对布局RelativeLayout的强大功能
3.基本用法
ConstraintLayout的位置约束属性如下,属性值可以是parent或者@+id/兄弟组件的id:
layout_constraintLeft_toLeftOf
layout_constraintLeft_toRightOf
layout_constraintRight_toLeftOf
layout_constraintRight_toRightOf
layout_constraintTop_toTopOf
layout_constraintTop_toBottomOf
layout_constraintBottom_toTopOf
layout_constraintBottom_toBottomOf
layout_constraintStart_toEndOf
layout_constraintStart_toStartOf
layout_constraintEnd_toStartOf
Layout_constraintEnd_toEndOf
怎么这么多12个属性,相对布局你都会,这个就不用害怕理解一下就明白了,相对布局不就是top,bottom,left,right四个属性吗,看单词只不过多了start和end(为了支持阿拉伯国家),这里你也可以当成left和right,效果一样。推荐使用start和end.下面就解析一下这些属性。
3.1 看一个布局
<?xml version="1.0" encoding="utf-8"?>
<androidx.constraintlayout.widget.ConstraintLayout xmlns:android="http://schemas.android.com/apk/res/android"
    xmlns:app="http://schemas.android.com/apk/res-auto"
    xmlns:tools="http://schemas.android.com/tools"
    android:layout_width="match_parent"
    android:layout_height="match_parent">
    <Button
        android:id="@+id/button"
        android:layout_width="wrap_content"
        android:layout_height="wrap_content"
        android:textSize="24sp"
        android:text="Button"
        app:layout_constraintBottom_toBottomOf="parent"
        app:layout_constraintStart_toStartOf="parent"
        app:layout_constraintTop_toTopOf="parent" />
</androidx.constraintlayout.widget.ConstraintLayout>

先理解一下这个button控件,它使用了layout_constraintStart_toStartOf、layout_constraintBottom_toBottomOf和
layout_constraintTop_toTopOf
意思:parent表示父布局,而且使用约束布局必须在水平和垂直都添加约束,不然不完整。
button的左边和父布局的左边对齐,
button的下面边和父布局的下面边对齐,
button的上面的边和父布局的上面边对齐
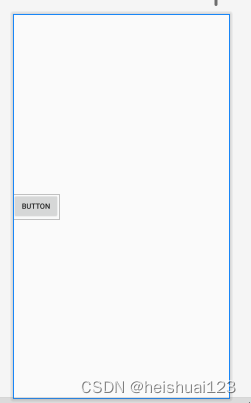
从显示效果图可以看到第一个左对左效果有了,又由于要求控件上对上和下对下就会出现在中间的效果。
3.2再看一个布局
<?xml version="1.0" encoding="utf-8"?>
<androidx.constraintlayout.widget.ConstraintLayout xmlns:android="http://schemas.android.com/apk/res/android"
    xmlns:app="http://schemas.android.com/apk/res-auto"
    xmlns:tools="http://schemas.android.com/tools"
    android:layout_width="match_parent"
    android:layout_height="match_parent">

    <Button
        android:id="@+id/button"
        android:layout_width="wrap_content"
        android:layout_height="wrap_content"
        android:testSize="24sp"
        android:text="Button"
        app:layout_constraintBottom_toBottomOf="parent"
        app:layout_constraintStart_toStartOf="parent"
        app:layout_constraintTop_toTopOf="parent" />
    <Button
        android:id="@+id/button1"
        android:layout_width="wrap_content"
        android:layout_height="wrap_content"
        android:testSize="24sp"
        android:text="Button1"
        app:layout_constraintStart_toEndOf="@+id/button"
        app:layout_constraintTop_toTopOf="@+id/button"
     />

</androidx.constraintlayout.widget.ConstraintLayout>

它使用了layout_constraintStart_toEndOf和
layout_constraintTop_toTopOf
意思:"@+id/button表示兄弟布局
button1的左边和兄弟布局的右边对齐,
button1的上面边和兄弟布局的上面边对齐,
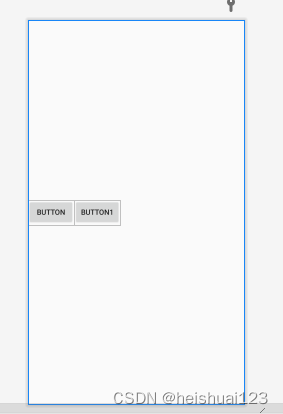
从显示效果图可以看到效果都有了,真的好强大,下面再讲布局的时候不用详细讲了,不用死记硬背,理解了这个就基本的会了。
此博客没完成,有时间继续。尽快会完成