学习上位机开发,自然离不开自定义控件开发。
Windows 窗体支持三种类型的用户定义的控件:复合控件、扩展控件和自定义控件。
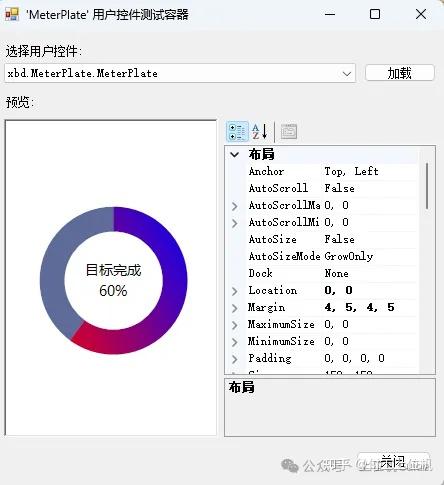
这里的自定义控件主要是指基于GDI+技术实现控件的绘制,最终实现效果如下所示:
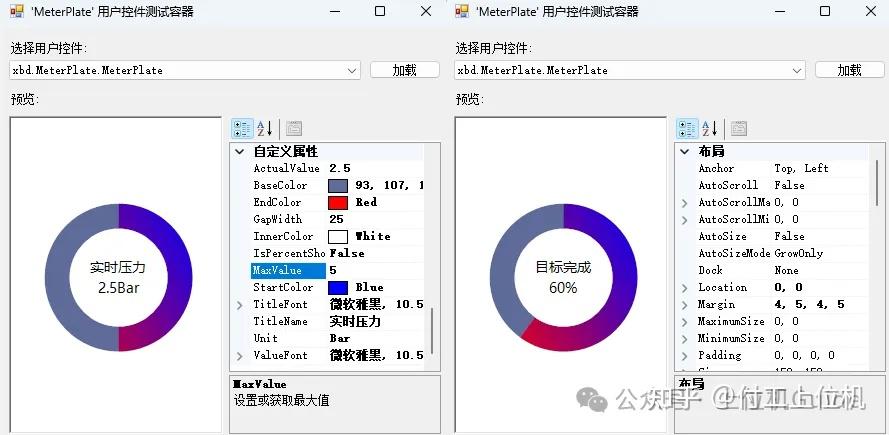
这个控件可以作为仪表盘数据显示,也可以作为进度条来使用。
一、项目创建
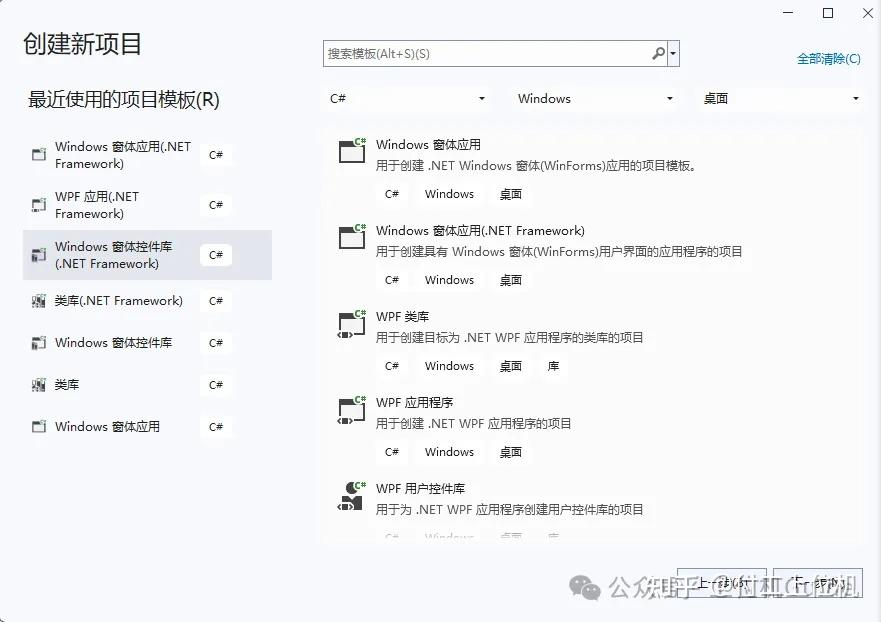
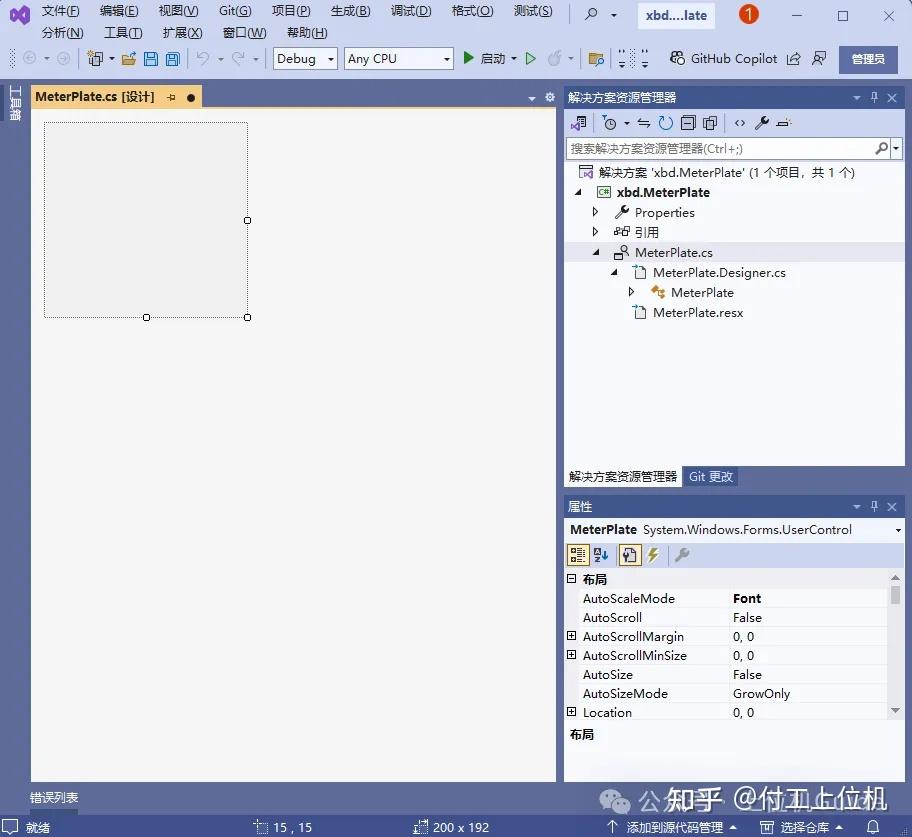
1、我们使用VS2022创建一个项目,项目模板选择Windows窗体控件库(.NET Framework)。
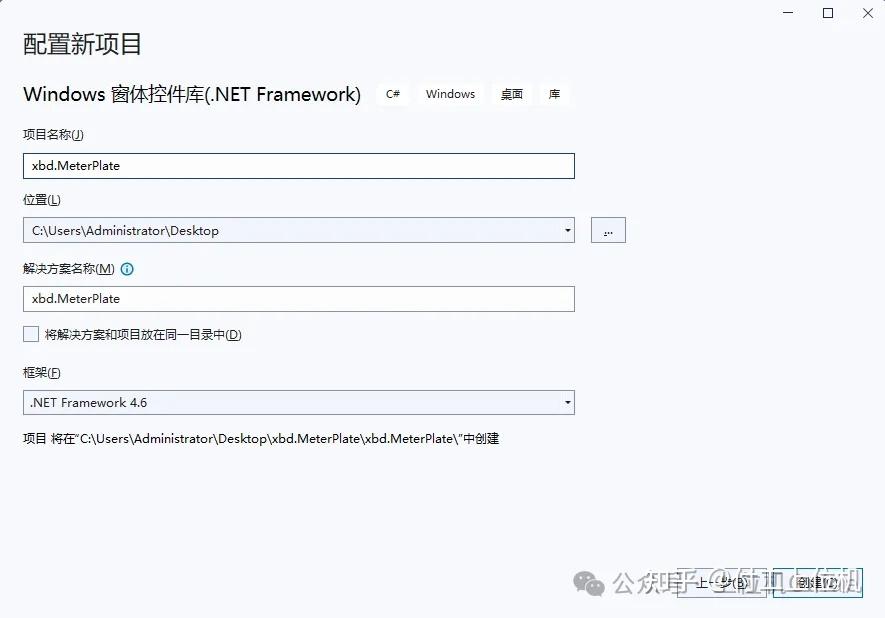
2、项目名称修改为xbd.MeterPlate,框架选择.NET Framework 4.6,点击创建即可。
3、项目创建完成后会自动创建一个自定义控件,将自定义控件名称改成MeterPlater。
二、实现思路
整个控件开发过程分成四个步骤:
1、绘制固定颜色的底圆
2、绘制渐变色的扇形
3、绘制一个与背景颜色相同的内圆
4、绘制显示文字

三、实现过程
1、我们将一些可以通过外部进行修改的封装成属性,具体代码如下所示:
//基础圆颜色
private Color baseColor = Color.FromArgb(93, 107, 15);
[Browsable(true)]
[Category("自定义属性")]
[Description("设置或获取基础圆颜色")]
public Color BaseColor
{
    get { return baseColor; }
    set
    {
        baseColor = value;
        this.Invalidate();
    }
}
//内圆颜色
private Color innerColor = Color.White;
[Browsable(true)]
[Category("自定义属性")]
[Description("设置或获取内圆颜色")]
public Color InnerColor
{
    get { return innerColor; }
    set
    {
        innerColor = value;
        this.Invalidate();
    }
}
//文本显示
private string titleName = "目标完成";
[Browsable(true)]
[Category("自定义属性")]
[Description("设置或获取标题文本显示")]
public string TitleName
{
    get { return titleName; }
    set
    {
        titleName = value;
        this.Invalidate();
    }
}
//文本字体
private Font titleFont = new Font("微软雅黑", 10.5f);
[Browsable(true)]
[Category("自定义属性")]
[Description("设置或获取标题文本字体")]
public Font TitleFont
{
    get { return titleFont; }
    set
    {
        titleFont = value;
        this.Invalidate();
    }
}
//数据字体
private Font valueFont = new Font("微软雅黑", 10.5f);
[Browsable(true)]
[Category("自定义属性")]
[Description("设置或获取数据字体")]
public Font ValueFont
{
    get { return valueFont; }
    set
    {
        valueFont = value;
        this.Invalidate();
    }
}
//圆环宽度
private int gapWidth = 25;
[Browsable(true)]
[Category("自定义属性")]
[Description("设置或获取圆环宽度")]
public int GapWidth
{
    get { return gapWidth; }
    set
    {
        gapWidth = value;
        this.Invalidate();
    }
}
//开始颜色
private Color startColor = Color.Blue;
[Browsable(true)]
[Category("自定义属性")]
[Description("设置或获取圆环开始颜色")]
public Color StartColor
{
    get { return startColor; }
    set
    {
        startColor = value;
        this.Invalidate();
    }
}
//结束颜色
private Color endColor = Color.Red;
[Browsable(true)]
[Category("自定义属性")]
[Description("设置或获取圆环结束颜色")]
public Color EndColor
{
    get { return endColor; }
    set
    {
        endColor = value;
        this.Invalidate();
    }
}
//最大值
private float maxValue = 1000.0f;
[Browsable(true)]
[Category("自定义属性")]
[Description("设置或获取最大值")]
public float MaxValue
{
    get { return maxValue; }
    set
    {
        maxValue = value;
        this.Invalidate();
    }
}
//实际值
private float actualValue = 600.0f;
[Browsable(true)]
[Category("自定义属性")]
[Description("设置或获取实际值")]
public float ActualValue
{
    get { return actualValue; }
    set
    {
        actualValue = value;
        this.Invalidate();
    }
}
//是否百分比显示
private bool isPercentShow = true;
[Browsable(true)]
[Category("自定义属性")]
[Description("设置或获取是否百分比显示")]
public bool IsPercentShow
{
    get { return isPercentShow; }
    set
    {
        isPercentShow = value;
        this.Invalidate();
    }
}
//单位
private string unit = string.Empty;
[Browsable(true)]
[Category("自定义属性")]
[Description("设置或获取单位显示")]
public string Unit
{
    get { return unit; }
    set
    {
        unit = value;
        this.Invalidate();
    }
2、绘制过程:绘制过程就是根据实现思路来实现,通过代码依次实现绘制基础圆、绘制扇形、绘制内圆、绘制文字,具体代码如下所示
protected override void OnPaint(PaintEventArgs e)
{
    base.OnPaint(e);
    //获取画布
    Graphics graphics = e.Graphics;
    //画布设置
    graphics.SmoothingMode = SmoothingMode.AntiAlias;
    graphics.TextRenderingHint = TextRenderingHint.ClearTypeGridFit;
    graphics.InterpolationMode = InterpolationMode.HighQualityBicubic;
    graphics.CompositingQuality = CompositingQuality.HighQuality;
    //绘制基础圆
    Rectangle rectangle = new Rectangle(1, 1, this.Width - 2, this.Height - 2);
    graphics.FillEllipse(new SolidBrush(this.baseColor), rectangle);
    //绘制扇形
    graphics.FillPie(new LinearGradientBrush(rectangle, startColor, endColor, 150.0f, true), rectangle, -90, (actualValue / maxValue) * 360);
    //绘制内圆
    graphics.FillEllipse(new SolidBrush(this.innerColor), new Rectangle(1 + gapWidth, 1 + gapWidth, this.Width - 2 * (1 + gapWidth), this.Height - 2 * (1 + gapWidth)));
    //绘制文字
    //上半个矩形
    Rectangle rectangle1 = new Rectangle(0, 0, this.Width, this.Height / 2);
    StringFormat stringFormat = new StringFormat();
    stringFormat.Alignment = StringAlignment.Center;
    stringFormat.LineAlignment = StringAlignment.Far;
    graphics.DrawString(this.titleName, this.titleFont, new SolidBrush(this.ForeColor), rectangle1, stringFormat);
    //下半个矩形
    Rectangle rectangle2 = new Rectangle(0, this.Height / 2, this.Width, this.Height / 2);
    stringFormat = new StringFormat();
    stringFormat.Alignment = StringAlignment.Center;
    stringFormat.LineAlignment = StringAlignment.Near;
    //考虑显示的数据内容
    string showValue = string.Empty;
    //如果百分比显示
    if (isPercentShow)
    {
        showValue = this.maxValue <= 0 ? "0.0%" : Convert.ToInt32(actualValue / maxValue * 100) + "%";
    }
    else
    {
        showValue = this.actualValue.ToString() + this.unit;
    }
    graphics.DrawString(showValue, this.valueFont, new SolidBrush(this.ForeColor), rectangle2, stringFormat);
}
3、最后在构造方法中添加一些初始化设置样式的代码:
 public MeterPlate()
 {
     InitializeComponent();
     this.SetStyle(ControlStyles.AllPaintingInWmPaint, true);
     this.SetStyle(ControlStyles.DoubleBuffer, true);
     this.SetStyle(ControlStyles.ResizeRedraw, true);
     this.SetStyle(ControlStyles.Selectable, true);
     this.SetStyle(ControlStyles.SupportsTransparentBackColor, true);
     this.SetStyle(ControlStyles.UserPaint, true);
 }
4、运行程序,效果如下所示:
