1. 介绍
springboot 项目官网:https://spring.io/projects/spring-boot
springboot 是一个基于java的开源框架,能够轻松快速地创建基于spring的应用程序。它的目的在于减少一些繁琐的配置,减少甚至不需要配置文件,因为内置了Tomcat服务器,所以可以快速开发并启动一个项目。
我们以创建HelloWorld项目为例来介绍。
2. 创建HelloWorld项目
2.1 手动maven创建
1)本机环境
-
springboot:2.4.5
-
java version:1.8.0_201
-
Apache Maven:3.5.0
官网的介绍:
Spring Boot 2.4.5 requires Java 8 and is compatible up to Java 16 (included). Spring Framework 5.3.6 or above is also required.

Explicit build support is provided for the following build tools:

Maven 3.3+
Gradle 6 (6.3 or later). 5.6.x is also supported but in a deprecated form
2)创建maven项目
首先,创建maven项目。创建maven项目成功后,在maven的pom.xml文件中,添加父依赖。
    <parent>
        <groupId>org.springframework.boot</groupId>
        <artifactId>spring-boot-starter-parent</artifactId>
        <version>2.4.5</version>
    </parent>
3) 添加依赖
在maven的pom.xml文件中,添加web依赖。
<dependencies>
    <dependency>
        <groupId>org.springframework.boot</groupId>
        <artifactId>spring-boot-starter-web</artifactId>
    </dependency>
</dependencies>
等待maven下载依赖之后,可以看见项目自动导入了许多web相关的依赖,json,log,tomcat等。
springboot中的starter相当于许多常用的依赖包的集合,以spring-boot-starter-*开头,常见的还有spring-boot-starter-cache,spring-boot-starter-jdbc 等。
具体也可查看官网介绍。
4) 编写代码
创建主类 MainApplication
package com.yt.myboot;

import org.springframework.boot.SpringApplication;
import org.springframework.boot.autoconfigure.SpringBootApplication;

/**
 * SpringBootApplication: spring 应用
 */
@SpringBootApplication
public class MainApplication {
    public static void main(String[] args) {
        SpringApplication.run(MainApplication.class, args);
    }
}
创建控制类 HelloController:
package com.yt.myboot.controller;

import org.springframework.web.bind.annotation.RequestMapping;
import org.springframework.web.bind.annotation.RestController;

/**
 * @author: yt
 * @date: 2021/5/19  22:42
 * @description:
 */
// @RestController 相当于 @ResponseBody 和 @Controller
@RestController
public class HelloController {

    @RequestMapping("/hello")
    public String hello() {
        return "Hello world!";
    }
}
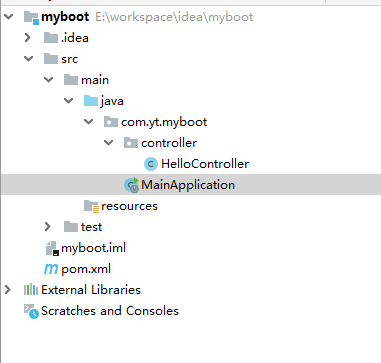
注: Springboot项目可以扫描到和主类所在的同级目录和其所有子目录下的文件。因为controller包和MainApplication是同级,可以被扫描到。
项目结构:
5)运行
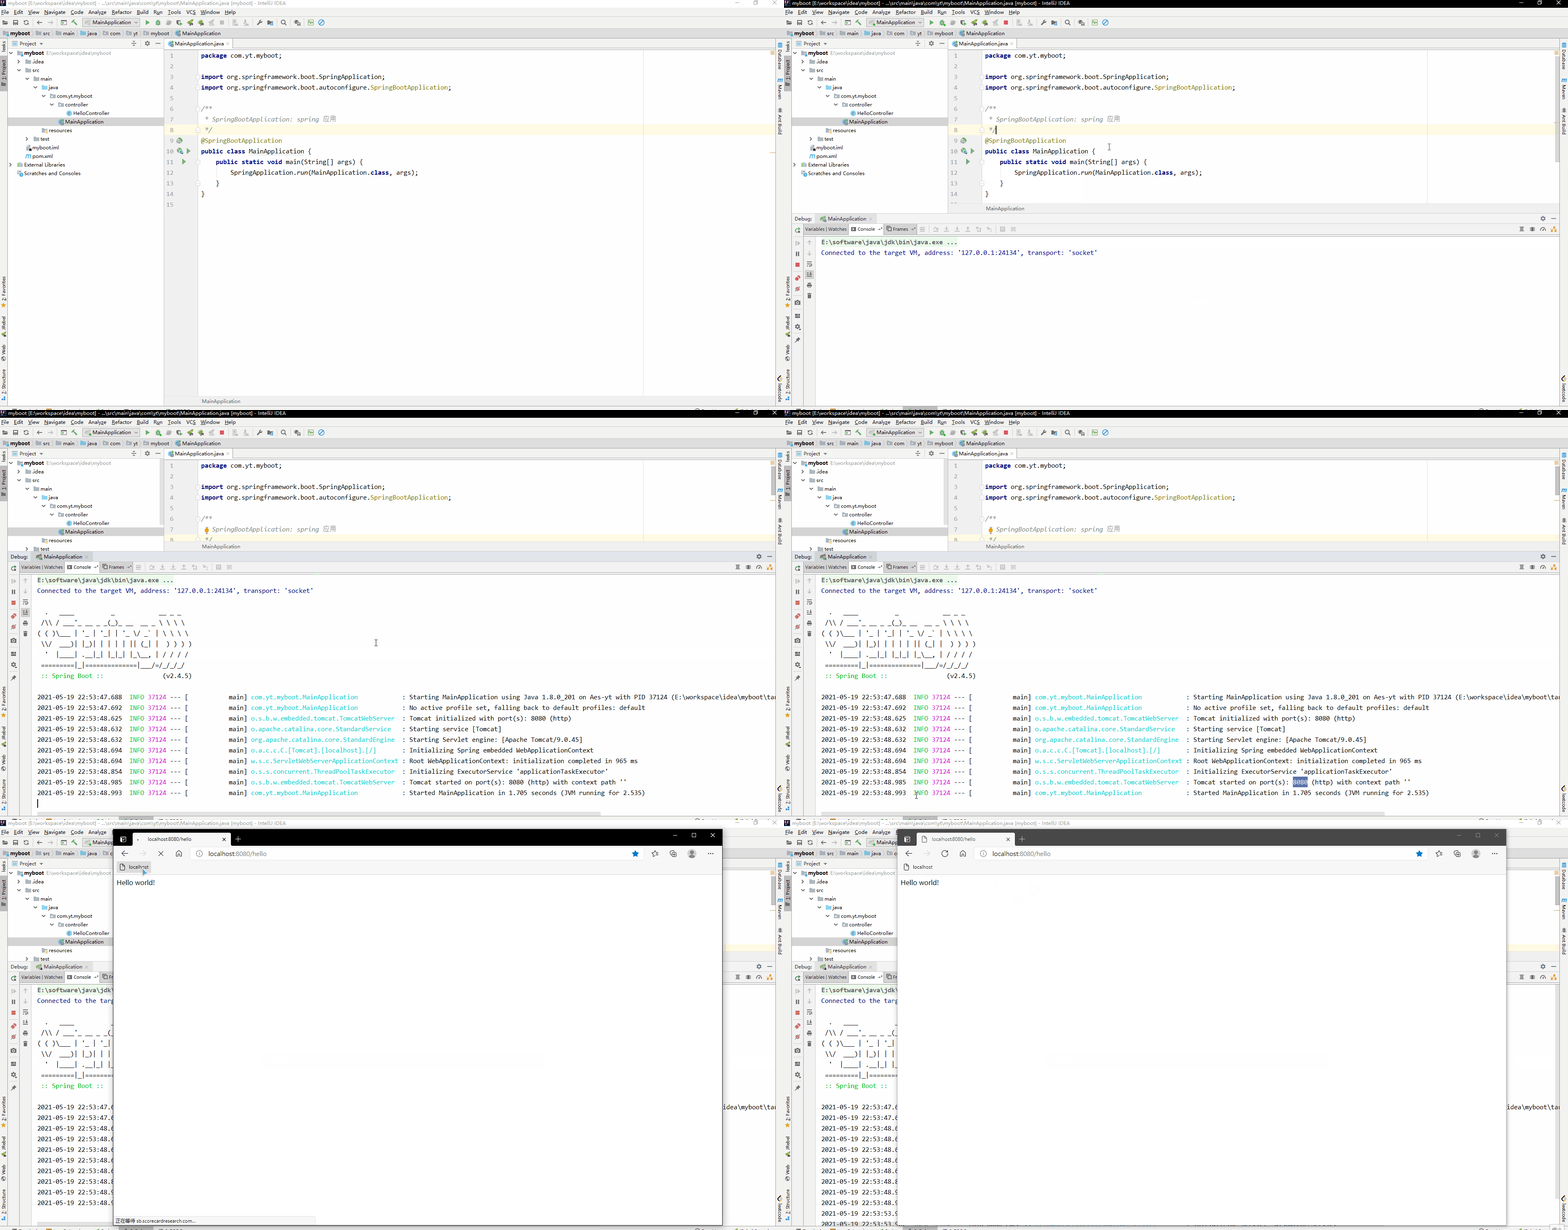
从启动的日志可以看出默认端口是8080,如果要更改端口,可以在resources路径下,新建application.properties文件,配置端口。
server.port=8888
重新启动后,端口就改为了8888
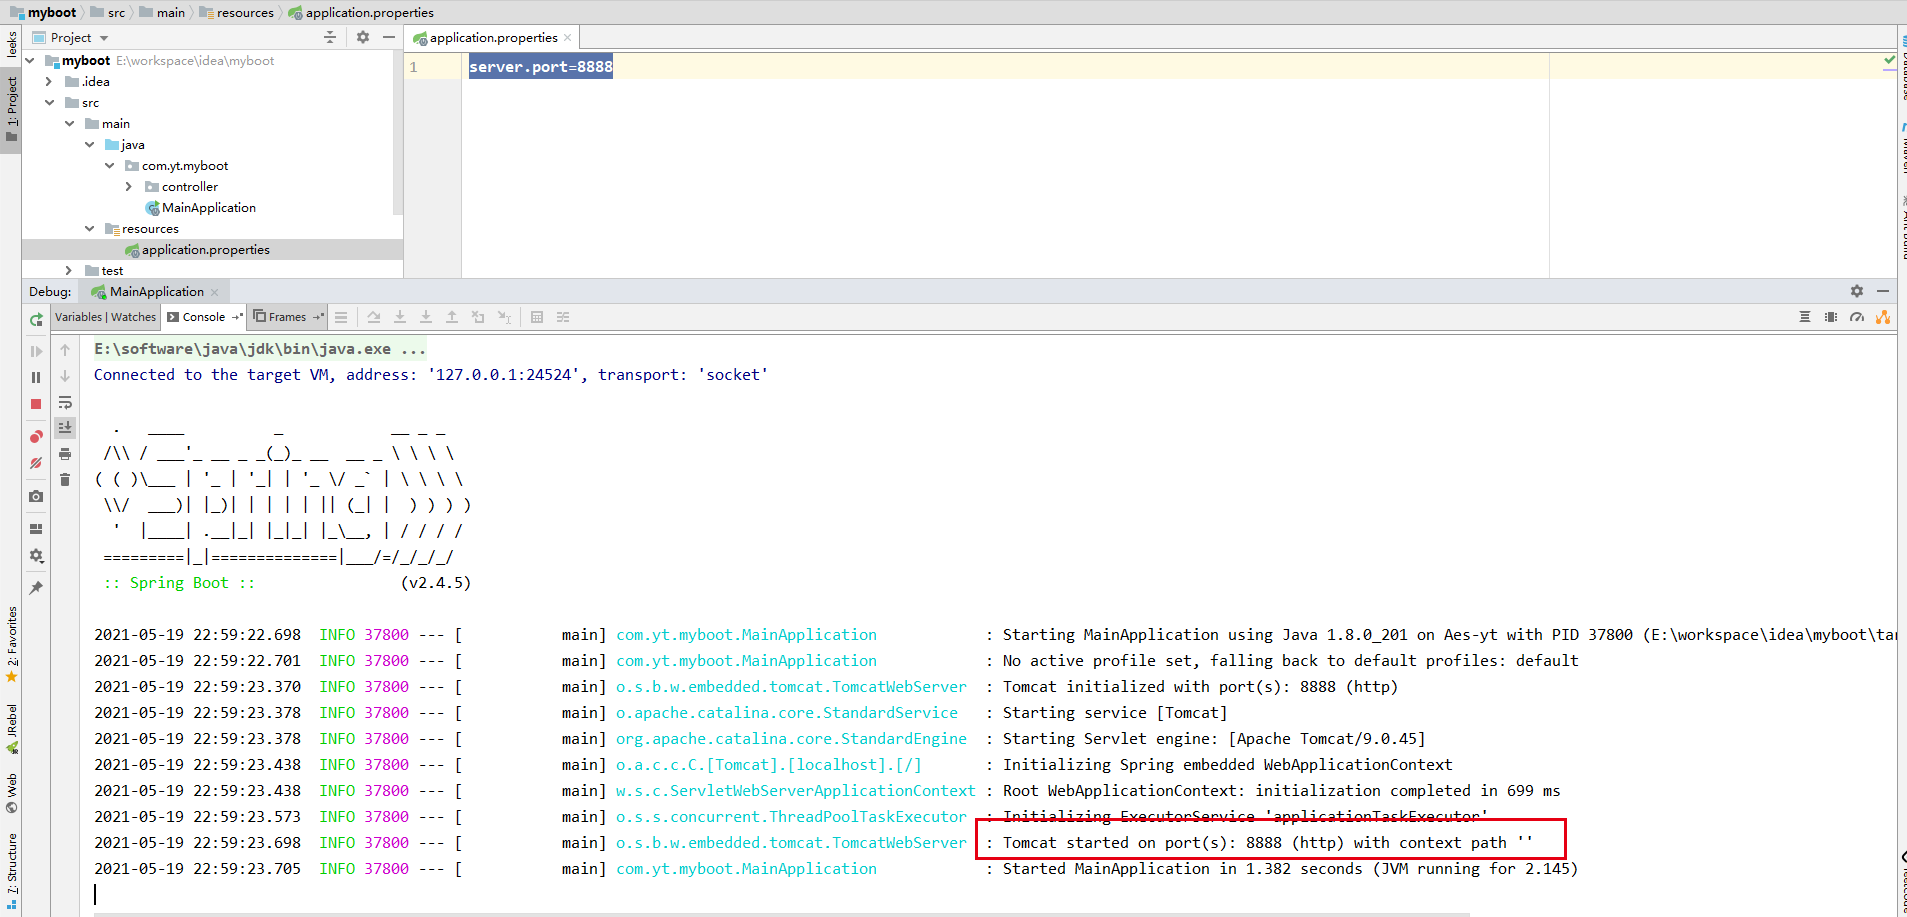
具体的application.properties文件的配置参数,可以查看官网的详细介绍。
6)打包
在maven的pom.xml文件中,添加springboot的打包插件。
<build>
    <plugins>
        <plugin>
            <groupId>org.springframework.boot</groupId>
            <artifactId>spring-boot-maven-plugin</artifactId>
        </plugin>
    </plugins>
</build>
运行mvn package命令。(idea 可以在右边maven项中,Lifecycle->package)
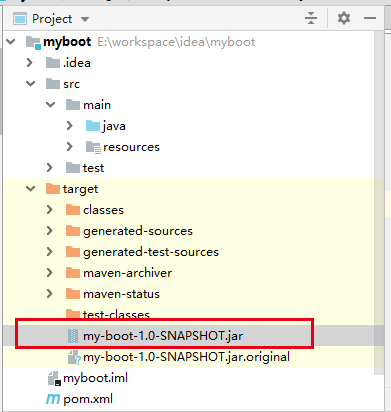
运行完后,项目的target文件夹下,就会创建一个 my-boot-1.0-SNAPSHOT.jar 的包。
在该文件路径下用java -jar my-boot-1.0-SNAPSHOT.jar 即可启动服务。
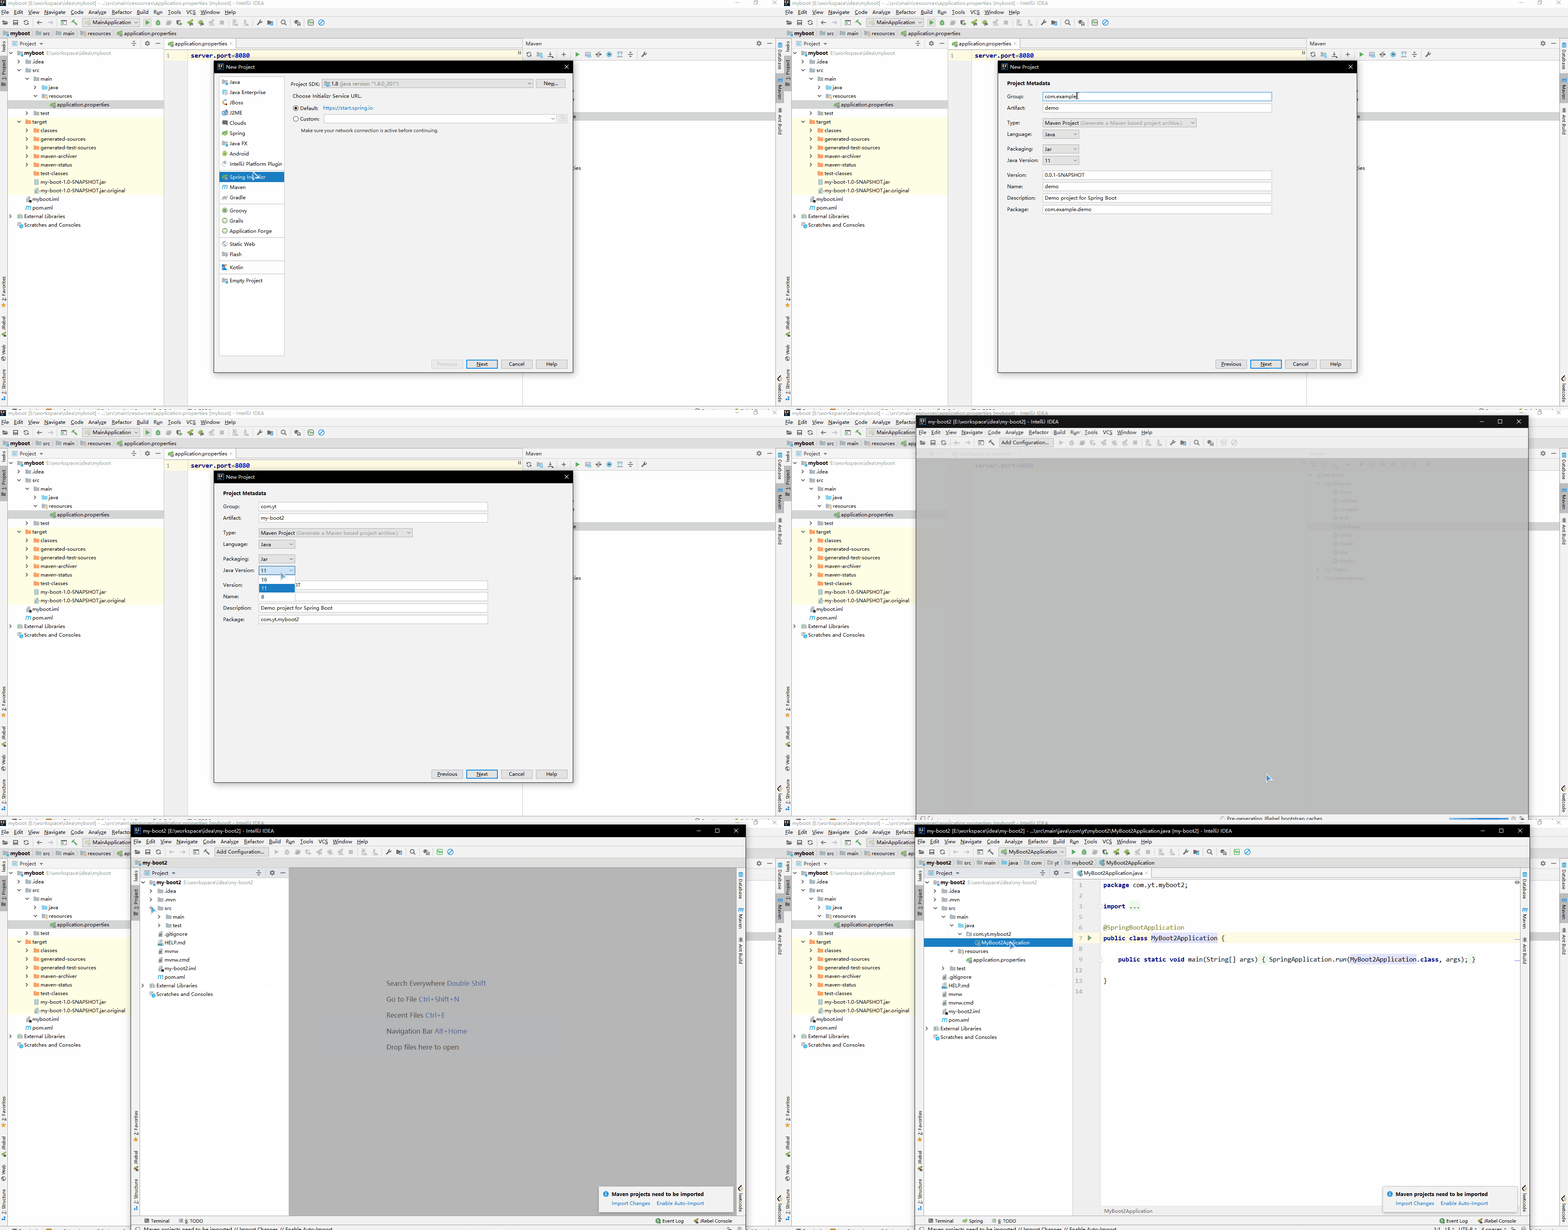
2.2 Spring Initializr 创建
还可用Spring Initializr快速建一个web项目。
