What is a Verilog Testbench ?
A Verilog Testbench is a simulation environment used to verify the functionality and correctness of a digital design described in the Verilog hardware description language (HDL).
The purpose of a testbench is to provide a way to simulate the behavior of the degign under various conditions, inputs and scenarios before actually fabricating the physical hardware. It allows designers to catch bugs, validate functionality, and optimize designs without the cost and time associated with physical prototyping.

Verilog Testbench Components
DUT or Design Under Test is the Verilog module or design that you want to test. It could be a simple component like an adder or a more complex design like a microprocessor.
The testbench itself is implemented as a separate top-level Verilog module. This module is responsible for generating input stimuli for the DUT, capturing its output, and comparing it with expected outputs.
The testbench generates different input patterns and sequences to test different scenarios and edge cases of the design and can be coded using functions and tasks and forms the test stimulus. Some examples are the different input patterns, clock signals, reset signals, and other control signals to test various aspects of the DUT's behavior.
Testbench signals are connected to the ports of the DUT instantiation, and are monitored by different tasks to check design functionality.
Verilog Testbench Example
1. functionality of a latch.
module d_latch (
                input d,
                input en,
                input rstn,
                output reg q
               );

  always @ (en or rstn or d)begin
    if (!rstn) begin
      q <= 0;
    end else begin
      if (en) begin
        q <= d;
      end
    end
  end
endmodule
A Verilog Testbench can be written by the following steps:
1. Declare top-level testbench module
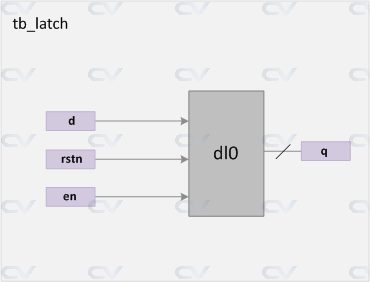
module tb_latch;

    // All testbench code goes inside this module

endmodule
2. Declare signals for DUT connection
The latch design contains 3 inputs and 1 output. Inputs are declared of type reg so that it can be driven from a procedural block such as initial. Outputs are declared as type wire so that it is visible in the testbench module and can be monitored to check design behavior.
reg  d;         // To drive input "d" of the DUT
reg  en;        // To drive input "en" of the DUT
reg  rstn;      // To drive input "rstn" of the DUT
reg  prev_q;    // To ensure q has not changed when en=0

wire q;        // To tap output "q" from DUT
3. Instantiate DUT
Create a module instantiation of the DUT verilog module and connect testbench signals to the DUT ports.
dut    u0(
          .d(d),
          .clk(clk),
          .rstn(rstn),
          .q(q)
         );
4. Initialize testbench variables
Note that all reg variables have an uninitialized value of X and can be initialized to some value inside an initial block.
initial begin
  d    <= 0;
  en   <= 0;
  rstn <= 0;
end
It can also be written inside a function which can be called inside the initial block. Note that functions cannot have simulation delays using # operator.
function void init();
  d    <= 0;
  en   <= 0;
  rstn <= 0;
endfunction

initial begin
  init();

  #10;  // Wait for 10 time units
end
5. Write test stimulus.
For our case, we have to release reset and drive some random combination of inputs to see what values the design provides on its output port q for each change in input.
task reset_release();
  // 2. Release reset
  #10 rstn <= 1;
endtask

task test_1();
  // 3. Randomly change d and enable
  for (i = 0; i < 5; i = i+1) begin
    delay  = $random;
    delay2 = $random;
    #(delay2) en <= ~en;
    #(delay)  d  <= i;

    // Check output value for given inputs
    checker(d, en, rstn, q);
    prev_q <= q;
  end
endtask

initial begin
  // As shown in step 4
  init();
  reset_release();
  test_1();
end
6. Write checker code
The checker, depending on the complexity of the design can be written in multiple functions and tasks and called at different points in a simulation. For our purposes of a simple design such as a latch in this example, it can be coded entirely in a single function and called just after driving inputs to the design as shown in step 5.
function checker (input d, en, rstn, q);
  #1;
  if (!rstn) begin
    if (q != 0)
        $srror("Q is not 0 during resetn!");
  end else begin
    if (en) begin
        if (q != d)
            $srror("Q does not follow D when EN is high!");
    end else begin
        if (q != prev_q)
            $srror("Q does not get latched!");
    end
  end
endfunction
Hence by running simulations using the testbench, designers can design flaws, validate the functionality of the DUT, and refine the design before moving on to the physical implementation stage. Testbenches are a crucial part of the digital design and verification process, ensuring that the resulting hardware behaves as intended.
See other examples like 4-bit counter, Full Adder, Single Port RAM!
标签:--,module,design,Verilog,Testbench,input,IC,rstn,DUT From: https://www.cnblogs.com/sys-123456/p/18107100