zabbix安装
一、部署lamp
-
首先配置yum网络仓库,更换centos源和epel源,这里使用阿里云
[root@rh3 ~]# curl -o /etc/yum.repos.d/CentOS-Base.repo https://mirrors.aliyun.com/repo/Centos-vault-8.5.2111.repo [root@rh3 ~]# sed -i -e '/mirrors.cloud.aliyuncs.com/d' -e '/mirrors.aliyuncs.com/d' /etc/yum.repos.d/CentOS-Base.repo [root@rh3 ~]# yum install -y https://mirrors.aliyun.com/epel/epel-release-latest-8.noarch.rpm [root@rh3 ~]# sed -i 's|^#baseurl=https://download.example/pub|baseurl=https://mirrors.aliyun.com|' /etc/yum.repos.d/epel* [root@rh3 ~]# sed -i 's|^metalink|#metalink|' /etc/yum.repos.d/epel* [root@rh3 ~]# ls /etc/yum.repos.d/ CentOS-Base.repo epel-modular.repo epel.repo epel-testing-modular.repo epel-testing.repo redhat.repo -
安装httpd、php、mariadb这里使用yum安装
[root@rh3 ~]# yum -y install httpd [root@rh3 ~]# yum -y install php* [root@rh3 ~]# yum -y install mariadb* -
设置数据库服务
[root@rh3 ~]# vim /etc/php.ini #设置时区 date.timezone = Asia/Shanghai [root@rh3 ~]# systemctl restart mariadb.service #启动服务 [root@rh3 ~]# systemctl enable mariadb.service #设置开机自启 [root@rh3 ~]# mysql MariaDB [(none)]> set password = password('redhat'); #修改密码为redhat Query OK, 0 rows affected (0.001 sec) -
设置httpd服务
[root@rh3 ~]# vim /etc/httpd/conf/httpd.conf #搜索dir_module ***省略*** <IfModule dir_module> DirectoryIndex index.html index.php #添加index.php </IfModule> ***省略*** [root@rh3 ~]# systemctl enable --now httpd #设置开机自启并立即执行 -
测试php页面
[root@rh3 ~]# vim /etc/php.ini #搜索date ; http://php.net/date.timezone date.timezone = Asia/Shanghai #取消此行注释并添加上海时区 [root@rh3 ~]# vim /var/www/html/index.php <?php phpinfo(); ?> -
验证
[root@rh3 ~]# firewall-cmd --add-port=80/tcp #先放行80端口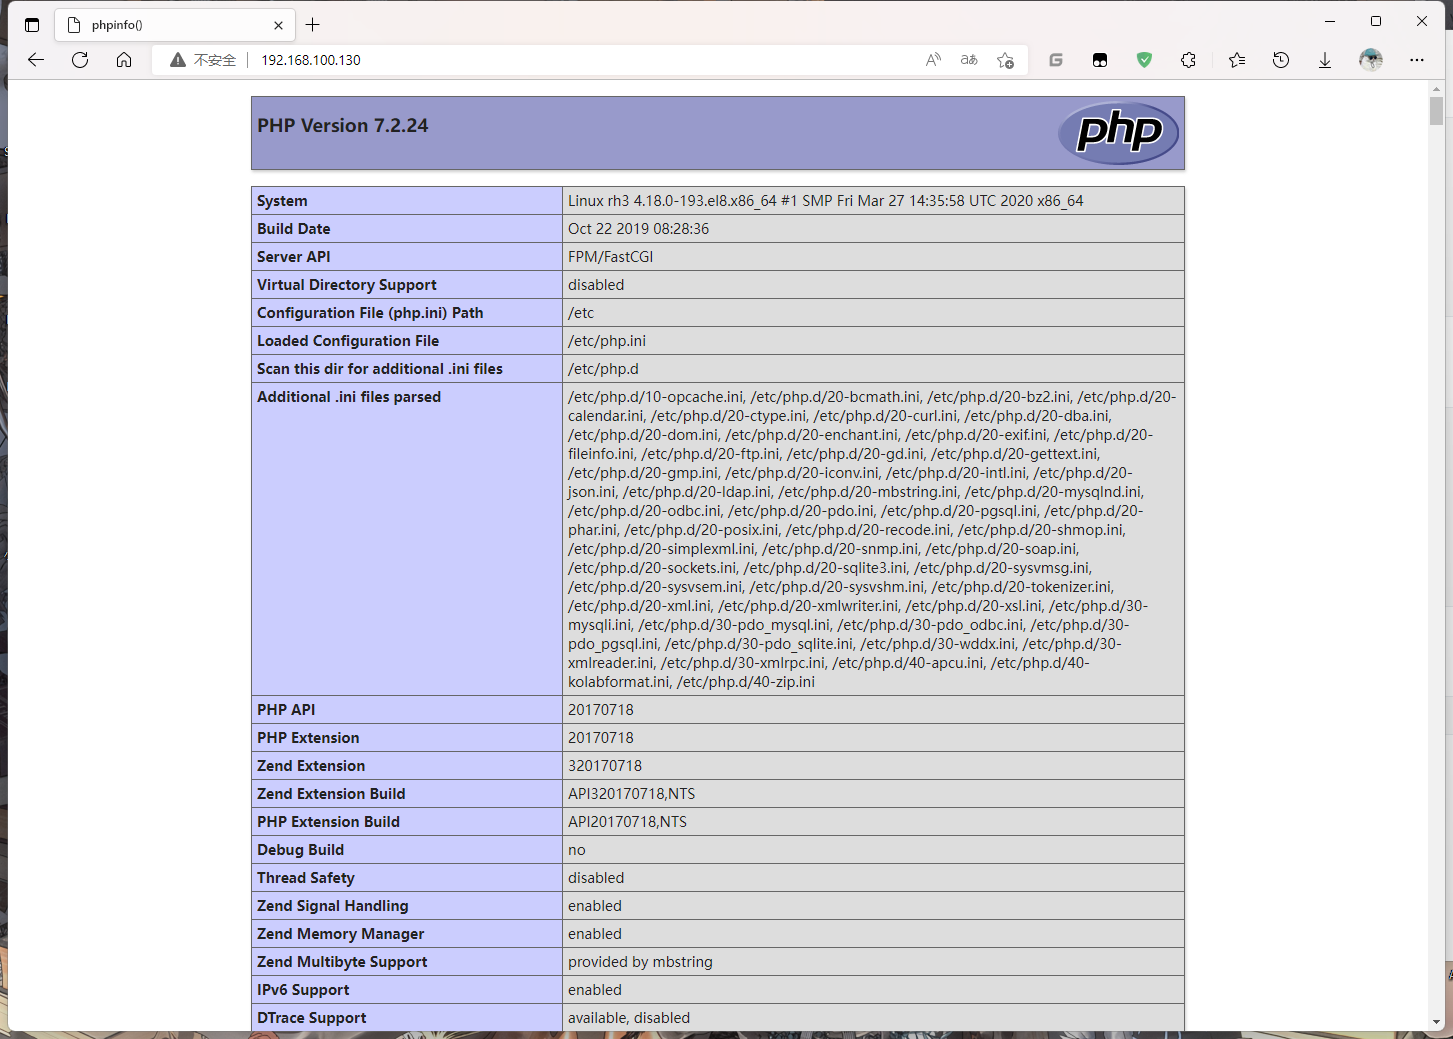
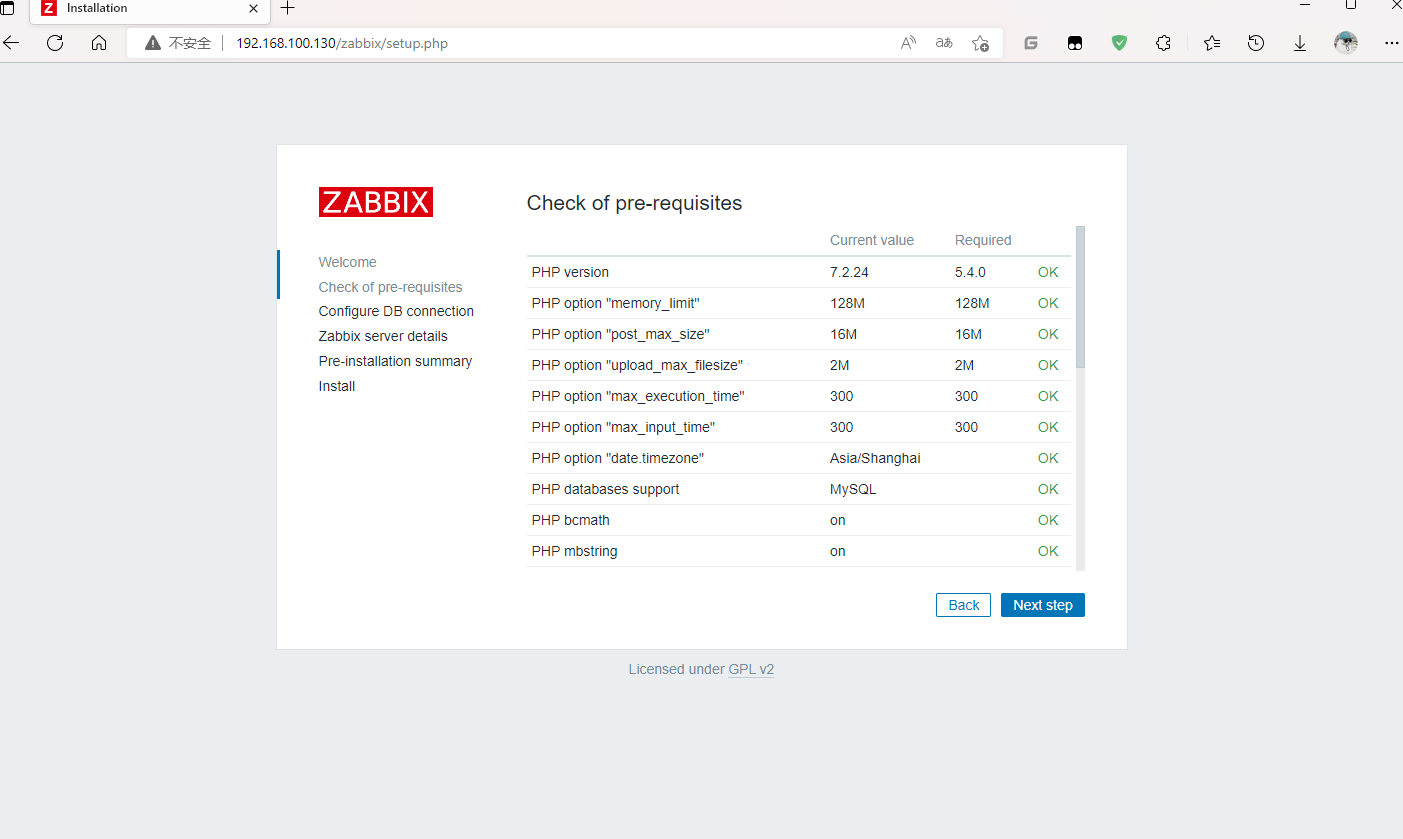
二、安装zabbix
-
配置zabbix网络仓库
[root@rh3 ~]# vim /etc/yum.repos.d/zabbix.repo [aliyun] name=aliyun baseurl=https://mirrors.aliyun.com/zabbix/zabbix/4.4/rhel/8/x86_64/ enable=1 gpgcheck=0 [qinghua] name=Zabbix Official Repository - $basearch baseurl=https://mirrors.tuna.tsinghua.edu.cn/zabbix/zabbix/4.4/rhel/8/$basearch/ enabled=1 gpgcheck=0 gpgkey=file:///etc/pki/rpm-gpg/RPM-GPG-KEY-ZABBIX-A14FE591 -
安装所需软件包
[root@rh3 ~]# dnf -y install zabbix-server-mysql zabbix-web-mysql zabbix-apache-conf zabbix-agent -
配置数据库并导入zabbix数据
[root@rh3 ~]# mysql -u root -p Enter password: Welcome to the MariaDB monitor. Commands end with ; or \g. Your MariaDB connection id is 17 Server version: 10.3.28-MariaDB MariaDB Server Copyright (c) 2000, 2018, Oracle, MariaDB Corporation Ab and others. Type 'help;' or '\h' for help. Type '\c' to clear the current input statement. MariaDB [(none)]> create database zabbix character set utf8 collate utf8_bin; Query OK, 1 row affected (0.002 sec) MariaDB [(none)]> grant all on zabbix.* to zabbix@'localhost' identified by 'redhat'; Query OK, 1 row affected (0.002 sec) MariaDB [(none)]> flush privileges; Query OK, 1 row affected (0.002 sec) [root@rh3 ~]# zcat /usr/share/doc/zabbix-server-mysql/create.sql.gz | mysql -u zabbix -predhat zabbix -
验证数据库数据
MariaDB [zabbix]> use zabbix; Database changed MariaDB [zabbix]> show tables; +----------------------------+ | Tables_in_zabbix | +----------------------------+ | acknowledges | | actions | | alerts | | application_discovery | | application_prototype | | application_template | | applications | | auditlog | | auditlog_details | ***省略*** -
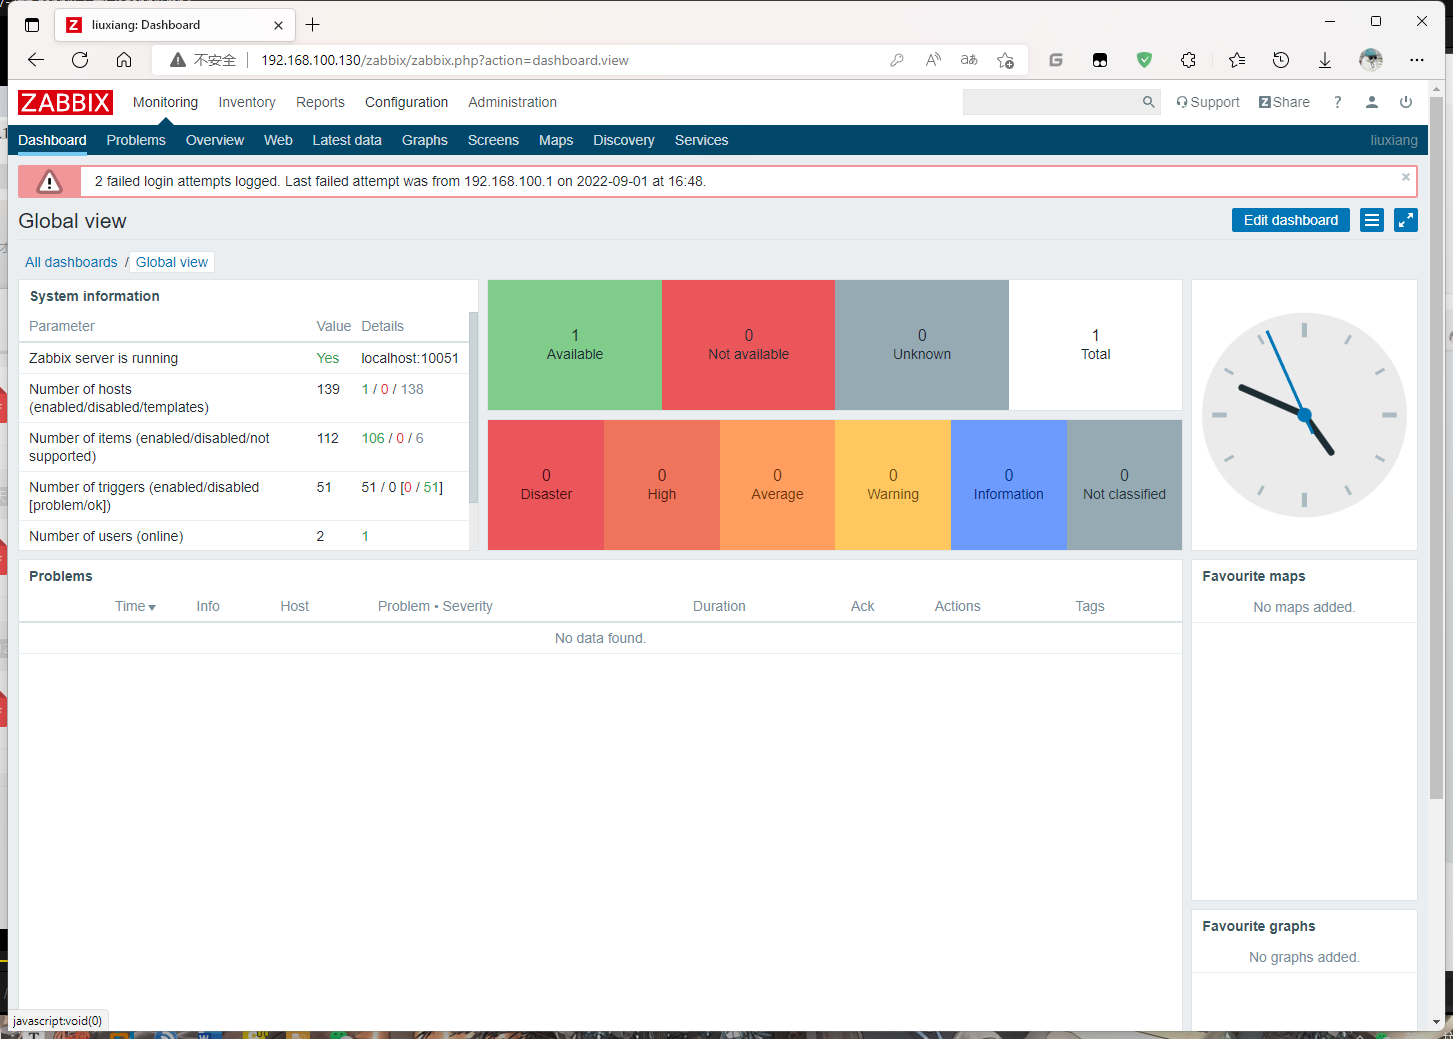
配置zabbix并启动,管理员账号:Admin 密码:zabbix
[root@rh3 ~]# vim /etc/zabbix/zabbix_server.conf 		#编辑配置文件
#搜索并删除注释,补充没有的地方
ListenPort=10051
DBHost=localhost
DBName=zabbix
DBUser=zabbix
DBPassword=redhat
DBSocket=/var/lib/mysql/mysql.sock
ListenIP=0.0.0.0
[root@rh3 ~]# systemctl restart zabbix-server.service 		#启动并设置开机自启
[root@rh3 ~]# systemctl enable zabbix-server.service