引言
在WPF应用程序开发中,数据校验是确保用户输入数据的正确性和完整性的重要一环。
之前在做一些参数配置功能时,最是头疼各种参数校验,查阅一些资料后,我总结了数据校验方式有两种:
- ValidationRule
- IDataErrorInfo
接下来分别介绍这两种校验方式。
ValidationRule
ValidationRule 是一个抽象类,提供了抽象方法 Validate(), 它是WPF中用于数据验证的一种机制,它可以在用户输入数据之前或之后执行自定义的验证逻辑。可以轻松地实现对数据的格式、范围、逻辑等方面的验证,并在验证失败时提供相应的反馈信息。
ValidationRule主要作用域在前端页面上。
基本用法
首先创建一个 ValidationRule,我这里设定了两个属性 MaxVal、MinVal,然后在 Validate() 方法中判断空、判断大于上限或小于下限,然后在符合条件是,返回 ValidationResult,并给出错误提示:
public class IntegerValidationRule : ValidationRule
{
    public int MaxVal { get; set; }
    public int MinVal { get; set; }

    public override ValidationResult Validate(object value, CultureInfo cultureInfo)
    {
        string text = value as string;

        if (!int.TryParse(text, out int result))
        {
            return new ValidationResult(false, "Text cannot be empty.");
        }

        if (result > MaxVal)
        {
            return new ValidationResult(false, "Value out of upper limit range.");
        }

        if (result < MinVal)
        {
            return new ValidationResult(false, "Value out of lower limit range.");
        }

        return ValidationResult.ValidResult;
    }
}
接下来创建有个测试使用的 ViewModel:
public class TestViewModel : INotifyPropertyChanged
{
    private TestViewModel() { }

    public static TestViewModel Instance { get; } = new TestViewModel();

    public event PropertyChangedEventHandler? PropertyChanged;

    protected void OnPropertyChanged(string propertyName)
    {
        PropertyChanged?.Invoke(this, new PropertyChangedEventArgs(propertyName));
    }

    private int testField1;
    /// <summary>
    /// 测试属性1
    /// </summary>
    public int TestField1
    {
        get => testField1;
        set
        {
            testField1 = value;
            OnPropertyChanged(nameof(TestField1));
        }
    }

    private int testField2;
    /// <summary>
    /// 测试属性2
    /// </summary>
    public int TestField2
    {
        get => testField2;
        set
        {
            testField2 = value;
            OnPropertyChanged(nameof(TestField2));
        }
    }
}
在测试之前,我们可以先看一下 Binding 的方法列表:
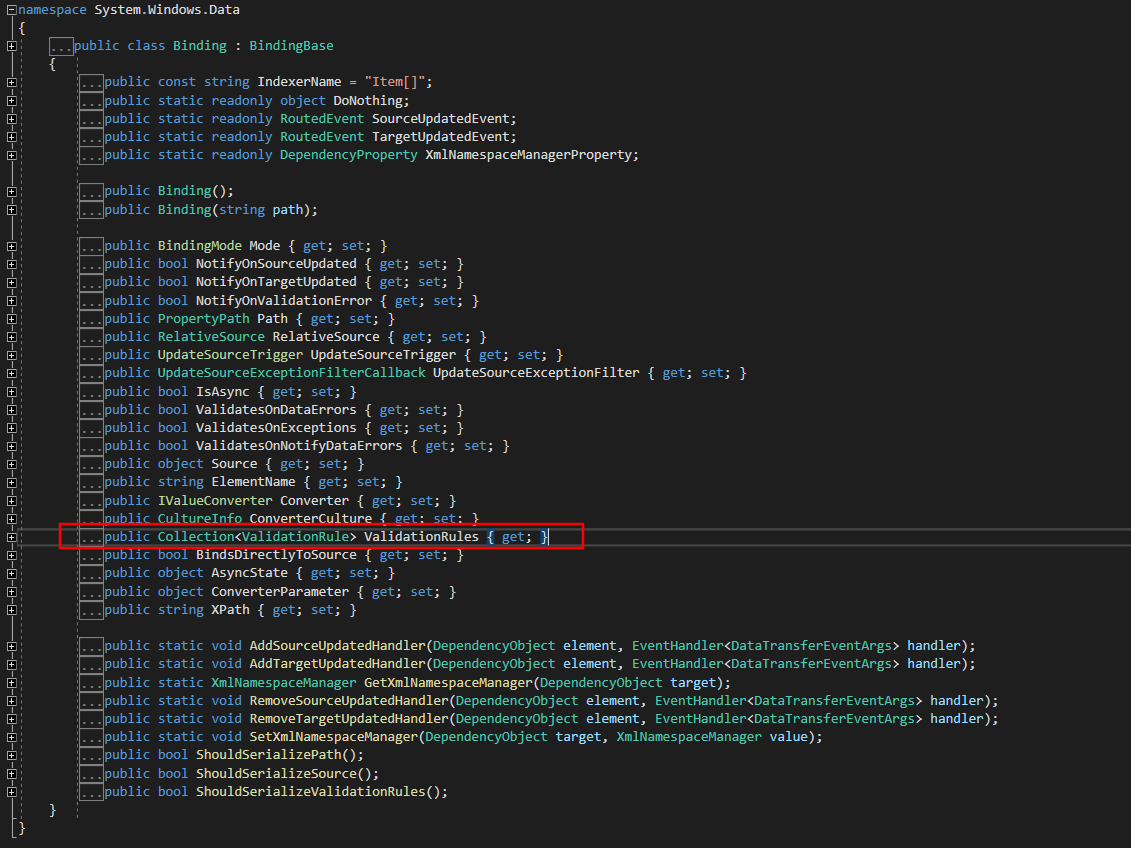
可以看到 ValidationRules 是 Binding 下的集合,这意味着 ValidationRule 是在 Binding 下使用且可以执行多个校验规则。校验时按照顺序依次校验。
接下来我们创建一个WPF应用程序,在界面添加 TextBox,命名为”textbox1“,将文本绑定在 TestViewModel 的 TestField1。
且为Validation.ErrorTemplate 绑定一个模板,这里绑定了一个红色的感叹号。
然后为 TextBox 设置触发器,当 Validation.HasError为 true时,将 ToolTip 绑定校验失败的错误提示。
代码如下:
<Window
    x:Class="WpfApp4.MainWindow"
    xmlns="http://schemas.microsoft.com/winfx/2006/xaml/presentation"
    xmlns:x="http://schemas.microsoft.com/winfx/2006/xaml"
    xmlns:d="http://schemas.microsoft.com/expression/blend/2008"
    xmlns:local="clr-namespace:WpfApp4"
    xmlns:mc="http://schemas.openxmlformats.org/markup-compatibility/2006"
    Title="MainWindow"
    Width="900"
    Height="450"
    mc:Ignorable="d">
    <Window.Resources>
        <ControlTemplate x:Key="ValidationTemplate">
            <DockPanel>
                <TextBlock
                    Margin="-10,0,0,0"
                    VerticalAlignment="Center"
                    FontSize="22"
                    Foreground="Red"
                    Text="!" />

            </DockPanel>
        </ControlTemplate>

        <Style TargetType="TextBox">
            <Style.Triggers>
                <Trigger Property="Validation.HasError" Value="true">
                    <Setter Property="ToolTip" Value="{Binding RelativeSource={RelativeSource Self}, Path=(Validation.Errors)[0].ErrorContent}" />
                </Trigger>
            </Style.Triggers>
        </Style>
    </Window.Resources>
    <Grid>
        <Grid.ColumnDefinitions>
            <ColumnDefinition Width="1*" />
            <ColumnDefinition Width="1*" />
        </Grid.ColumnDefinitions>
        <StackPanel Grid.Column="0">
            <TextBlock
                HorizontalAlignment="Center"
                FontSize="18"
                FontWeight="Bold"
                Text="Validation Demo" />
            <TextBox
                Name="textBox1"
                Height="30"
                Margin="10"
                FontSize="22"
                Validation.ErrorTemplate="{StaticResource ValidationTemplate}">
                <TextBox.Text>
                    <Binding Path="TestField1" UpdateSourceTrigger="PropertyChanged">
                        <Binding.ValidationRules>
                            <local:IntegerValidationRule
                                MaxVal="999"
                                MinVal="5" />
                        </Binding.ValidationRules>
                    </Binding>
                </TextBox.Text>
            </TextBox>

        </StackPanel>
    </Grid>
</Window>
最后在窗体后台绑定 ViewModel:
public MainWindow()
{
    InitializeComponent();
    this.DataContext =  TestViewModel.Instance;
}
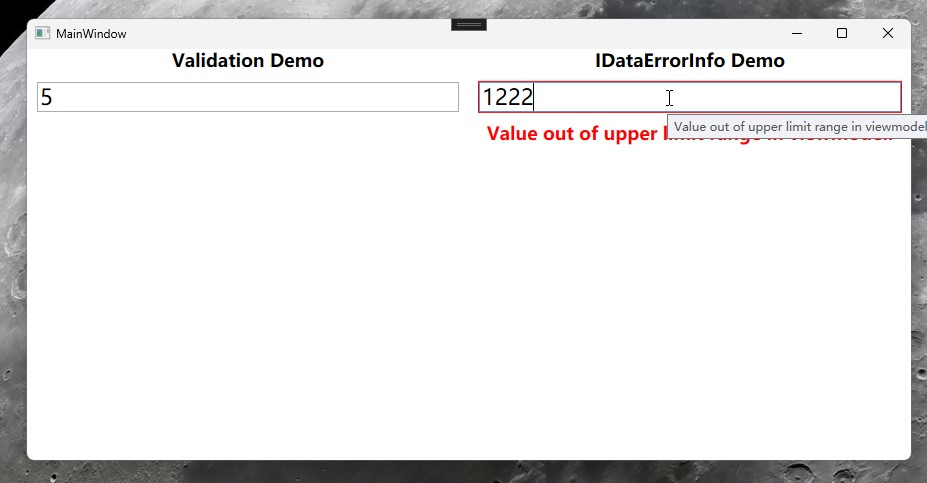
测试
-
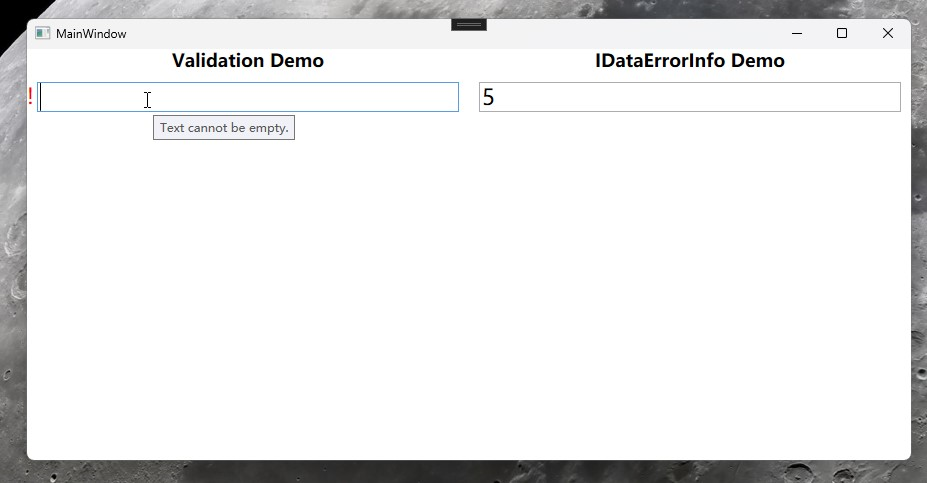
为空时,出现红色叹号,
ToolTip提示 "Text cannot be empty."
-
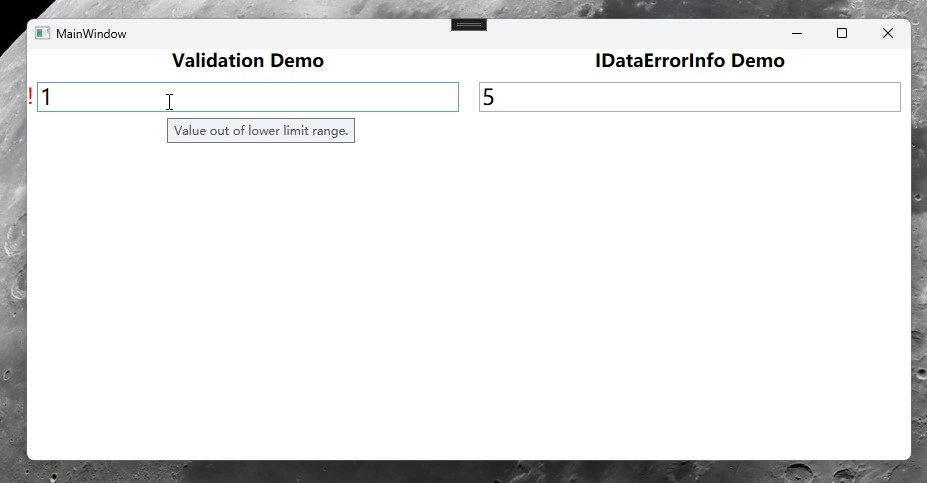
小于下限时,出现红色叹号,
ToolTip提示 "Value out of lower limit range."
-
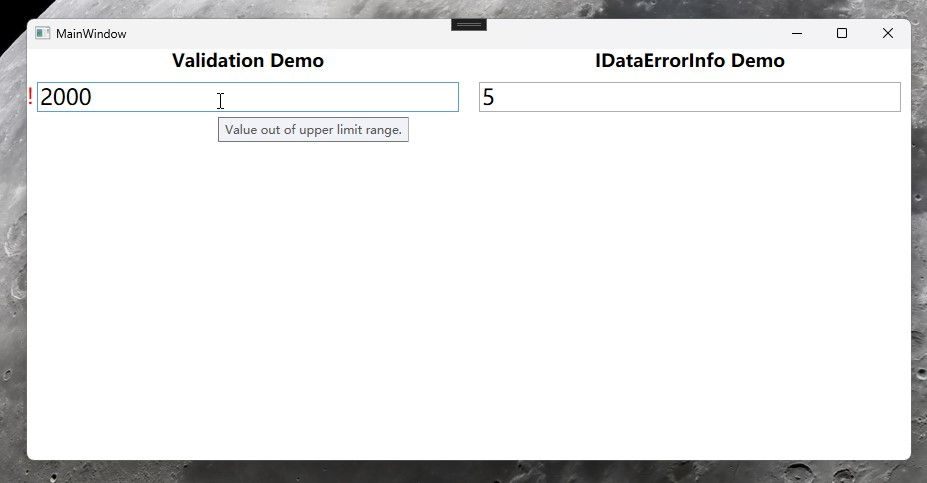
大于上限时,出现红色叹号,
ToolTip提示 "Value out of upper limit range."
IDataErrorInfo
IDataErrorInfo 是一个接口,Viewmodel 实现接口用于在后台,提供数据验证和错误信息。
IDataErrorInfo 主要作用域为后台 ViewModel
该接口包含两个成员:Error 和 this[string columnName]。这两个成员允许你在数据绑定时提供验证错误信息。
基本用法
接下来,在程序里添加 TextBox,命名为”textbox2“,并添加一个 TextBlock 绑定 Error 展示在界面。
<StackPanel Grid.Column="1">
    <TextBlock
        HorizontalAlignment="Center"
        FontSize="18"
        FontWeight="Bold"
        Text="IDataErrorInfo Demo" />
    <TextBox
        Name="textBox2"
        Margin="10"
        VerticalAlignment="Center"
        FontSize="22"
        Text="{Binding TestField2, Mode=TwoWay, UpdateSourceTrigger=PropertyChanged, ValidatesOnDataErrors=True}" />
     <TextBlock
         HorizontalAlignment="Center"
         FontSize="18"
         FontWeight="Bold"
         Foreground="Red"
         Text="{Binding Error, Mode=TwoWay, UpdateSourceTrigger=PropertyChanged}" />
</StackPanel>
后台 TestViweModel 实现 IDataErrorInfo,依旧是判断上限值和下限值,此处不判断空,是因为后台 TestField2 类型是Int,为空时不会赋值,代码如下:
public class TestViewModel : INotifyPropertyChanged, IDataErrorInfo
{
    //省略上文已有代码..。

    private string error;
    public string Error
    {
        get => error;
        set
        {
            error = value; OnPropertyChanged(nameof(Error));
        }
    }
    public string this[string columnName]
    {
        get
        {
            switch (columnName)
            {
                case nameof(TestField2):
                    return CheckTestFild2();
                default:
                    return null;
            }
        }
    }

    public int MaxVal = 999;
    public int MinVal = 5;

    private string CheckTestFild2()
    {
        if (TestField2 > MaxVal)
        {
            Error = "Value out of upper limit range in viewmodel.";
        }
        else if (TestField2 < MinVal)
        {
            Error = "Value out of lower limit range  in viewmodel.";
        }
        else
        {
            Error = string.Empty;
        }

        return Error;
    }
}
测试
-
小于下限时,出现红色文字提示,
ToolTip提示 "Value out of lower limit range in viewmodel."

-
大于上限时,出现红色文字提示,
ToolTip提示 "Value out of upper limit range in viewmodel."
小结
以上两种数据校验(IDataErrorInfo、ValidationRule)的方式,均可以实现自定义数据校验,例如对数据的格式、范围、逻辑等方面的验证,并在验证失败时提供相应的反馈信息。
ValidationRule适用于在界面做数据校验,且可以定义多个校验规则。
ValidationRule适用于在ViewModel做数据校验,可以做一些无法在前端页面做的事情,比如出现异常值是还原为默认值。
所以两者既可以单独使用,也可以组合使用,即使使用MVVM模式,依旧能够优雅的做数据校验。
标签:ValidationRule,string,int,校验,---,WPF,out,public,TextBox From: https://www.cnblogs.com/pandefu/p/17837358.html