环境准备
| 主机名 | 外网ip | 内网ip | 角色 | 应用 |
|---|---|---|---|---|
| web01 | 10.0.0.7 | 172.16.1.7 | web网站,nfs,的客户端 | nginx,php,nfs |
| web02 | 10.0.0.8 | 172.16.1.8 | web网站,nfs的客户端 | nginx,php,nfs |
| db01 | 10.0.0.51 | 172.16.1.51 | 数据库 | mysql(mariadb) |
| nfs | 10.0.0.31 | 172.16.1.31 | nfs服务端,sersync客户端 | nfs,sersync的依赖 |
| backup | 10.0.0.41 | 172.16.1.41 | rsync服务端,nfs服务端(备机) | nfs,rsync |
| lb01 | 10.0.0.5 | 172.16.1.5 | 负载均衡 | nginx |
部署数据库
db01
# 关闭防火墙
systemctl stop firewalld

# 安装数据库
yum install -y mariadb-server

#启动服务加入开机自启
systemctl start mariadb
systemctl enable mariadb

# 配置数据库的用户和密码
mysqladmin -uroot password '123'

# 链接数据库
mysql -uroot -p123

# 创建库
MariaDB [(none)]> create database wc charset utf8;
Query OK, 1 row affected (0.00 sec)

MariaDB [(none)]> create database wp charset utf8;
Query OK, 1 row affected (0.00 sec)

# 创建库的专用用户和密码
MariaDB [(none)]> grant all on wc.* to wc_user@'%' identified by '123';
Query OK, 0 rows affected (0.00 sec)

MariaDB [(none)]> grant all on wp.* to wp_user@'%' identified by '123';
Query OK, 0 rows affected (0.00 sec)

# 查看库
MariaDB [(none)]> show databases;
+--------------------+
| Database           |
+--------------------+
| information_schema |
| mysql              |
| performance_schema |
| test               |
| wc                 |
| wp                 |
+--------------------+
6 rows in set (0.00 sec)

MariaDB [(none)]> exit
Bye
部署web
web01,web02
--------------------
## web共同配置
--------------------
# 关闭防火墙
systemctl stop firewalld
# 创建nginx_php目录,把nginx_php.tgz放入
mkdir nginx_php
cd nginx_php/
# 安装nginx和php
tar xf nginx_php.tgz
yum localinstall -y *.rpm
# 创建www用户和组
groupadd www -g 666
useradd www -u 666 -g 666 -s /sbin/nologin -M
----------------------
## web01配置
----------------------
# 修改配置文件
# nginx主配置文件
vim /etc/nginx/nginx.conf
user www;
# php主配置文件
vim /etc/php-fpm.d/www.conf
[www]
user =www
group =www
----------------------
# 第二种php配置方法,套接字配置方法
----------------------
# 编写网站配置文件
vim /etc/nginx/conf.d/blog.conf
server{
listen 80;
server_name blog.xxx.com;
root /code/wordpress;
location / {
index index.php index.html;
}
location ~ \.php$ {
fastcgi_pass 127.0.0.1:9000;
fastcgi_param SCRIPT_FILENAME $document_root$fastcgi_script_name;
include /etc/nginx/fastcgi_params;
}
}
vim /etc/nginx/conf.d/zh.conf
server{
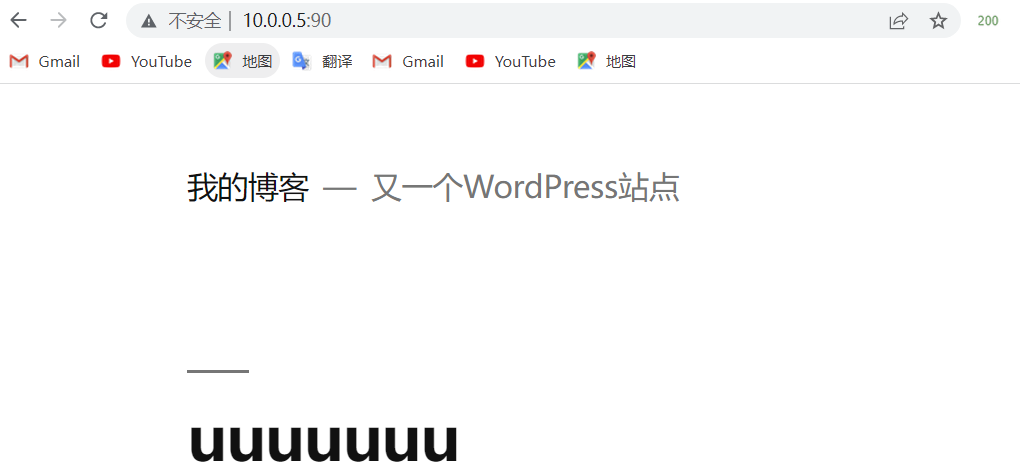
listen 90;
server_name zh.xxx.com;
root /code/wecenter;
location / {
index index.php
index.html;
}
location ~ \.php$ {
fastcgi_pass 127.0.0.1:9000;
fastcgi_param SCRIPT_FILENAME $document_root$fastcgi_script_name;
include /etc/nginx/fastcgi_params;
}
}
# 查看nginx配置文件是否正确
[root@webo2 ~]# nginx -t
nginx: the configuration file /etc/nginx/nginx.conf syntax is ok
nginx: configuration file /etc/nginx/nginx.conf test is successful
# 创建站点目录
mkdir /code
# 部署代码
cd /root/
wget http://test.driverzeng.com/Nginx_Code/wordpress-5.0.3-zh_CN.tar.gz
wget http://test.driverzeng.com/Nginx_Code/WeCenter_3-2-1.zip
# 解压
cd /root/
unzip WeCenter_3-2-1.zip
tar xf wordpress-5.0.3-zh_CN.tar.gz
# 移动到/code目录下,并改名
cd /root/
mv WeCenter_3-2-1 /code/wecenter
mv wordpress /code/
# 授权www给/code
chown -R www.www /code/
# 重启服务
systemctl restart nginx php-fpm
# 本地域名解析
10.0.0.7 blog.xxx.com zh.xxx.com
##### 先配置web01的博客和知乎再传送
##### 从web01传送到web02
# 从web01传送配置文件
scp /etc/nginx/nginx.conf root@10.0.0.8:/etc/nginx/
scp /etc/php-fpm.d/www.conf root@10.0.0.8:/etc/php-fpm.d/
# 传送网站配置文件
scp /etc/nginx/conf.d/* root@10.0.0.8:/etc/nginx/conf.d/
# 传送站点目录
scp -r /code/ root@10.0.0.8:/
##### web02
## 和web02一样,安装nginx和php,和www用户
# 授权www给/code
chown -R www.www /code/
# 重启服务
systemctl restart nginx php-fpm
# 本地域名解析
10.0.0.8 blog.xxx.com zh.xxx.com
###### php第二种配置方法,套接字配置方法

vim /etc/php-fpm.d/www.conf
[www]
user =www
group =www

# 注释这行
22行
;listen = 127.0.0.1:9000
# 添加这几个文件
listen = /opt/sock
listen.owner = www
listen.group = www

# 创建文件
vim /opt/sock
listen.owner = www
listen.group = www

### 两个网站(博客,知乎)配置文件
注释:#fastcgi_pass 127.0.0.1:9000;
添加:fastcgi_pass unix:/opt/sock;
-------------------------
server{
        listen 80;
        server_name zh.xxx.com;
        root /code/wecenter;
        location / {
                index index.php
                index.html;
        }
        location ~ \.php$ {
                #fastcgi_pass 127.0.0.1:9000;
                fastcgi_pass unix:/opt/sock;
                fastcgi_param SCRIPT_FILENAME $document_root$fastcgi_script_name;
        include /etc/nginx/fastcgi_params;
        }
}
##### 换库,可看数据库拆分
## 以哪台虚拟机为web服务,就修改哪台虚拟机的库的配置文件
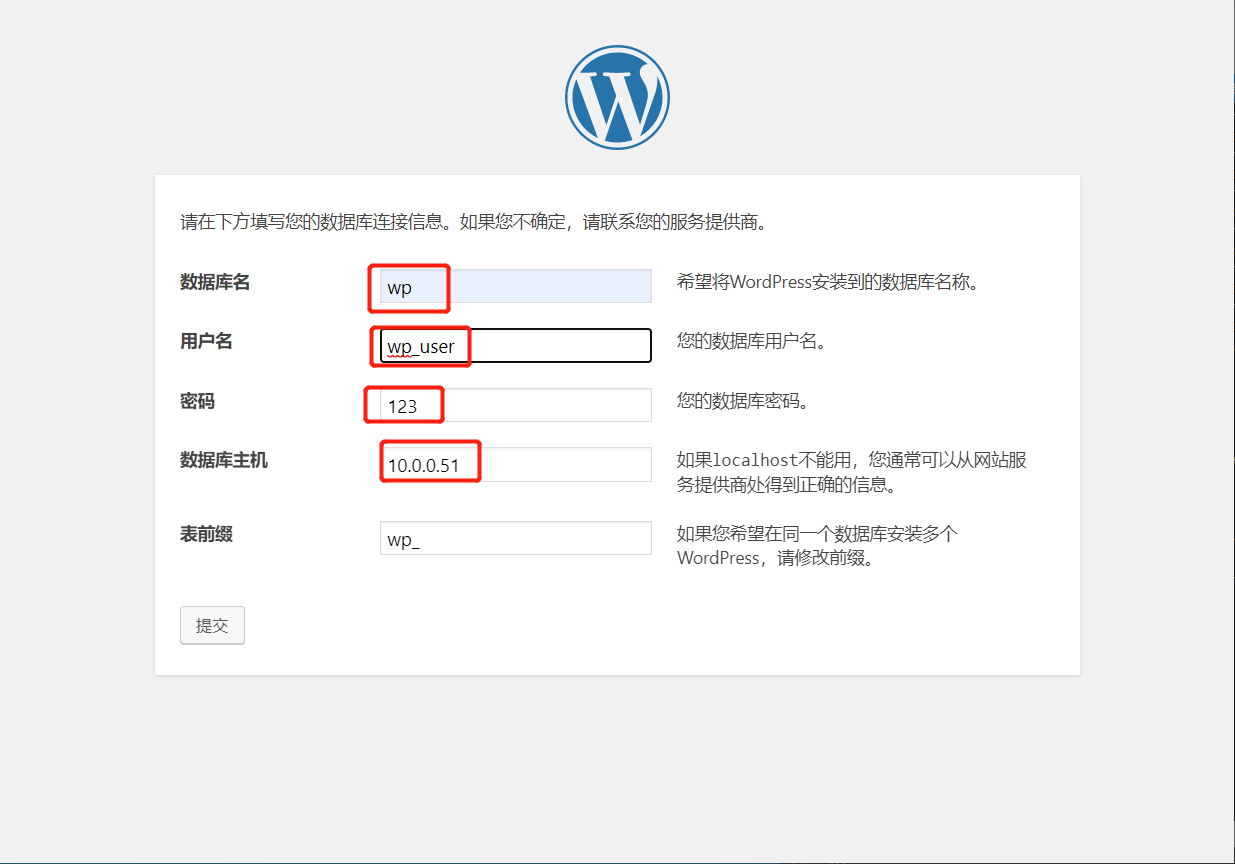
# wordpress
vim /code/wordpress/wp-config.php
/** WordPress数据库的名称 */
define('DB_NAME', 'wp');
/** MySQL数据库用户名 */
define('DB_USER', 'wp_user');
/** MySQL数据库密码 */
define('DB_PASSWORD', '123');
/** MySQL主机 */
define('DB_HOST', '10.0.0.51');
/** 创建数据表时默认的文字编码 */
define('DB_CHARSET', 'utf8mb4');
/** 数据库整理类型。如不确定请勿更改 */
define('DB_COLLATE', '');
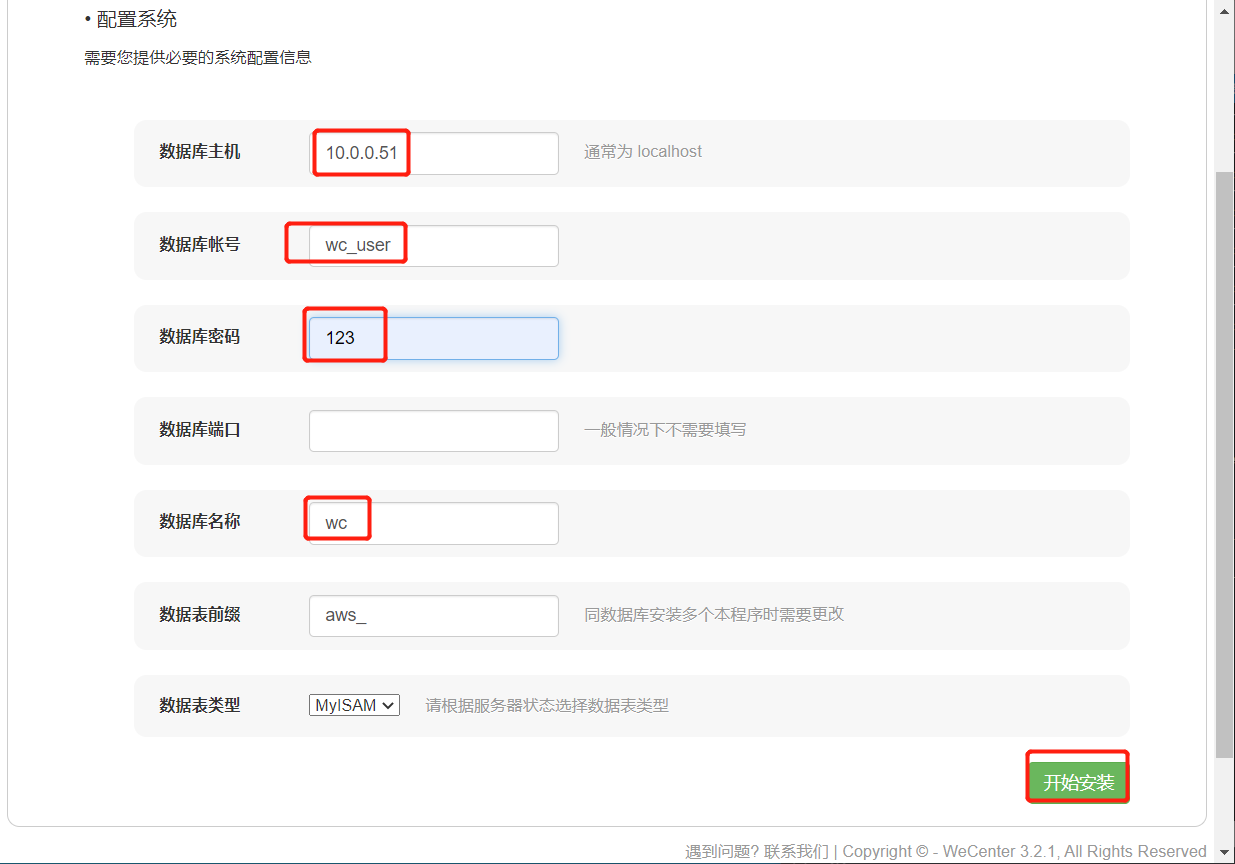
# wecenter
vim /code/wecenter/system/config/database.php
<?php
$config['charset'] = 'utf8';^M
$config['prefix'] = 'aws_';^M
$config['driver'] = 'MySQLi';^M
$config['master'] = array (
'charset' => 'utf8',
'host' => '10.0.0.51',
'username' => 'wc_user',
'password' => '123',
'dbname' => 'wc',
);^M
$config['slave'] = false;^M
部署nfs服务端
nfs
# nfs 安装nfs
yum install -y nfs-utils

# 创建www用户和组
groupadd www -g 666
useradd www -u 666 -g 666 -s /sbin/nologin -M

# 配置服务端
vim /etc/exports
/data/wp_data 172.16.1.0/24(rw,sync,all_squash,anonuid=666,anongid=666)
/data/wc_data 172.16.1.0/24(rw,sync,all_squash,anonuid=666,anongid=666)

# 创建共享目录
mkdir -p /data/{wc,wp}_data

# 修改共享目录的属主和属组为nfs匿名用户
chown -R www.www /data/

# 启动服务并开机自启
systemctl start nfs
systemctl enable nfs

# 检查进程
[root@nfs ~]# ps -ef | grep [n]fs
root      11419      2  0 17:27 ?        00:00:00 [nfsd4_callbacks]
root      11425      2  0 17:27 ?        00:00:00 [nfsd]
root      11426      2  0 17:27 ?        00:00:00 [nfsd]
root      11427      2  0 17:27 ?        00:00:00 [nfsd]
root      11428      2  0 17:27 ?        00:00:00 [nfsd]
root      11429      2  0 17:27 ?        00:00:00 [nfsd]
root      11430      2  0 17:27 ?        00:00:00 [nfsd]
root      11431      2  0 17:27 ?        00:00:00 [nfsd]
root      11432      2  0 17:27 ?        00:00:00 [nfsd]

# 检查配置文件是否生效
[root@nfs ~]# cat /var/lib/nfs/etab
/data/wc_data	172.16.1.0/24(rw,sync,wdelay,hide,nocrossmnt,secure,root_squash,all_squash,no_subtree_check,secure_locks,acl,no_pnfs,anonuid=666,anongid=666,sec=sys,rw,secure,root_squash,all_squash)
/data/wp_data	172.16.1.0/24(rw,sync,wdelay,hide,nocrossmnt,secure,root_squash,all_squash,no_subtree_check,secure_locks,acl,no_pnfs,anonuid=666,anongid=666,sec=sys,rw,secure,root_squash,all_squash)
部署nfs服务端
web01 web02
# web01 web02 安装nfs
[root@web01 ~]# yum install -y nfs-utils
[root@web02 ~]# yum install -y nfs-utils

# 查看挂载点
[root@web01 opt]# showmount -e 172.16.1.31
Export list for 172.16.1.31:
/data/wc_data 172.16.1.0/24
/data/wp_data 172.16.1.0/24

# 确保数据不会丢失
scp -r /code/wordpress/wp-content/uploads/ root@10.0.0.31:/data/wp_data
scp -r /code/wecenter/uploads/ root@10.0.0.31:/data/wc_data

-------------------
## uploads目录 如果没有在博客上面创建过文件就没有这文件,可以自己创建。
mkdir /code/wordpress/wp-content/uploads
-------------------

# 挂载共享目录
mount -t nfs 172.16.1.31:data/wp_data /code/wordpress/wp-content/uploads
mount -t nfs 172.16.1.31:data/wc_data /code/wecenter/uploads/

# 查看是否挂载
[root@web01 wecenter]# df -h
Filesystem                 Size  Used Avail Use% Mounted on
devtmpfs                   476M     0  476M   0% /dev
tmpfs                      487M     0  487M   0% /dev/shm
tmpfs                      487M  7.7M  479M   2% /run
tmpfs                      487M     0  487M   0% /sys/fs/cgroup
/dev/sda3                   19G  1.9G   17G  11% /
/dev/sda1                  497M  125M  373M  25% /boot
tmpfs                       98M     0   98M   0% /run/user/0
172.16.1.31:/data/wp_data   19G  1.7G   17G   9% /code/wordpress/wp-content/uploads
172.16.1.31:/data/wc_data   19G  1.7G   17G   9% /code/wecenter/uploads
##### 开机挂载
vim /etc/fstab

[root@webo2 ~]# tail -2 /etc/fstab
172.16.1.31:/data/wp_user /code/wordpress/wp-content/uploads nfs defaults 0 0
172.16.1.31:/data/wc_user /code/wecenter/uploads nfs defaults 0 0

# mount -a 命令把文件里的所有挂载信息全都执行了一遍
mount -a

### mount
常用命令选项:
    -t vsftype:指定要挂载的设备上的文件系统类型;
    -r: readonly,只读挂载;
    -w: read and write, 读写挂载;
    -n: 不更新/etc/mtab;
    -a:自动挂载所有支持自动挂载的设备;(定义在了/etc/fstab文件中,且挂载选项中有“自动挂载”功能)
    -L 'LABEL': 以卷标指定挂载设备;
    -U 'UUID': 以UUID指定要挂载的设备;
    -B, --bind: 绑定目录到另一个目录上;

# 卸载mount,取消挂载
umount /opt
结合sersync
服务端
backup
# 安装rsync
yum install -y rsync

# 创建www用户,uid=666,gid=666
groupadd www -g 666
useradd www -u 666 -g 666 -s /sbin/nologin -M

# 编辑配置文件
uid = www
gid = www
port = 873
fake super = yes
use chroot = no
max connections = 200
timeout = 600
ignore errors
read only = false
list = false
auth users = rsync_backup
secrets file = /etc/rsync.passwd
log file = /var/log/rsyncd.log
###################################
[wp_data]
comment = this is rsync for wp_data
path = /backup/wp_data
[wc_data]
comment = this is rsync for wc_data
path = /backup/wc_data

# 创建密码文件
[root@backup ~]# echo 'rsync_backup:123'> /etc/rsync.passwd
[root@backup ~]# cat /etc/rsync.passwd
rsync_backup:123

# 授权,rsync要求密码文件的权限是600
chmod 600 /etc/rsync.passwd

# 创建备份目录
mkdir -p /backup/{wp,wc}_data

# 授权备份目录
chown -R www.www /backup/

# 启动服务加入开机自启
systemctl restart rsyncd
systemctl enable rsyncd

# 检查进程,检查端口
[root@backup ~]# ps -ef | grep rsync
root      11232      1  0 18:07 ?        00:00:00 /usr/bin/rsync --daemon --no-detach
root      11251   1085  0 18:07 pts/0    00:00:00 grep --color=auto rsync
[root@backup ~]# netstat -lntup | grep 873
tcp        0      0 0.0.0.0:873             0.0.0.0:*               LISTEN      11232/rsync
tcp6       0      0 :::873                  :::*                    LISTEN      11232/rsync
客户端
nfs
# 安装sersync的依赖
yum install -y inotify-tools

# 设置密码
echo '123' > /etc/rsyncd.pass

# 授权密码文件
chmod 600 /etc/rsyncd.pass

# 下载sersync的包
cd /root/
wget http://test.driverzeng.com/other/sersync2.5.4_64bit_binary_stable_final.tar.gz

# 创建安装目录
mkdir /application

# 解压到安装目录
tar xf sersync2.5.4_64bit_binary_stable_final.tar.gz -C /application/

# 改名
mv /application/GNU-Linux-x86/ /application/sersync

# 修改配置文件
vim /application/sersync/confxml.xml
改成:
-----------------
        <exclude expression="^static/*"></exclude>
    </filter>
    <inotify>
        <delete start="true"/>
        <createFolder start="true"/>
        <createFile start="true"/>                  ### 全部改为true
        <closeWrite start="true"/>
        <moveFrom start="true"/>
        <moveTo start="true"/>
        <attrib start="true"/>
        <modify start="true"/>
    </inotify>

    <sersync>
        <localpath watch="/data/wp_data"> ## 要监听的目录
            <remote ip="172.16.1.41" name="wp_data"/>
            ### 要同步的主机               ##  模块名
            <!--<remote ip="192.168.8.39" name="tongbu"/>-->
            <!--<remote ip="192.168.8.40" name="tongbu"/>-->
        </localpath>
        <rsync>
            <commonParams params="-az"/>  ### rsync的选项,为什么不加--delete 因为最后也有执行
            <auth start="true" users="rsync_backup" passwordfile="/etc/rsyncd.pass"/>
         ### 打开密码认证   ### 匿名用户:backup密码文件的那个用户   ### 认证密码文件
            <userDefinedPort start="false" port="874"/><!-- port=874 -->
            <timeout start="false" time="100"/><!-- timeout=100 -->
            <ssh start="false"/>

----------------
###### 修改文件名
mv /application/sersync/confxml.xml /application/sersync/wp_data

# 在cp一个文件
cp /application/sersync/wp_data /application/sersync/wc_data
-----------------
vim /application/sersync/wc_data

<?xml version="1.0" encoding="ISO-8859-1"?>
<head version="2.5">
    <host hostip="localhost" port="8008"></host>
    <debug start="false"/>
    <fileSystem xfs="false"/>
    <filter start="false">
        <exclude expression="(.*)\.svn"></exclude>
        <exclude expression="(.*)\.gz"></exclude>
        <exclude expression="^info/*"></exclude>
        <exclude expression="^static/*"></exclude>
    </filter>
    <inotify>
        <delete start="true"/>
        <createFolder start="true"/>
        <createFile start="true"/>
        <closeWrite start="true"/>
        <moveFrom start="true"/>
        <moveTo start="true"/>
        <attrib start="true"/>
        <modify start="true"/>
    </inotify>

    <sersync>
        <localpath watch="/data/wc_data">
            <remote ip="172.16.1.41" name="wc_data"/>
            <!--<remote ip="192.168.8.39" name="tongbu"/>-->
            <!--<remote ip="192.168.8.40" name="tongbu"/>-->
        </localpath>
        <rsync>
            <commonParams params="-az"/>
            <auth start="true" users="rsync_backup" passwordfile="/etc/rsyncd.pass"/>
            <userDefinedPort start="false" port="874"/><!-- port=874 -->
            <timeout start="false" time="100"/><!-- timeout=100 -->
            <ssh start="false"/>

# 启动sersync
/application/sersync/sersync2 -rdo /application/sersync/wp_data /application/sersync/sersync2 -rdo /application/sersync/wc_data

[root@nfs application]# /application/sersync/sersync2 -rdo /application/sersync/wc_data
set the system param
execute:echo 50000000 > /proc/sys/fs/inotify/max_user_watches
execute:echo 327679 > /proc/sys/fs/inotify/max_queued_events
parse the command param
option: -r 	rsync all the local files to the remote servers before the sersync work
option: -d 	run as a daemon
option: -o 	config xml name:  /application/sersync/wc_data
daemon thread num: 10
parse xml config file
host ip : localhost	host port: 8008
will ignore the inotify createFile event
daemon start,sersync run behind the console
use rsync password-file :
user is	rsync_backup
passwordfile is 	/etc/rsyncd.pass
config xml parse success
please set /etc/rsyncd.conf max connections=0 Manually
sersync working thread 12  = 1(primary thread) + 1(fail retry thread) + 10(daemon sub threads)
Max threads numbers is: 22 = 12(Thread pool nums) + 10(Sub threads)
please according your cpu ,use -n param to adjust the cpu rate
------------------------------------------
rsync the directory recursivly to the remote servers once
working please wait...
execute command: cd /data/wc_data && rsync -az -R --delete ./ rsync_backup@172.16.1.41::wc_data --password-file=/etc/rsyncd.pass >/dev/null 2>&1
run the sersync:
watch path is: /data/wc_data

# 查看启动参数
[root@nfs sersync]# cd /application/sersync/
[root@nfs sersync]# ./sersync2 -h
set the system param
execute:echo 50000000 > /proc/sys/fs/inotify/max_user_watches
execute:echo 327679 > /proc/sys/fs/inotify/max_queued_events
parse the command param
_______________________________________________________
参数-d:启用守护进程模式
参数-r:在监控前,将监控目录与远程主机用rsync命令推送一遍
c参数-n: 指定开启守护线程的数量,默认为10个
参数-o:指定配置文件,默认使用confxml.xml文件
参数-m:单独启用其他模块,使用 -m refreshCDN 开启刷新CDN模块
参数-m:单独启用其他模块,使用 -m socket 开启socket模块
参数-m:单独启用其他模块,使用 -m http 开启http模块
不加-m参数,则默认执行同步程序
________________________________________________________________
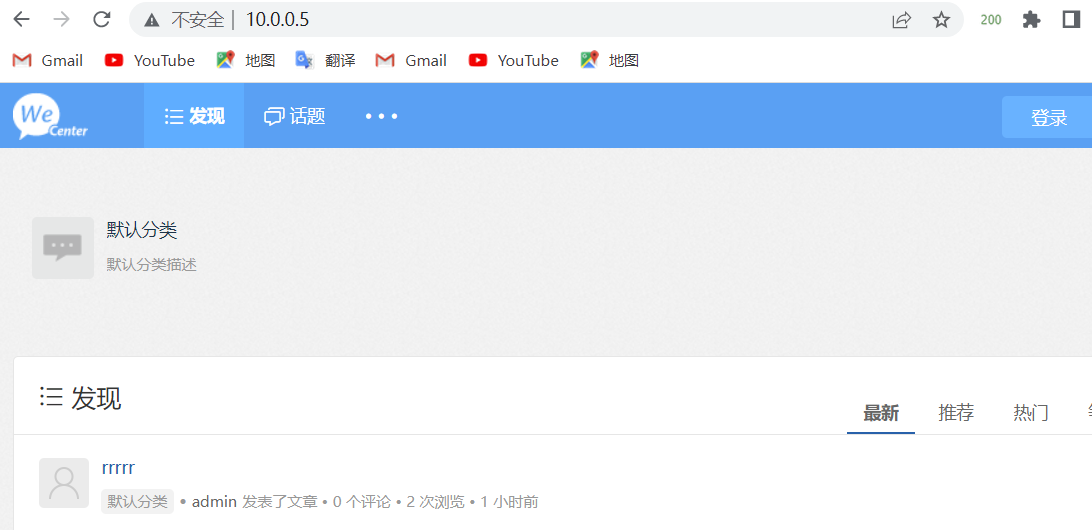
部署lb01的七层负载均衡
# 安装nginx
yum install -y nginx

# 博客配置文件
vim /etc/nginx/conf.d/ttt.conf
upstream bk{
	server 172.16.1.7;
	server 172.16.1.8;
	server 172.16.1.9;
}
upstream zh{
	server 172.16.1.7:90;
	server 172.16.1.8:90;
	server 172.16.1.9:90;
}
server{
	listen 90;
	server_name blog.xxx.com;

	location /{
		proxy_pass http://bk;
		include /etc/nginx/proxy_params;
	}
}
server{
	listen 80;
	server_name zh.xxx.com;

	location /{
		proxy_pass http://zh;
		include /etc/nginx/proxy_params;
	}
}


# 配置文件完善
vim /etc/nginx/proxy_params
proxy_set_header Host $host;
proxy_set_header X-Forwarded-For $proxy_add_x_forwarded_for;
proxy_connect_timeout 30;
proxy_send_timeout 60;
proxy_read_timeout 60;
proxy_buffering on;
proxy_buffer_size 32k;
proxy_buffers 4 128k;

# 检查服务配置文件
nginx -t

# 启动服务
systemctl restart nginx

# 本地解析
10.0.0.5 blog.xxx.com
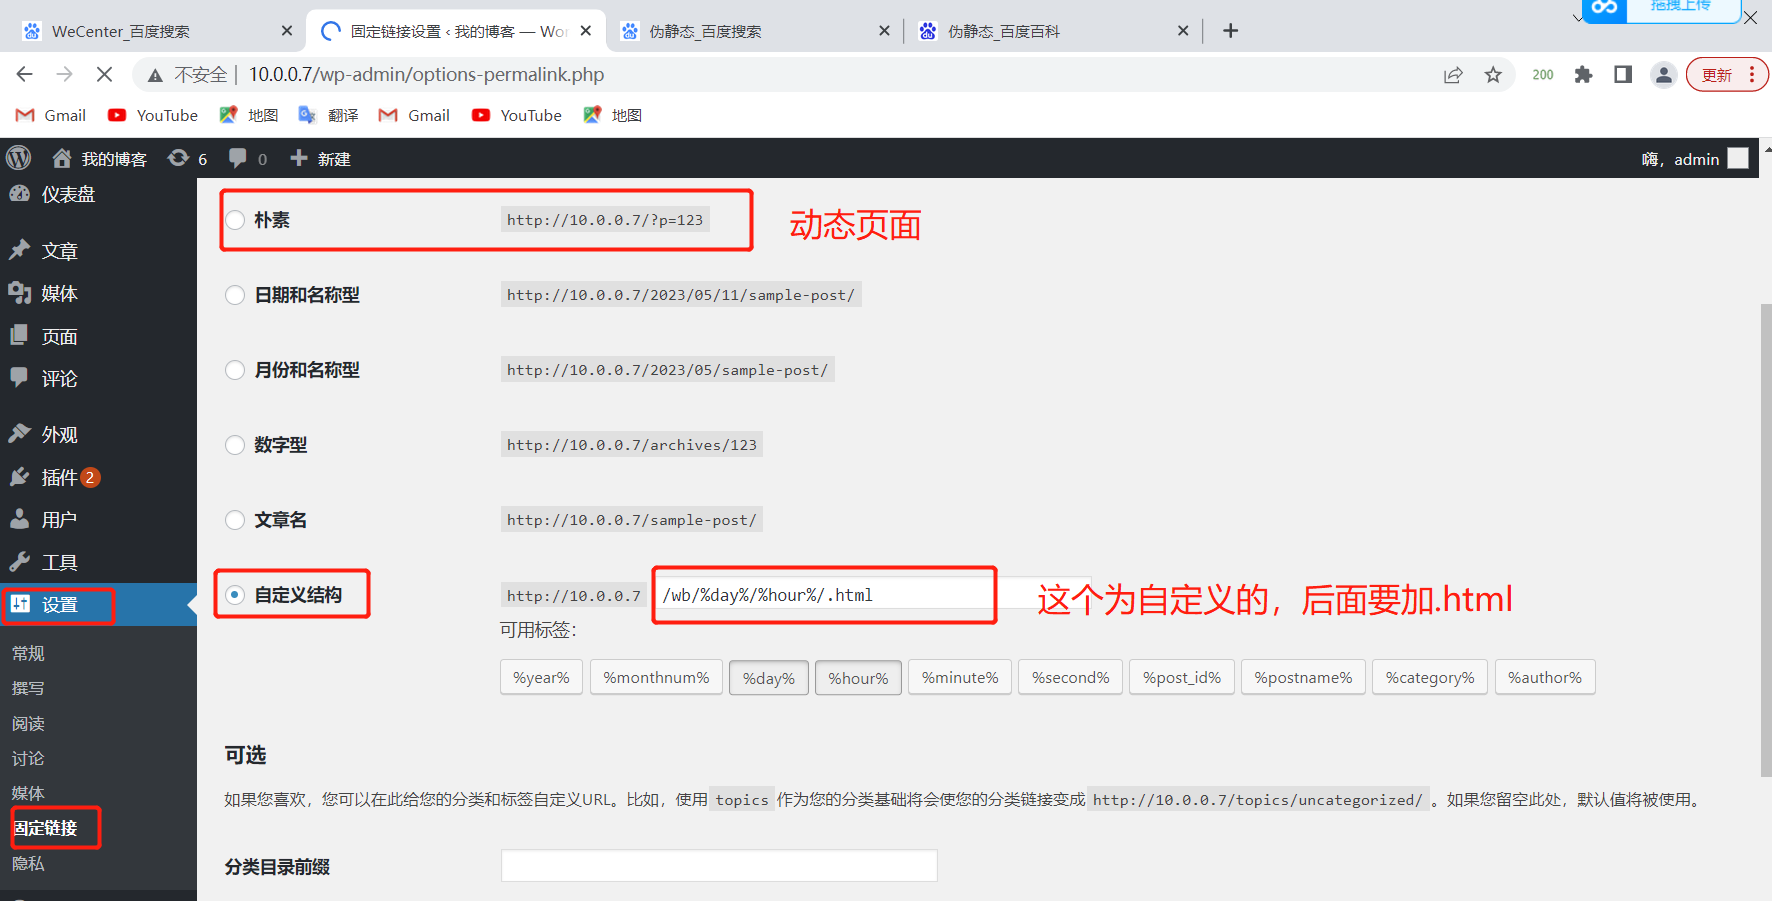
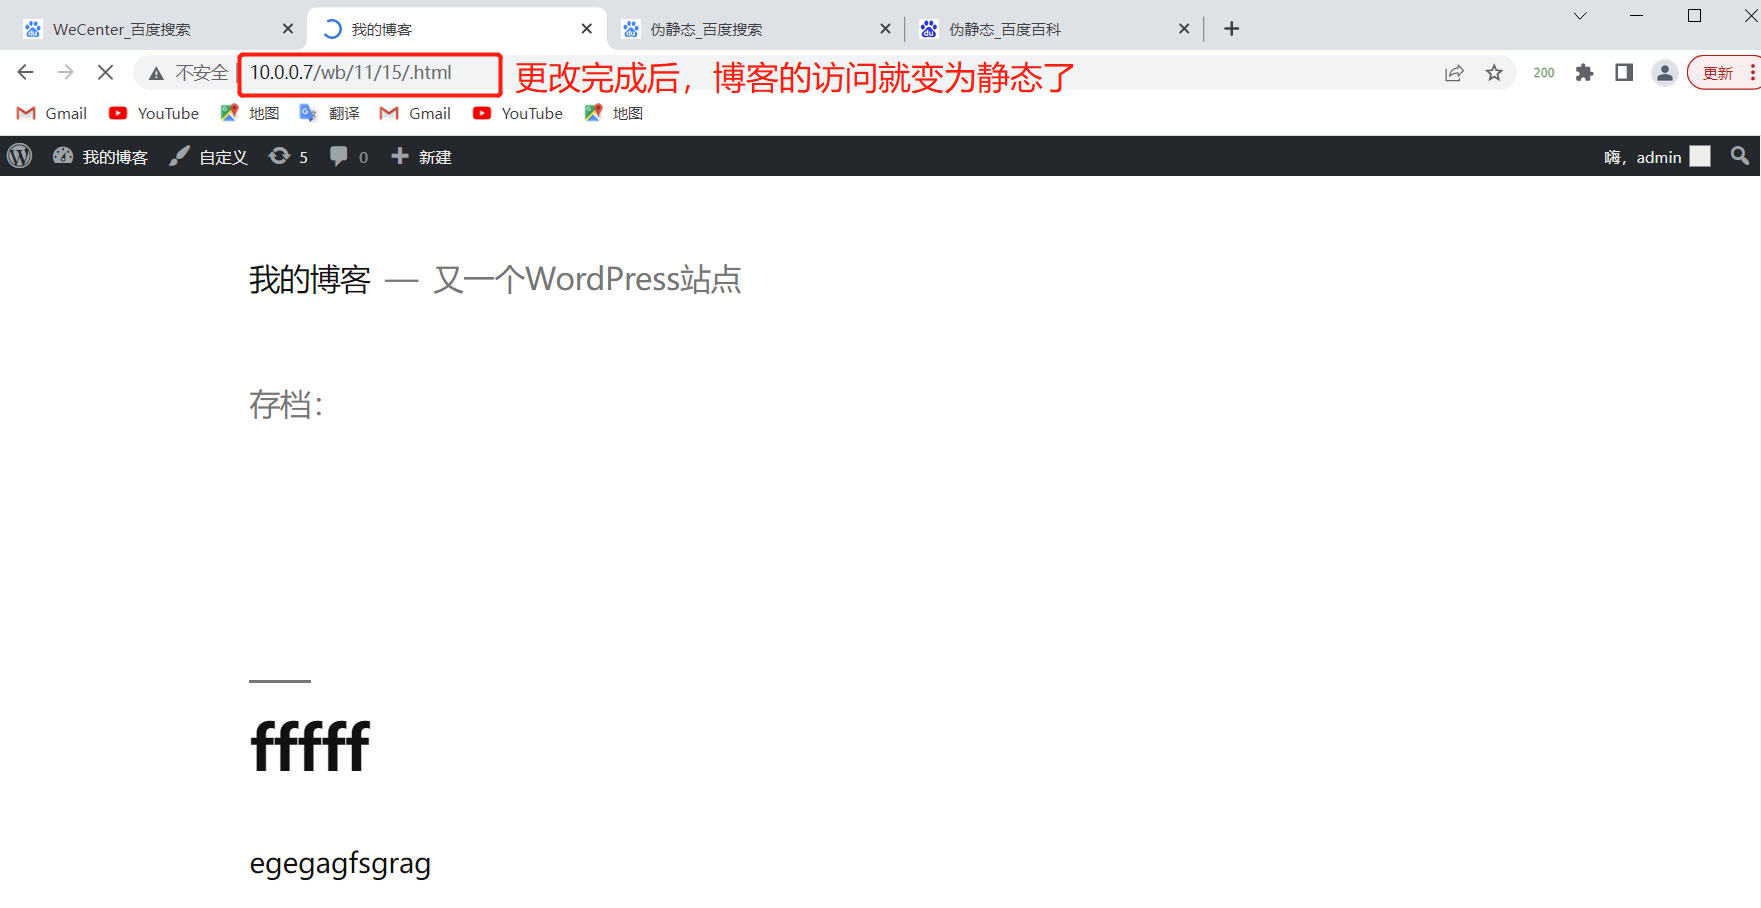
博客伪静态
web
# 添加配置文件
[root@web01 ~]# cat /etc/nginx/conf.d/blog.conf
server{
        listen 80;
        server_name blog.xxx.com;
        root /code/wordpress;
        location / {
                index index.php index.html;
		if ( -f $request_filename/index.html ){
			rewrite (.*) $1/index.html break;
		}
		if ( -f $request_filename/index.php ){
			rewrite (.*) $1/index.php;
		}
		if ( !-f $request_filename ){
			rewrite (.*) /index.php;
        }
        location ~ \.php$ {
                fastcgi_pass 127.0.0.1:9000;
                fastcgi_param SCRIPT_FILENAME $document_root$fastcgi_script_name;
        include /etc/nginx/fastcgi_params;
        }
}
}
http访问换为https访问
lb01
# CA机构创建证书
cd /root/
[root@web01 ~]# openssl genrsa -idea -out server.key 2048
Generating RSA private key, 2048 bit long modulus
......................................................................+++
.......................................................+++
e is 65537 (0x10001)
Enter pass phrase for server.key:1234
Verifying - Enter pass phrase for server.key:1234
# 查看当前目录生成的证书
[root@web01 ~]# ll
-rw-r--r-- 1 root root 1747 May 11 17:13 server.key
# 跟CA机构填写个人信息 签发证书
[root@web01 ~]# openssl req -days 36500 -x509 -sha256 -nodes -newkey rsa:2048 -keyout server.key -out server.crt
Generating a 2048 bit RSA private key
........+++
..........................+++
writing new private key to 'server.key'
-----
You are about to be asked to enter information that will be incorporated
into your certificate request.
What you are about to enter is what is called a Distinguished Name or a DN.
There are quite a few fields but you can leave some blank
For some fields there will be a default value,
If you enter '.', the field will be left blank.
-----
# 国家代码,简写 2个字符
Country Name (2 letter code) [XX]:CH
# 所在省
State or Province Name (full name) []:shanghai
# 所在城市
Locality Name (eg, city) [Default City]:shanghai
# 公司名字
Organization Name (eg, company) [Default Company Ltd]:oldboy
# 公司名字
Organizational Unit Name (eg, section) []:oldboy
# 域名
Common Name (eg, your name or your server's hostname) []:blog.xxx.com
# 邮箱地址
Email Address []:123@qq.com
# 查看证书位置
[root@web01 ~]# ll
-rw-r--r-- 1 root root 1411 May 11 17:16 server.crt
-rw-r--r-- 1 root root 1704 May 11 17:16 server.key
# 创建证书存放路径
cd /root/
mkdir -p /etc/nginx/ssl_key
mv server.* /etc/nginx/ssl_key/
[root@web01 ~]# ll //etc/nginx/ssl_key/
total 8
-rw-r--r-- 1 root root 1411 May 11 17:16 server.crt
-rw-r--r-- 1 root root 1704 May 11 17:16 server.key
# 修改配置
[root@lb01 ~]# cat /etc/nginx/conf.d/ttt.conf
upstream bk{
server 172.16.1.7;
server 172.16.1.8;
server 172.16.1.9;
}
upstream zh{
server 172.16.1.7:90;
server 172.16.1.8:90;
server 172.16.1.9:90;
}
server{
listen 80;
server_name blog.xxx.com;
rewrite (.*) https://blog.xxx.com$1 redirect;
}
server{
listen 443 ssl;
server_name blog.xxx.com;
ssl_certificate /etc/nginx/ssl_key/server.crt;
ssl_certificate_key /etc/nginx/ssl_key/server.key;
location /{
proxy_pass http://bk;
include /etc/nginx/proxy_params;
}
}
server{
listen 80;
server_name zh.xxx.com;
rewrite (.*) https://zh.xxx.com$1 redirect;
}
server{
listen 443 ssl;
server_name zh.xxx.com;
ssl_certificate /etc/nginx/ssl_key/server.crt;
ssl_certificate_key /etc/nginx/ssl_key/server.key;
location /{
proxy_pass http://zh;
include /etc/nginx/proxy_params;
}
}
# 监测语法
[root@web01 ~]# nginx -t
nginx: the configuration file /etc/nginx/nginx.conf syntax is ok
nginx: configuration file /etc/nginx/nginx.conf test is successful
# 重启
systemctl restart nginx
# 域名解析
10.0.0.5 blog.xxx.com zh.xxx.com
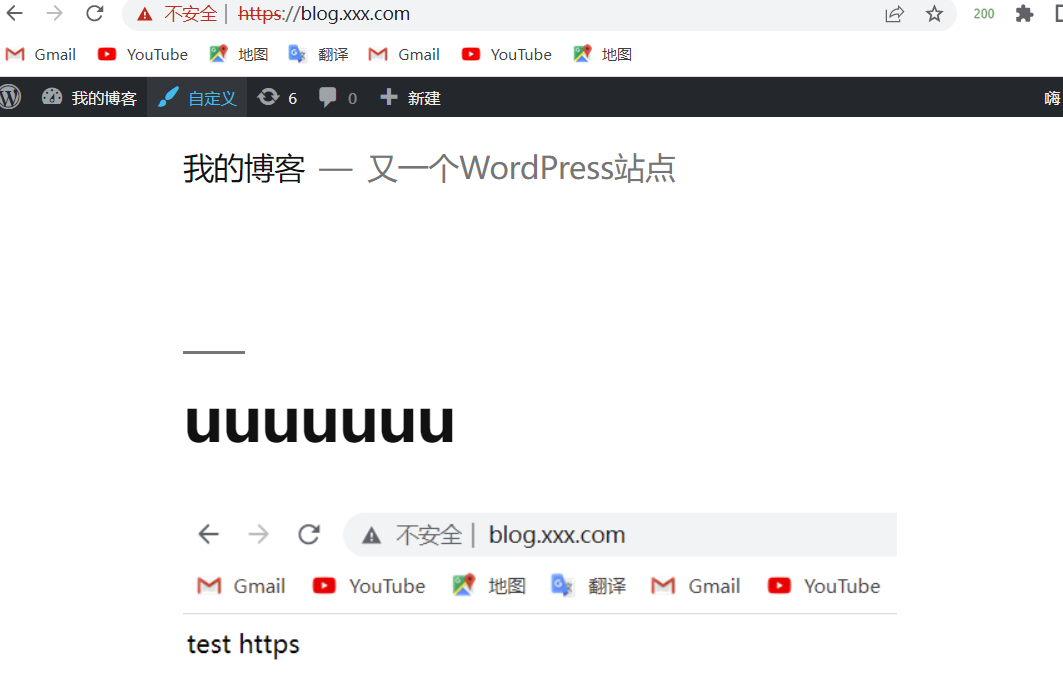
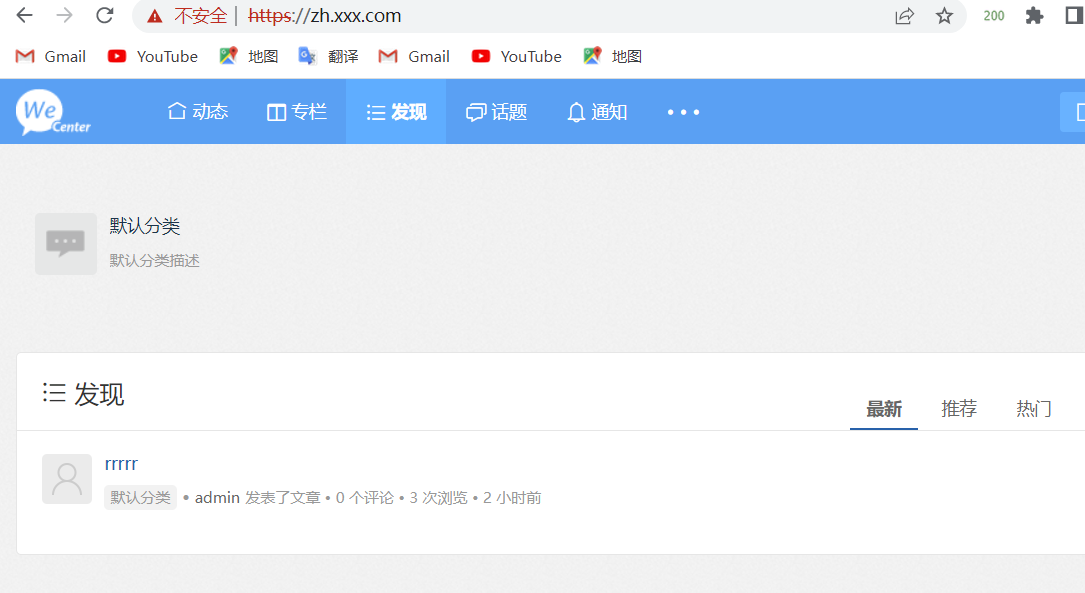
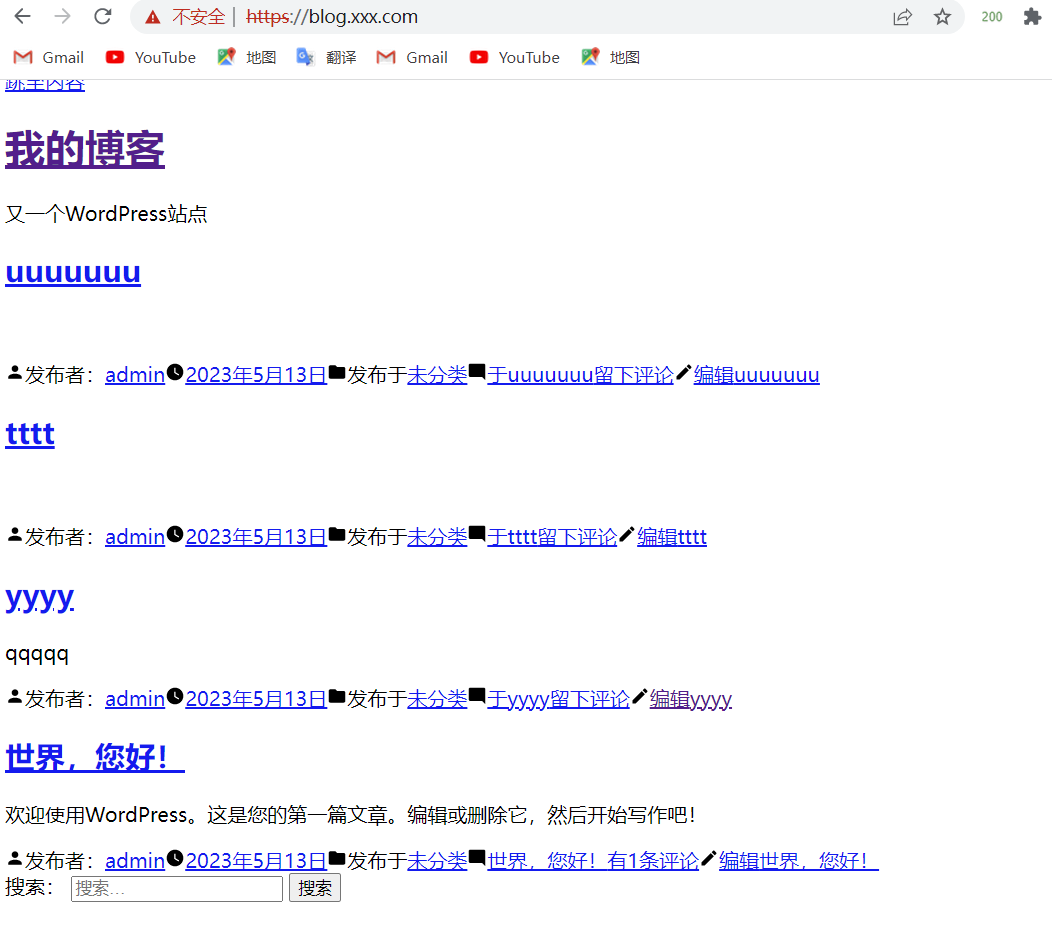
# 浏览器访问
blog.xxx.com
zh.xxx.com

破图修改
# web配置文件添加
fastcgi_param HTTPS on;

[root@web01 ~]# cat /etc/nginx/conf.d/blog.conf
server{
        listen 80;
        server_name blog.xxx.com;
        root /code/wordpress;
        location / {
                index index.php index.html;
		if ( -f $request_filename/index.html ){
			rewrite (.*) $1/index.html break;
		}
		if ( -f $request_filename/index.php ){
			rewrite (.*) $1/index.php;
		}
		if ( !-f $request_filename ){
			rewrite (.*) /index.php;
        }
        location ~ \.php$ {
                fastcgi_pass 127.0.0.1:9000;
                fastcgi_param SCRIPT_FILENAME $document_root$fastcgi_script_name;
		fastcgi_param HTTPS on;
        include /etc/nginx/fastcgi_params;
        }
}
}

[root@web01 ~]# cat /etc/nginx/conf.d/zh.conf
server{
        listen 90;
        server_name zh.xxx.com;
        root /code/wecenter;
        location / {
                index index.php
                index.html;
        }
        location ~ \.php$ {
                fastcgi_pass 127.0.0.1:9000;
                fastcgi_param SCRIPT_FILENAME $document_root$fastcgi_script_name;
        	fastcgi_param HTTPS on;
		include /etc/nginx/fastcgi_params;
        }
}