The VAS 5054A V7.1.1 is a universal diagnostic interface for the vehicles of the Volkswagen Group and all OBD vehicle systems from other manufacturers,mainly do AUDI VW Seat Skoda, newly add Bentley and Lamborghini. It is bluetooth version, and it supports multi-language.
Top 5 Reasons to Get VAS 5054A
1. Newest version: ODIS V7.1.1
2. Supported Multi-language: English/ Chinese/ Japanese/ Portuguese/
Romanian/ Korean/ Dutch/ Polish/ Turkish/ Spanish/ French/ Italian/
Croatian/Danish/ German/ Swedish/ Finnish/ Slovenian/ Czech/ Russian/
Greek/ Polish
3. Add new car models Bentley and Lamborghini (If you want CD of Bently
and Lamborghini, please leave message when you place the order on our
website)
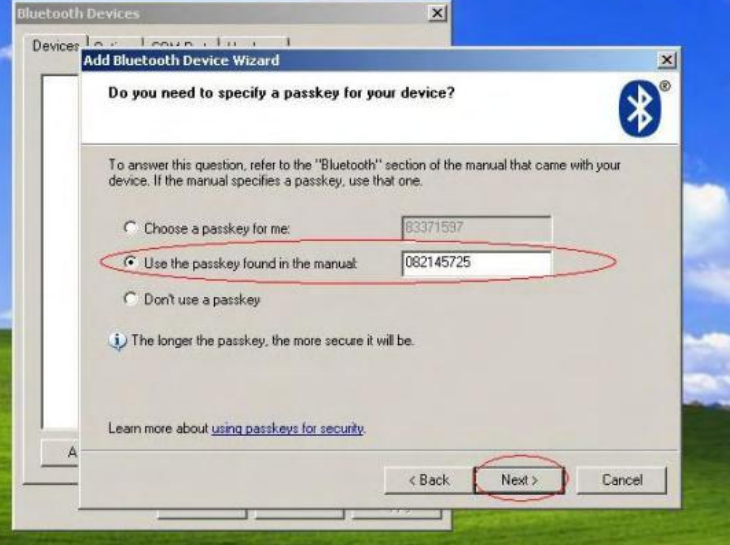
4. Bluetooth Version (Bluetooth Connection Password: 082145725)
5. Car models: VW, Audi, Seat, Skoda, Bentley and Lamborghini
VAS 5054A ODIS Software Computer System Requirements:
1) Language: English
2) Windows XP(xp2/xp3)
3) System C:// have to be NTFS format
4) C:// need to have at least 5GB space for installing VAS5054A
VAS5054A V19 setup steps
step 1: put 5054a-basis CD into computer, then select “setupstart”
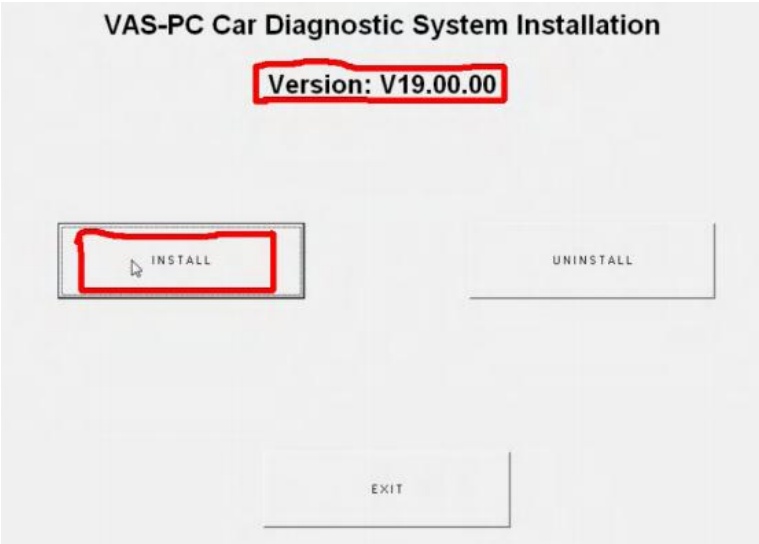
Step 2: Enter VAS5054A installation interface,select“INSTALL”
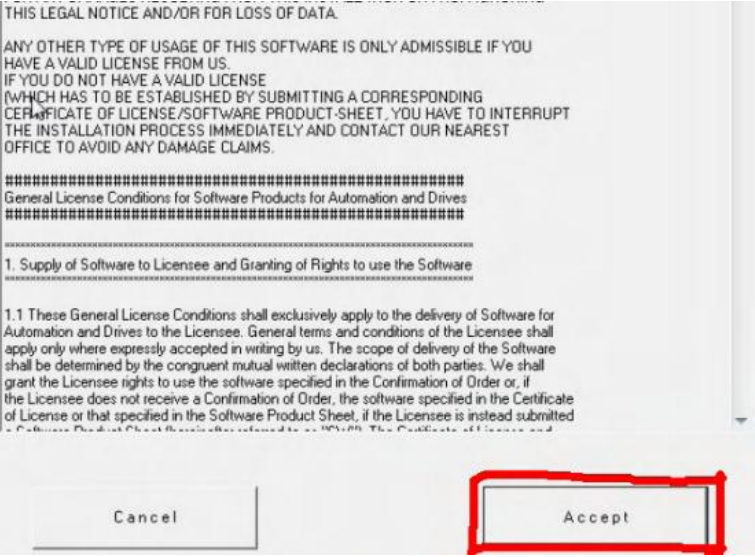
Step 3: click “Accept”
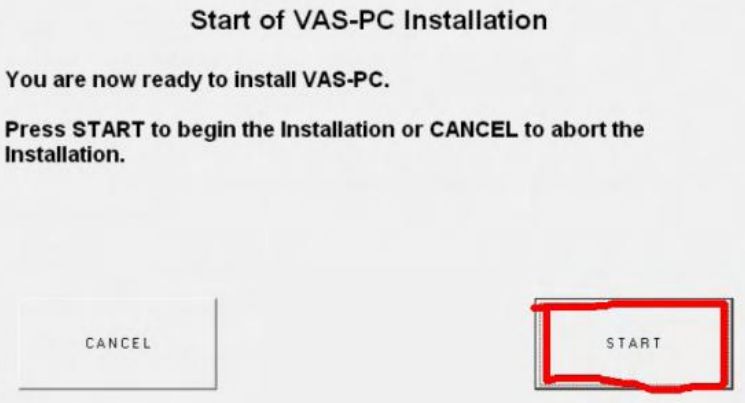
Step 4: click “START”
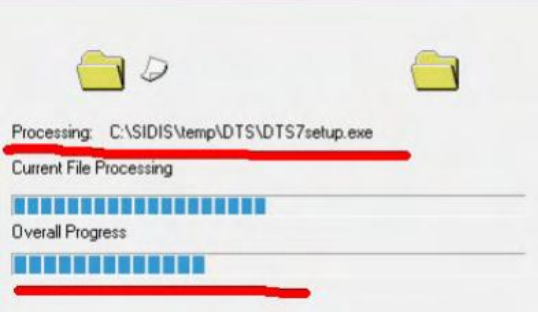
Step 5: installing software, please wait patiently
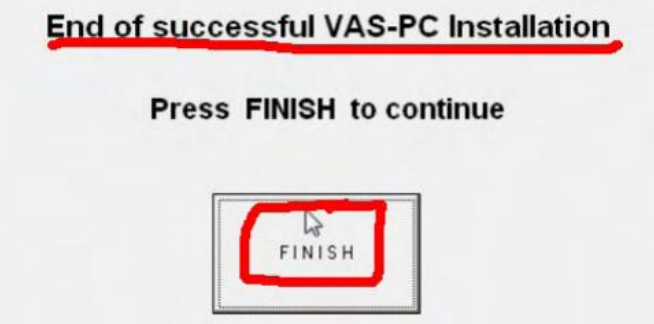
Step 6: end software installation, click “FINISH”
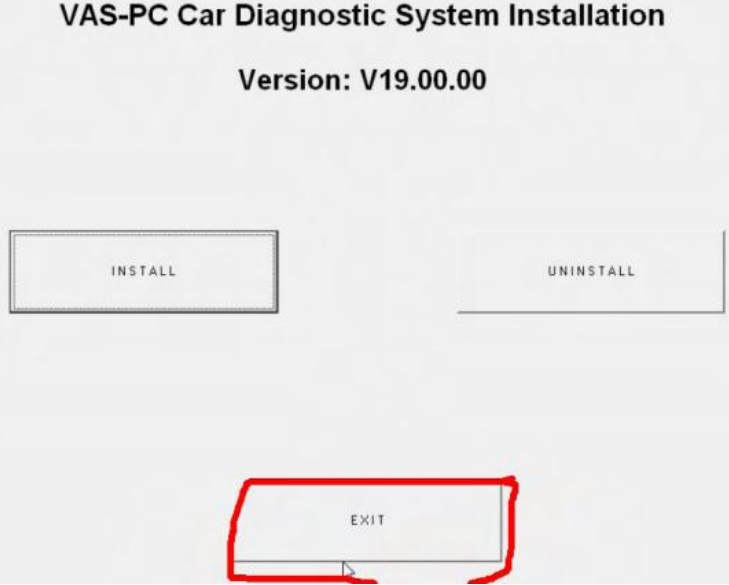
Step 7: Click “EXIT”
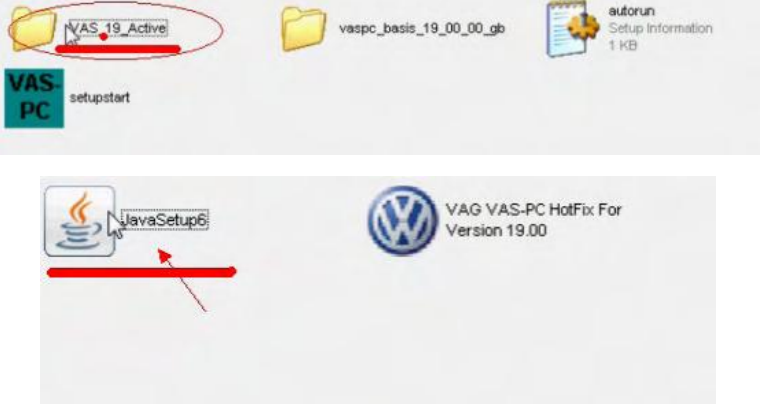
Step 8: Open C:// and Click “VAS_19_Active” to install java.
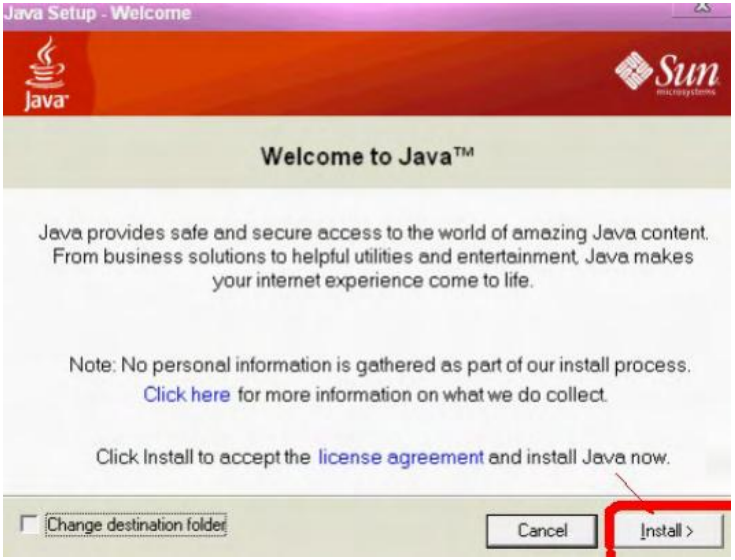
Step 9: Finish installing Java
Step 10: click “VAG VAS-PC Hotfix for Version 19.00 HotFix Tool”
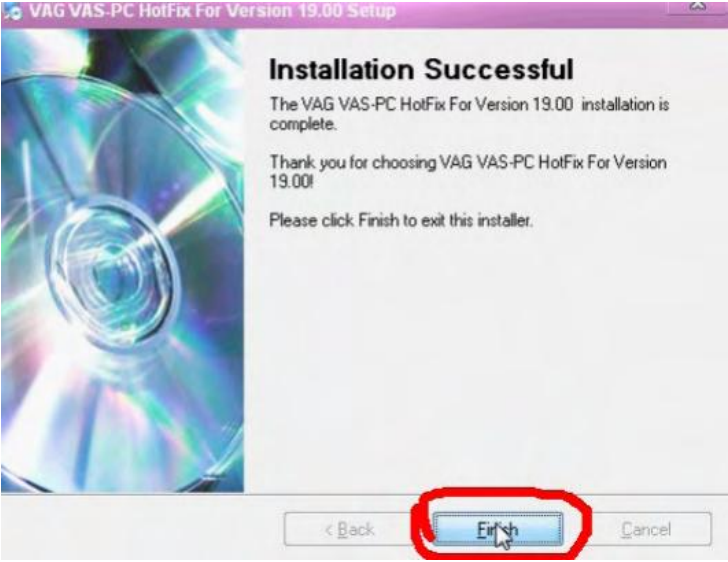
Step 11: Installation Successful, click “Finish”
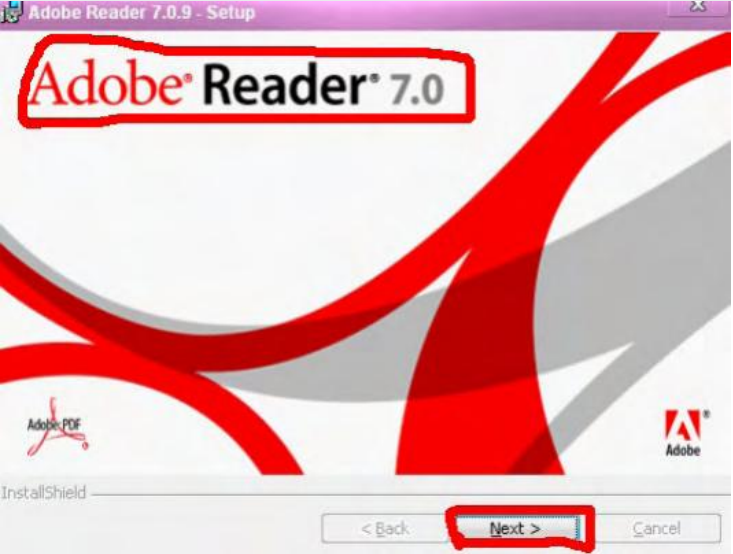
Step 12: Download and install “Adobe Reader 7.0.9”
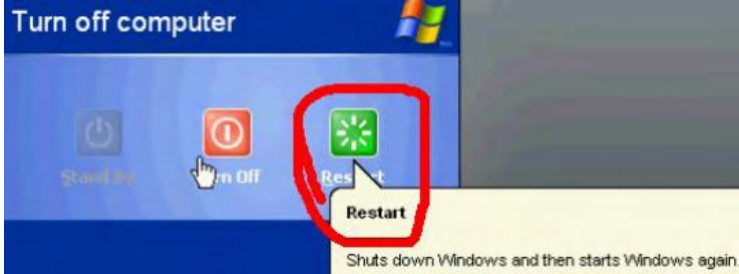
Step 13: Now restart computer (have to restart), to save VAS5054A installation settings.
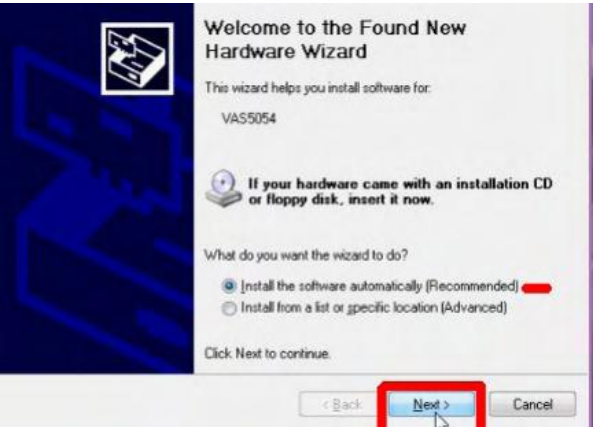
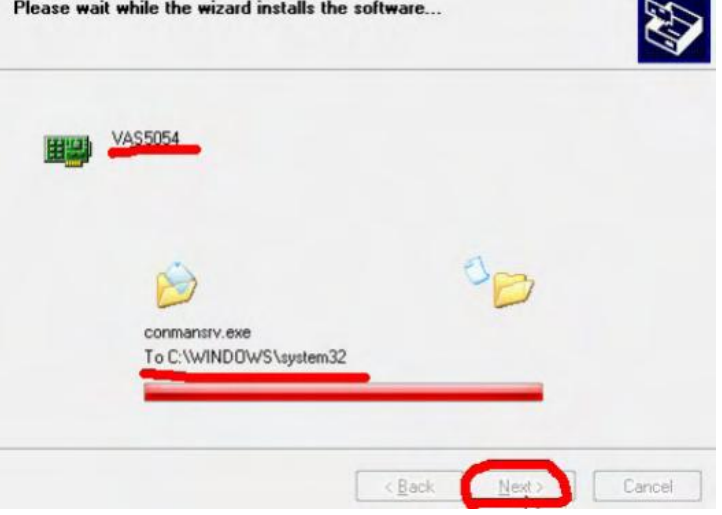
Step 14: after restart computer, connect VAS5054A to car and with computer, then start to install driver.
Step 14: Driver installation finish
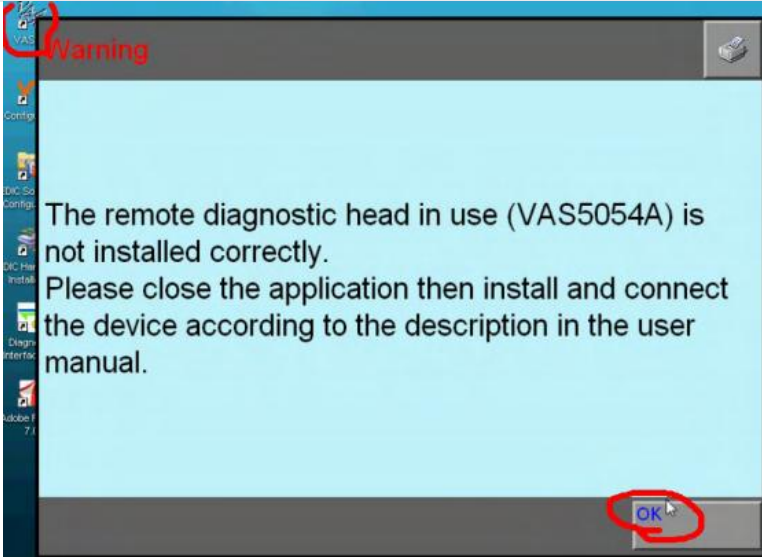
Step 15: open “VAS-PC” on your computer desktop, when the dialog box named “Warning” open, click “ok”
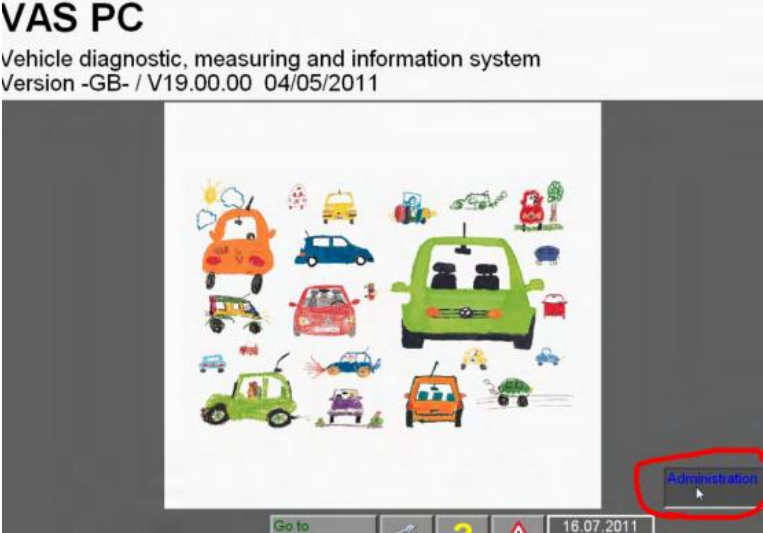
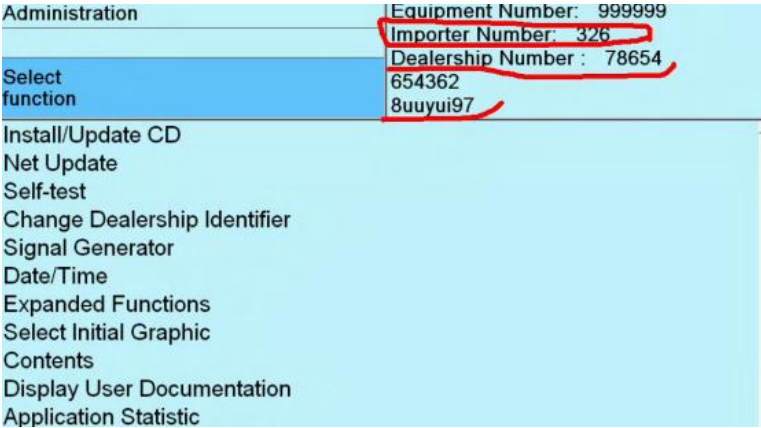
Step 16: Now enter VAS5054A V19 software, begin to set “administration”
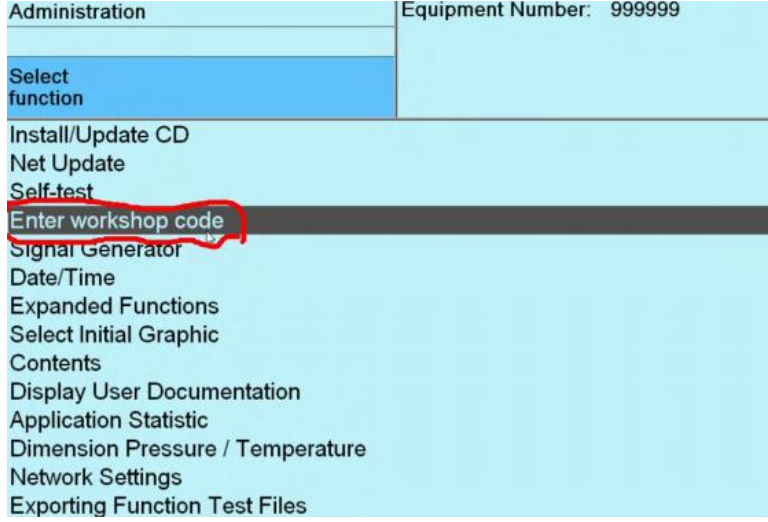
Step 17: Click “Enter Workshop Code”
Step 18:
Importer Number consists of three digits Dealership
Number consists of five digits
The third group code consists of two lines, no more than 60 characters
After finish setup “administration” , exit it, you will see operation menu.
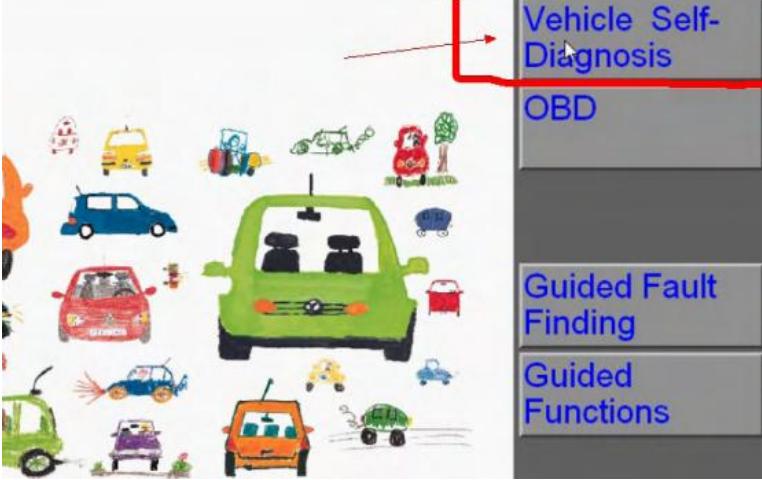
Step 19: Click “Vehicle self-diagnosis”
Step 20: Click “On Board Diagnosis OBD”
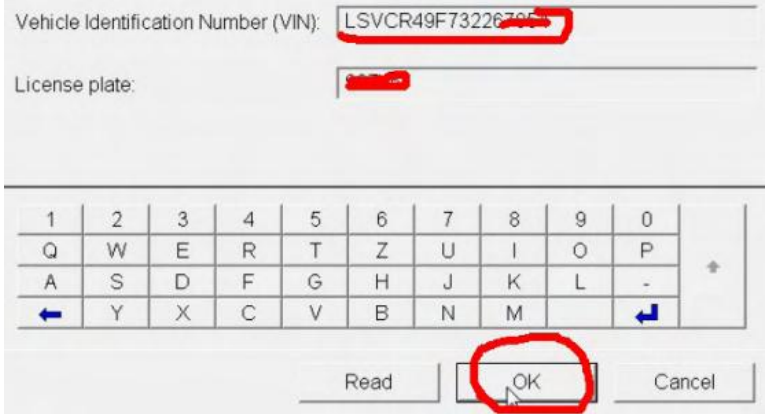
Step 21: enter vehicle “VIN”
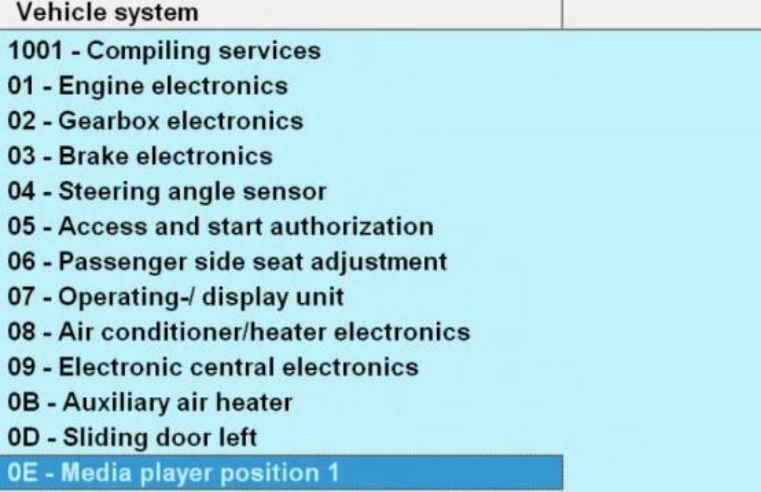
Step 22: Now you are able to check all Vehicle Systems. Click any Control Unit you want to check.
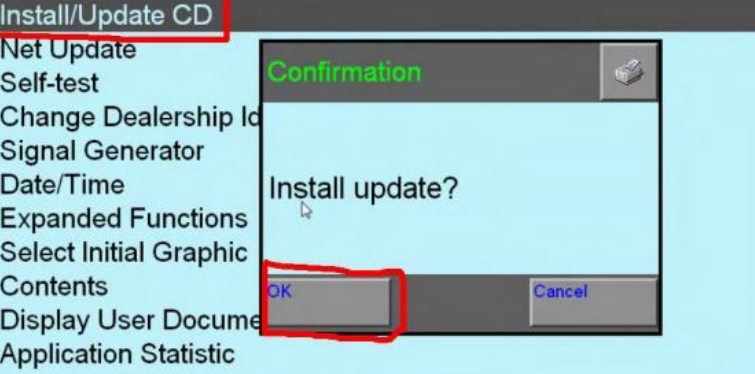
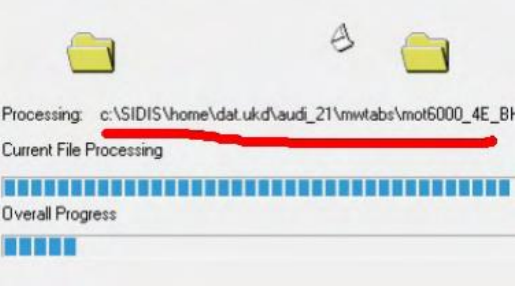
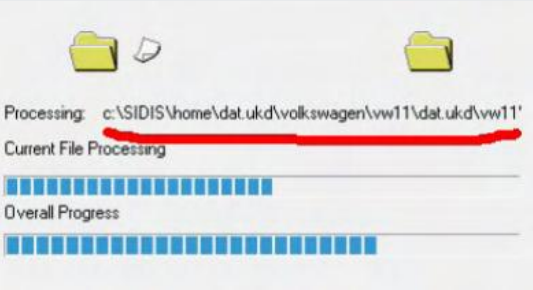
Step 23: begin to update Audi data, firstly insert Audi CD, and click “administration”
Step 24: click “Install/Update CD” , then click “OK”
Note: use the same way to update VW data
Step 25: after update the data of VW and Audi, you will see their LOGO as following shows. Now you are able to use Guide Function.
Step 26: Set Bluetooth Device
Firstly put Bluetooth Device into computer USB port, then the right corner of computer desktop will appear“Found New Hardware” .
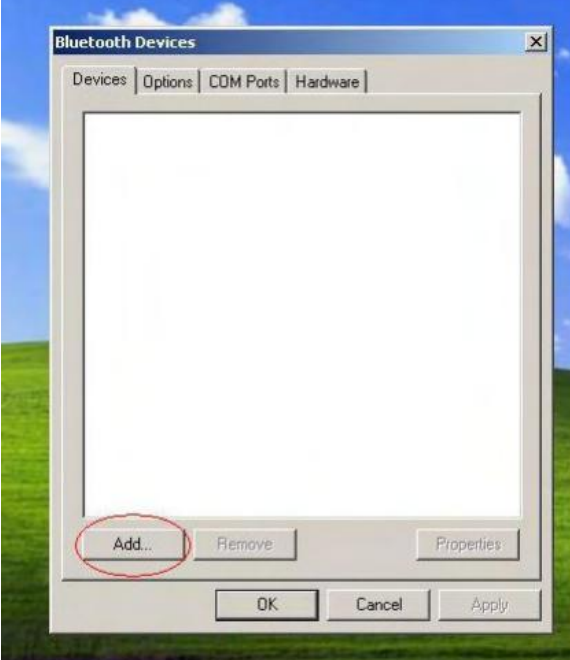
Step 27: double click the Bluetooth Icon at the right corner of your computer desktop. Then a dialog box appears as follows, then click “Add”.
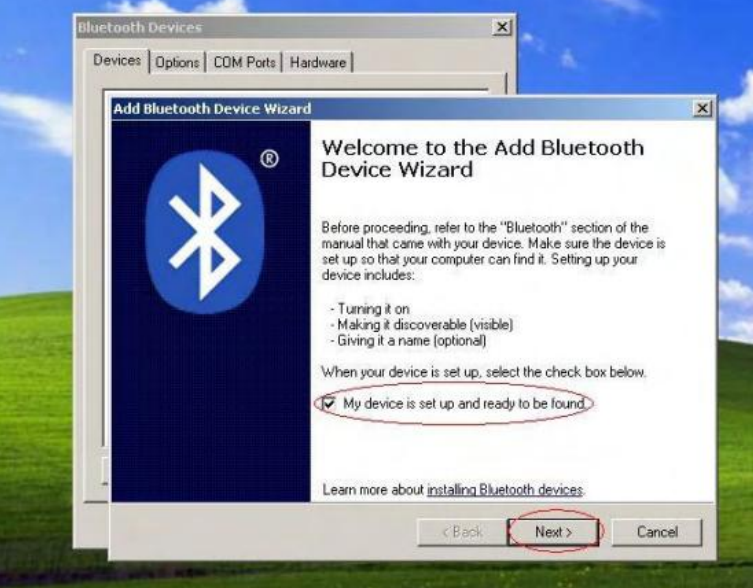
Step 28: follow the suggestion, click “Next”
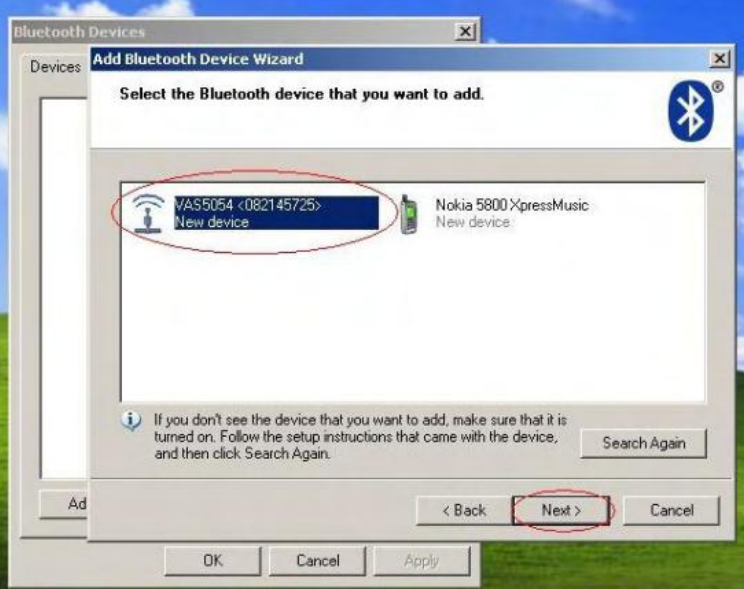
Step 29: After search the Bluetooth Device, we select “VAS5054” and click “Next”
Step 30: choose “Use the passkey found in the manual” and enter Bluetooth password, finally click “Next”
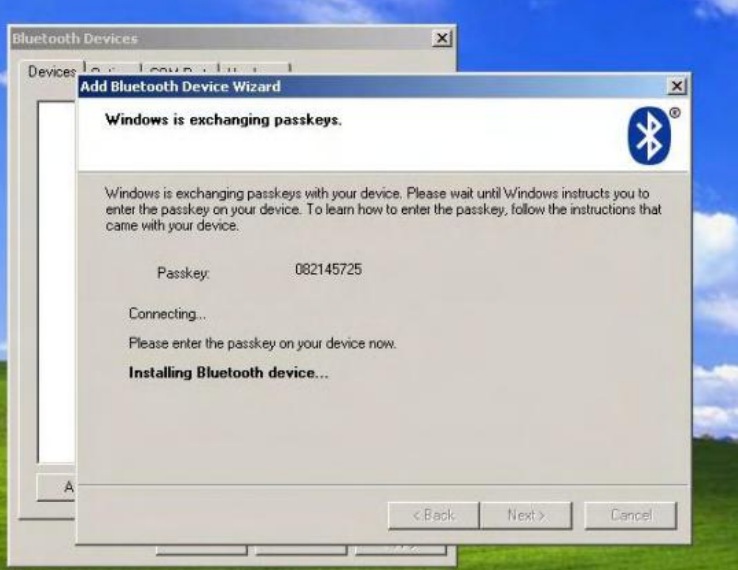
Step 31: Adding Bluetooth, please wait… .
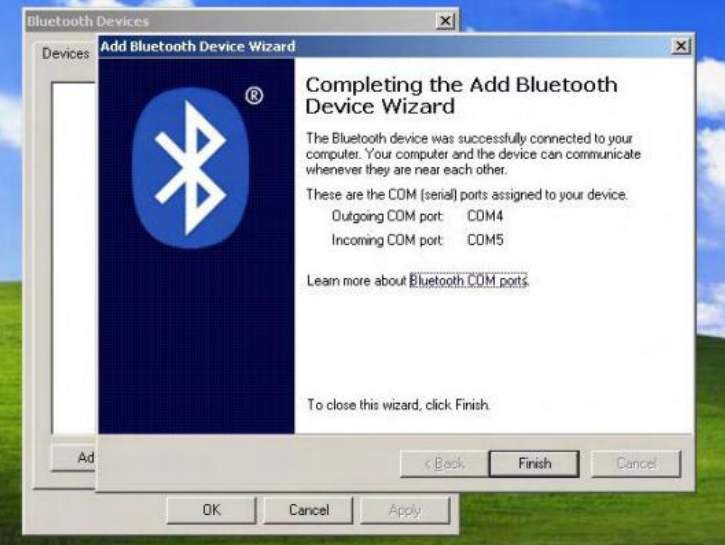
Step 32: Adding Bluetooth successfully, Outgoing COM port must be com4
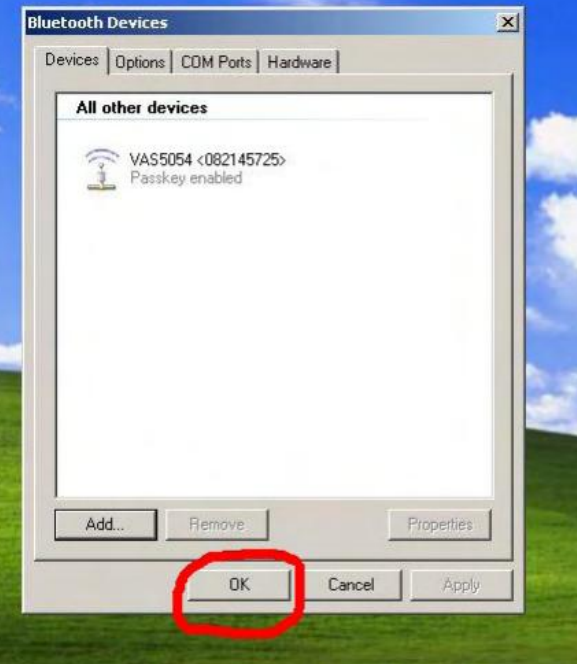
Step 33: Bluetooth Device can work well, click “OK” to close this window
Step 34: go to computer desktop to open “EDIC”
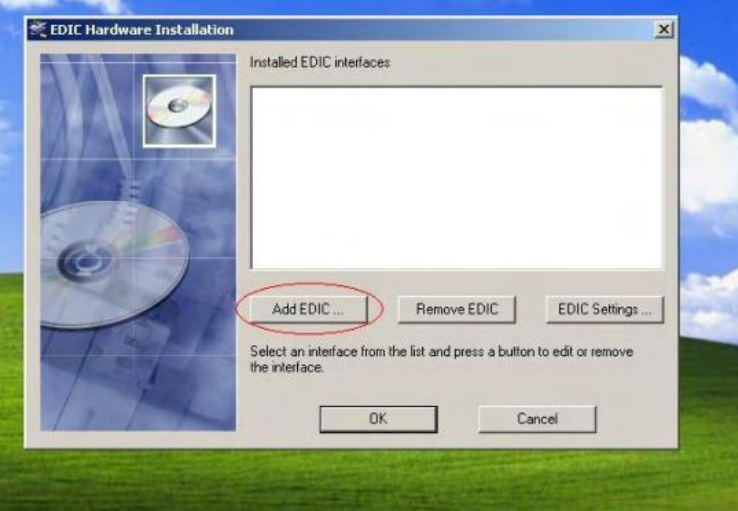
Step 35: Click “Add EDIC”
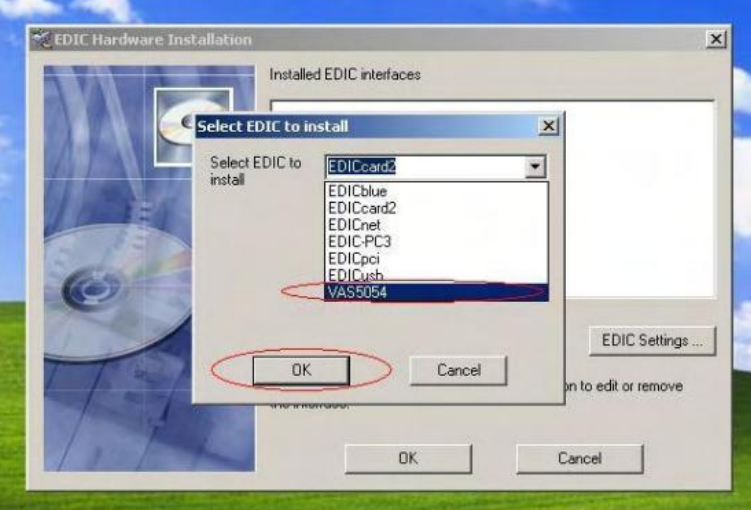
Step 36: Select EDIC to install, choose “VAS5054”
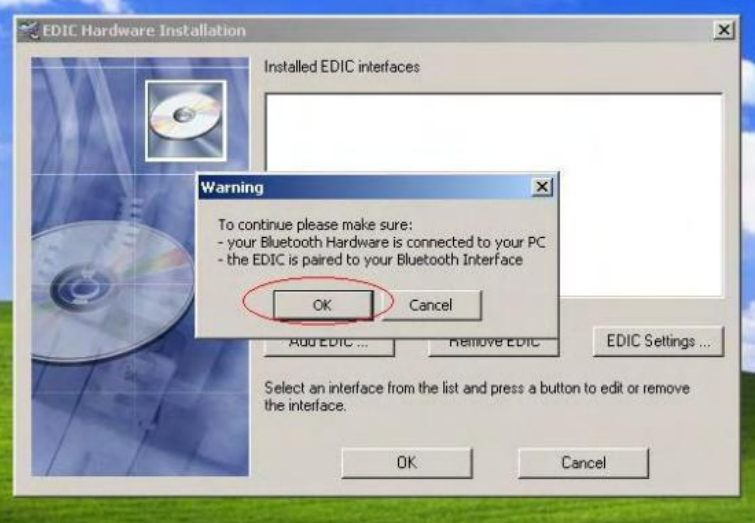
Step 37: when “Warning” window display, click “OK”
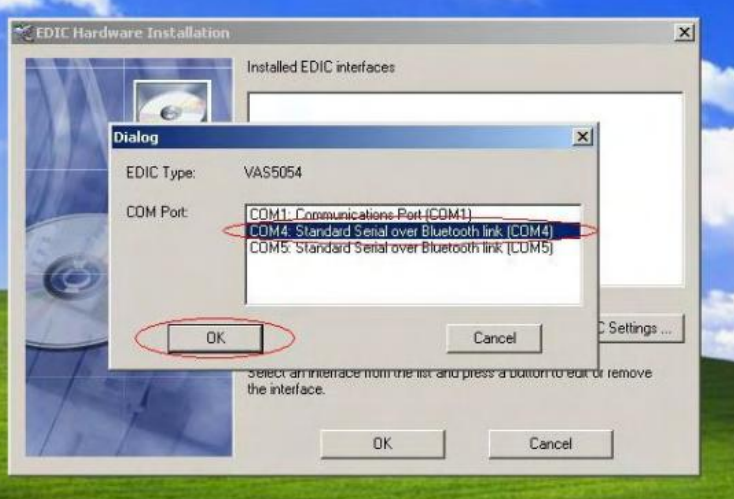
Step 38: in the window named “Dialog”, choose COM Port as COM4, then click “OK.
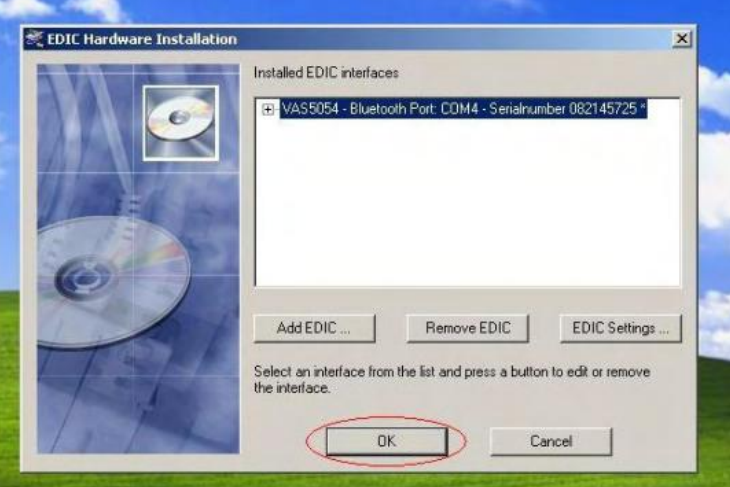
Step 39: Complete setting, click “OK” to close this window.
https://www.autonumen.com/blog/how-to-setup-vas-5054a-odis-software/ 标签:Click,setup,VAS5054A,Bluetooth,Step,computer,steps,click From: https://www.cnblogs.com/paulakeener/p/17325082.html
