Set up a cluster
On each etcd node, specify the cluster members:
TOKEN=token-01
CLUSTER_STATE=new
NAME_1=machine-1
NAME_2=machine-2
NAME_3=machine-3
HOST_1=10.240.0.17
HOST_2=10.240.0.18
HOST_3=10.240.0.19
CLUSTER=${NAME_1}=http://${HOST_1}:2380,${NAME_2}=http://${HOST_2}:2380,${NAME_3}=http://${HOST_3}:2380
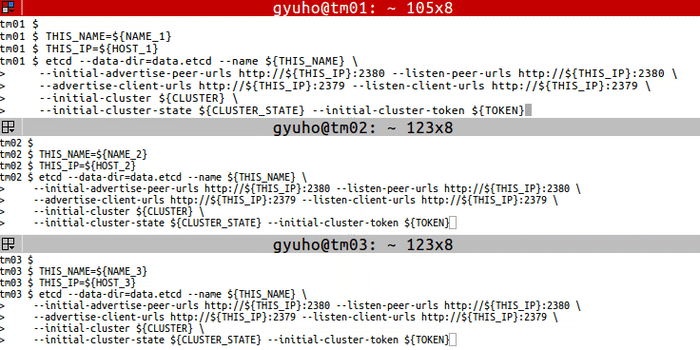
Run this on each machine:
# For machine 1
THIS_NAME=${NAME_1}
THIS_IP=${HOST_1}
etcd --data-dir=data.etcd --name ${THIS_NAME} \
	--initial-advertise-peer-urls http://${THIS_IP}:2380 --listen-peer-urls http://${THIS_IP}:2380 \
	--advertise-client-urls http://${THIS_IP}:2379 --listen-client-urls http://${THIS_IP}:2379 \
	--initial-cluster ${CLUSTER} \
	--initial-cluster-state ${CLUSTER_STATE} --initial-cluster-token ${TOKEN}

# For machine 2
THIS_NAME=${NAME_2}
THIS_IP=${HOST_2}
etcd --data-dir=data.etcd --name ${THIS_NAME} \
	--initial-advertise-peer-urls http://${THIS_IP}:2380 --listen-peer-urls http://${THIS_IP}:2380 \
	--advertise-client-urls http://${THIS_IP}:2379 --listen-client-urls http://${THIS_IP}:2379 \
	--initial-cluster ${CLUSTER} \
	--initial-cluster-state ${CLUSTER_STATE} --initial-cluster-token ${TOKEN}

# For machine 3
THIS_NAME=${NAME_3}
THIS_IP=${HOST_3}
etcd --data-dir=data.etcd --name ${THIS_NAME} \
	--initial-advertise-peer-urls http://${THIS_IP}:2380 --listen-peer-urls http://${THIS_IP}:2380 \
	--advertise-client-urls http://${THIS_IP}:2379 --listen-client-urls http://${THIS_IP}:2379 \
	--initial-cluster ${CLUSTER} \
	--initial-cluster-state ${CLUSTER_STATE} --initial-cluster-token ${TOKEN}
Or use our public discovery service:
curl https://discovery.etcd.io/new?size=3
https://discovery.etcd.io/a81b5818e67a6ea83e9d4daea5ecbc92

# grab this token
TOKEN=token-01
CLUSTER_STATE=new
NAME_1=machine-1
NAME_2=machine-2
NAME_3=machine-3
HOST_1=10.240.0.17
HOST_2=10.240.0.18
HOST_3=10.240.0.19
DISCOVERY=https://discovery.etcd.io/a81b5818e67a6ea83e9d4daea5ecbc92

THIS_NAME=${NAME_1}
THIS_IP=${HOST_1}
etcd --data-dir=data.etcd --name ${THIS_NAME} \
	--initial-advertise-peer-urls http://${THIS_IP}:2380 --listen-peer-urls http://${THIS_IP}:2380 \
	--advertise-client-urls http://${THIS_IP}:2379 --listen-client-urls http://${THIS_IP}:2379 \
	--discovery ${DISCOVERY} \
	--initial-cluster-state ${CLUSTER_STATE} --initial-cluster-token ${TOKEN}

THIS_NAME=${NAME_2}
THIS_IP=${HOST_2}
etcd --data-dir=data.etcd --name ${THIS_NAME} \
	--initial-advertise-peer-urls http://${THIS_IP}:2380 --listen-peer-urls http://${THIS_IP}:2380 \
	--advertise-client-urls http://${THIS_IP}:2379 --listen-client-urls http://${THIS_IP}:2379 \
	--discovery ${DISCOVERY} \
	--initial-cluster-state ${CLUSTER_STATE} --initial-cluster-token ${TOKEN}

THIS_NAME=${NAME_3}
THIS_IP=${HOST_3}
etcd --data-dir=data.etcd --name ${THIS_NAME} \
	--initial-advertise-peer-urls http://${THIS_IP}:2380 --listen-peer-urls http://${THIS_IP}:2380 \
	--advertise-client-urls http://${THIS_IP}:2379 --listen-client-urls http://${THIS_IP}:2379 \
	--discovery ${DISCOVERY} \
	--initial-cluster-state ${CLUSTER_STATE} --initial-cluster-token ${TOKEN}
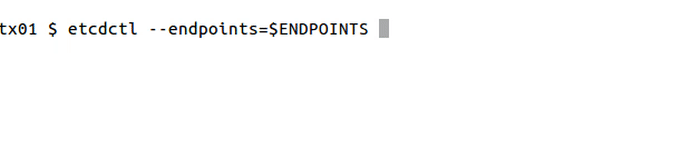
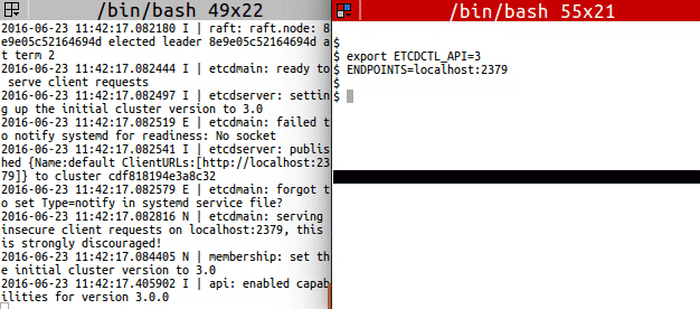
Now etcd is ready! To connect to etcd with etcdctl:
export ETCDCTL_API=3
HOST_1=10.240.0.17
HOST_2=10.240.0.18
HOST_3=10.240.0.19
ENDPOINTS=$HOST_1:2379,$HOST_2:2379,$HOST_3:2379

etcdctl --endpoints=$ENDPOINTS member list
Access etcd
put command to write:
etcdctl --endpoints=$ENDPOINTS put foo "Hello World!"
get to read from etcd:
etcdctl --endpoints=$ENDPOINTS get foo
etcdctl --endpoints=$ENDPOINTS --write-out="json" get foo
Get by prefix
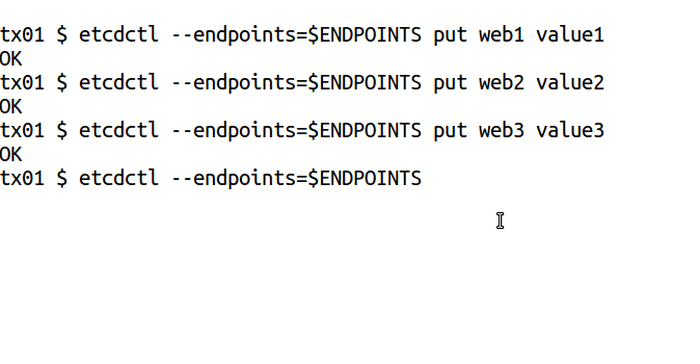
etcdctl --endpoints=$ENDPOINTS put web1 value1
etcdctl --endpoints=$ENDPOINTS put web2 value2
etcdctl --endpoints=$ENDPOINTS put web3 value3

etcdctl --endpoints=$ENDPOINTS get web --prefix
Delete
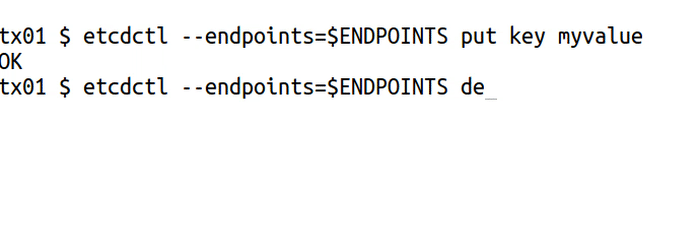
etcdctl --endpoints=$ENDPOINTS put key myvalue
etcdctl --endpoints=$ENDPOINTS del key

etcdctl --endpoints=$ENDPOINTS put k1 value1
etcdctl --endpoints=$ENDPOINTS put k2 value2
etcdctl --endpoints=$ENDPOINTS del k --prefix
Transactional write
txn to wrap multiple requests into one transaction:
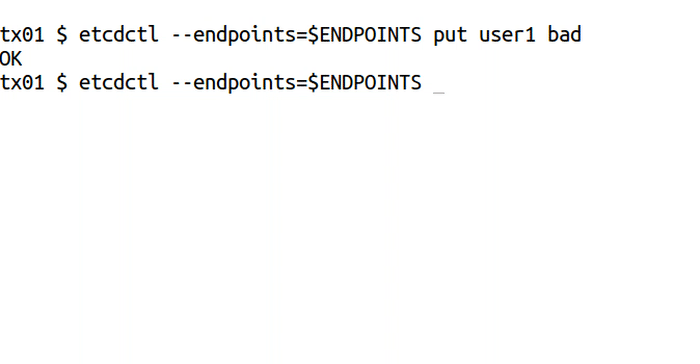
etcdctl --endpoints=$ENDPOINTS put user1 bad
etcdctl --endpoints=$ENDPOINTS txn --interactive

compares:
value("user1") = "bad"

success requests (get, put, delete):
del user1

failure requests (get, put, delete):
put user1 good
Watch
watch to get notified of future changes:
etcdctl --endpoints=$ENDPOINTS watch stock1
etcdctl --endpoints=$ENDPOINTS put stock1 1000

etcdctl --endpoints=$ENDPOINTS watch stock --prefix
etcdctl --endpoints=$ENDPOINTS put stock1 10
etcdctl --endpoints=$ENDPOINTS put stock2 20
Lease
lease to write with TTL:
etcdctl --endpoints=$ENDPOINTS lease grant 300
# lease 2be7547fbc6a5afa granted with TTL(300s)

etcdctl --endpoints=$ENDPOINTS put sample value --lease=2be7547fbc6a5afa
etcdctl --endpoints=$ENDPOINTS get sample

etcdctl --endpoints=$ENDPOINTS lease keep-alive 2be7547fbc6a5afa
etcdctl --endpoints=$ENDPOINTS lease revoke 2be7547fbc6a5afa
# or after 300 seconds
etcdctl --endpoints=$ENDPOINTS get sample
Distributed locks
lock for distributed lock:
etcdctl --endpoints=$ENDPOINTS lock mutex1

# another client with the same name blocks
etcdctl --endpoints=$ENDPOINTS lock mutex1
Elections
elect for leader election:
etcdctl --endpoints=$ENDPOINTS elect one p1

# another client with the same name blocks
etcdctl --endpoints=$ENDPOINTS elect one p2
Cluster status
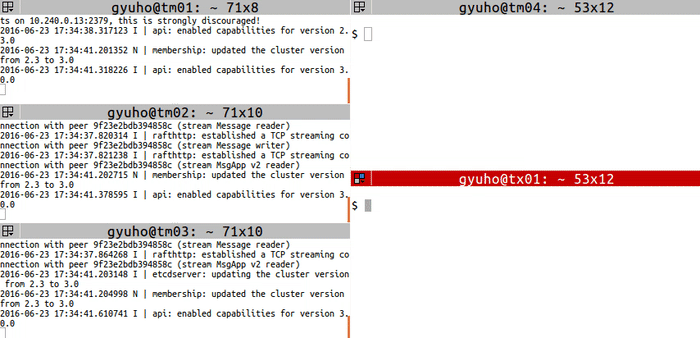
Specify the initial cluster configuration for each machine:
etcdctl --write-out=table --endpoints=$ENDPOINTS endpoint status

+------------------+------------------+---------+---------+-----------+-----------+------------+
|     ENDPOINT     |        ID        | VERSION | DB SIZE | IS LEADER | RAFT TERM | RAFT INDEX |
+------------------+------------------+---------+---------+-----------+-----------+------------+
| 10.240.0.17:2379 | 4917a7ab173fabe7 | 3.0.0   | 45 kB   | true      |         4 |      16726 |
| 10.240.0.18:2379 | 59796ba9cd1bcd72 | 3.0.0   | 45 kB   | false     |         4 |      16726 |
| 10.240.0.19:2379 | 94df724b66343e6c | 3.0.0   | 45 kB   | false     |         4 |      16726 |
+------------------+------------------+---------+---------+-----------+-----------+------------+
etcdctl --endpoints=$ENDPOINTS endpoint health

10.240.0.17:2379 is healthy: successfully committed proposal: took = 3.345431ms
10.240.0.19:2379 is healthy: successfully committed proposal: took = 3.767967ms
10.240.0.18:2379 is healthy: successfully committed proposal: took = 4.025451ms
Snapshot
snapshot to save point-in-time snapshot of etcd database:
Snapshot can only be requested from one etcd node, so --endpoints flag should contain only one endpoint.
ENDPOINTS=$HOST_1:2379
etcdctl --endpoints=$ENDPOINTS snapshot save my.db

Snapshot saved at my.db
etcdctl --write-out=table --endpoints=$ENDPOINTS snapshot status my.db

+---------+----------+------------+------------+
|  HASH   | REVISION | TOTAL KEYS | TOTAL SIZE |
+---------+----------+------------+------------+
| c55e8b8 |        9 |         13 | 25 kB      |
+---------+----------+------------+------------+
Migrate
migrate to transform etcd v2 to v3 data:
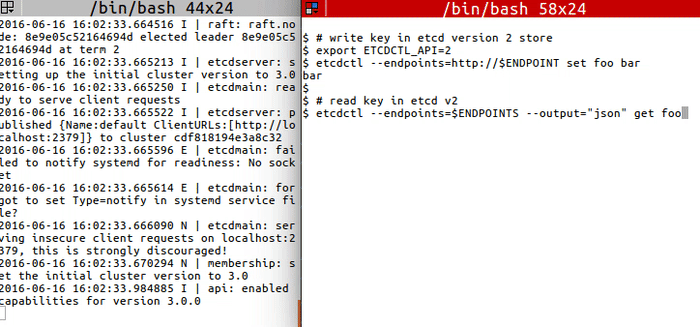
# write key in etcd version 2 store
export ETCDCTL_API=2
etcdctl --endpoints=http://$ENDPOINT set foo bar

# read key in etcd v2
etcdctl --endpoints=$ENDPOINTS --output="json" get foo

# stop etcd node to migrate, one by one

# migrate v2 data
export ETCDCTL_API=3
etcdctl --endpoints=$ENDPOINT migrate --data-dir="default.etcd" --wal-dir="default.etcd/member/wal"

# restart etcd node after migrate, one by one

# confirm that the key got migrated
etcdctl --endpoints=$ENDPOINTS get /foo
Member
member to add,remove,update membership:
# For each machine
TOKEN=my-etcd-token-1
CLUSTER_STATE=new
NAME_1=etcd-node-1
NAME_2=etcd-node-2
NAME_3=etcd-node-3
HOST_1=10.240.0.13
HOST_2=10.240.0.14
HOST_3=10.240.0.15
CLUSTER=${NAME_1}=http://${HOST_1}:2380,${NAME_2}=http://${HOST_2}:2380,${NAME_3}=http://${HOST_3}:2380

# For node 1
THIS_NAME=${NAME_1}
THIS_IP=${HOST_1}
etcd --data-dir=data.etcd --name ${THIS_NAME} \
	--initial-advertise-peer-urls http://${THIS_IP}:2380 \
	--listen-peer-urls http://${THIS_IP}:2380 \
	--advertise-client-urls http://${THIS_IP}:2379 \
	--listen-client-urls http://${THIS_IP}:2379 \
	--initial-cluster ${CLUSTER} \
	--initial-cluster-state ${CLUSTER_STATE} \
	--initial-cluster-token ${TOKEN}

# For node 2
THIS_NAME=${NAME_2}
THIS_IP=${HOST_2}
etcd --data-dir=data.etcd --name ${THIS_NAME} \
	--initial-advertise-peer-urls http://${THIS_IP}:2380 \
	--listen-peer-urls http://${THIS_IP}:2380 \
	--advertise-client-urls http://${THIS_IP}:2379 \
	--listen-client-urls http://${THIS_IP}:2379 \
	--initial-cluster ${CLUSTER} \
	--initial-cluster-state ${CLUSTER_STATE} \
	--initial-cluster-token ${TOKEN}

# For node 3
THIS_NAME=${NAME_3}
THIS_IP=${HOST_3}
etcd --data-dir=data.etcd --name ${THIS_NAME} \
	--initial-advertise-peer-urls http://${THIS_IP}:2380 \
	--listen-peer-urls http://${THIS_IP}:2380 \
	--advertise-client-urls http://${THIS_IP}:2379 \
	--listen-client-urls http://${THIS_IP}:2379 \
	--initial-cluster ${CLUSTER} \
	--initial-cluster-state ${CLUSTER_STATE} \
	--initial-cluster-token ${TOKEN}
Then replace a member with member remove and member add commands:
# get member ID
export ETCDCTL_API=3
HOST_1=10.240.0.13
HOST_2=10.240.0.14
HOST_3=10.240.0.15
etcdctl --endpoints=${HOST_1}:2379,${HOST_2}:2379,${HOST_3}:2379 member list

# remove the member
MEMBER_ID=278c654c9a6dfd3b
etcdctl --endpoints=${HOST_1}:2379,${HOST_2}:2379,${HOST_3}:2379 \
	member remove ${MEMBER_ID}

# add a new member (node 4)
export ETCDCTL_API=3
NAME_1=etcd-node-1
NAME_2=etcd-node-2
NAME_4=etcd-node-4
HOST_1=10.240.0.13
HOST_2=10.240.0.14
HOST_4=10.240.0.16 # new member
etcdctl --endpoints=${HOST_1}:2379,${HOST_2}:2379 \
	member add ${NAME_4} \
	--peer-urls=http://${HOST_4}:2380
Next, start the new member with --initial-cluster-state existing flag:
# [WARNING] If the new member starts from the same disk space,
# make sure to remove the data directory of the old member
#
# restart with 'existing' flag
TOKEN=my-etcd-token-1
CLUSTER_STATE=existing
NAME_1=etcd-node-1
NAME_2=etcd-node-2
NAME_4=etcd-node-4
HOST_1=10.240.0.13
HOST_2=10.240.0.14
HOST_4=10.240.0.16 # new member
CLUSTER=${NAME_1}=http://${HOST_1}:2380,${NAME_2}=http://${HOST_2}:2380,${NAME_4}=http://${HOST_4}:2380

THIS_NAME=${NAME_4}
THIS_IP=${HOST_4}
etcd --data-dir=data.etcd --name ${THIS_NAME} \
	--initial-advertise-peer-urls http://${THIS_IP}:2380 \
	--listen-peer-urls http://${THIS_IP}:2380 \
	--advertise-client-urls http://${THIS_IP}:2379 \
	--listen-client-urls http://${THIS_IP}:2379 \
	--initial-cluster ${CLUSTER} \
	--initial-cluster-state ${CLUSTER_STATE} \
	--initial-cluster-token ${TOKEN}
Auth
auth,user,role for authentication:
export ETCDCTL_API=3
ENDPOINTS=localhost:2379

etcdctl --endpoints=${ENDPOINTS} role add root
etcdctl --endpoints=${ENDPOINTS} role grant-permission root readwrite foo
etcdctl --endpoints=${ENDPOINTS} role get root

etcdctl --endpoints=${ENDPOINTS} user add root
etcdctl --endpoints=${ENDPOINTS} user grant-role root root
etcdctl --endpoints=${ENDPOINTS} user get root

etcdctl --endpoints=${ENDPOINTS} auth enable
# now all client requests go through auth

etcdctl --endpoints=${ENDPOINTS} --user=root:123 put foo bar
etcdctl --endpoints=${ENDPOINTS} get foo
etcdctl --endpoints=${ENDPOINTS} --user=root:123 get foo
etcdctl --endpoints=${ENDPOINTS} --user=root:123 get foo1