目录
一、概述
Presto是一个Facebook开源的分布式SQL查询引擎,适用于交互式分析查询,数据量支持GB到PB字节。客户在使用Presto的时候发现单个集群不能满足业务需求,而建立多个Presto集群之后,如何在集群间调度任务就成为一个问题。在Presto中,一个Query执行周期内需要客户端和服务端进行多次的HTTP请求,在多集群模式下,如何保证同一个Query的请求都分发到同一个集群呢?
Lyft为解决这个问题而开发了presto-gateway这个工具,并将它开源出来。(https://github.com/lyft/presto-gateway)
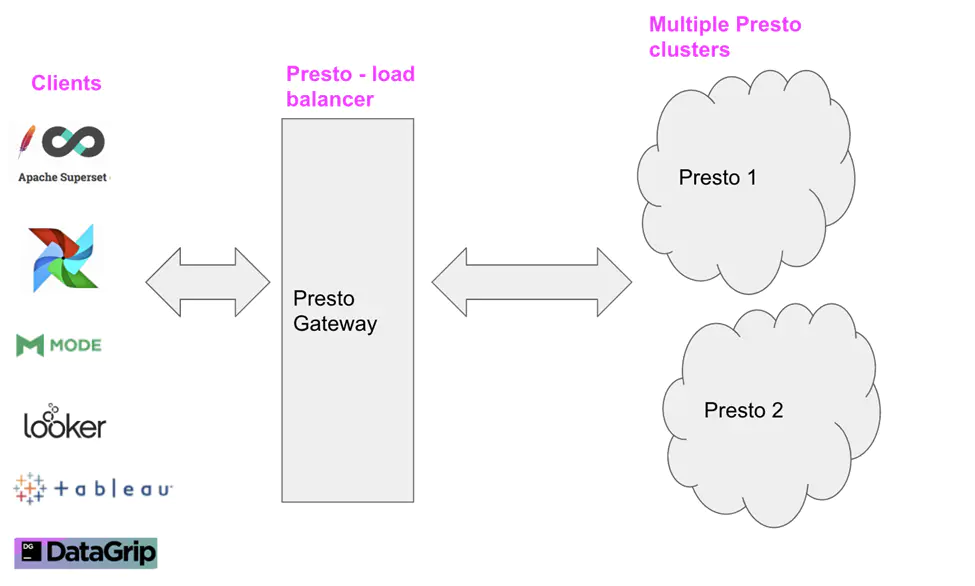
Presto-gateway 是在多个Presto集群前的一个有状态Load-balancer,Proxy和Router,它提供了透明的访问方法。如下图:(内容来自于https://eng.lyft.com/presto-infrastructure-at-lyft-b10adb9db01)
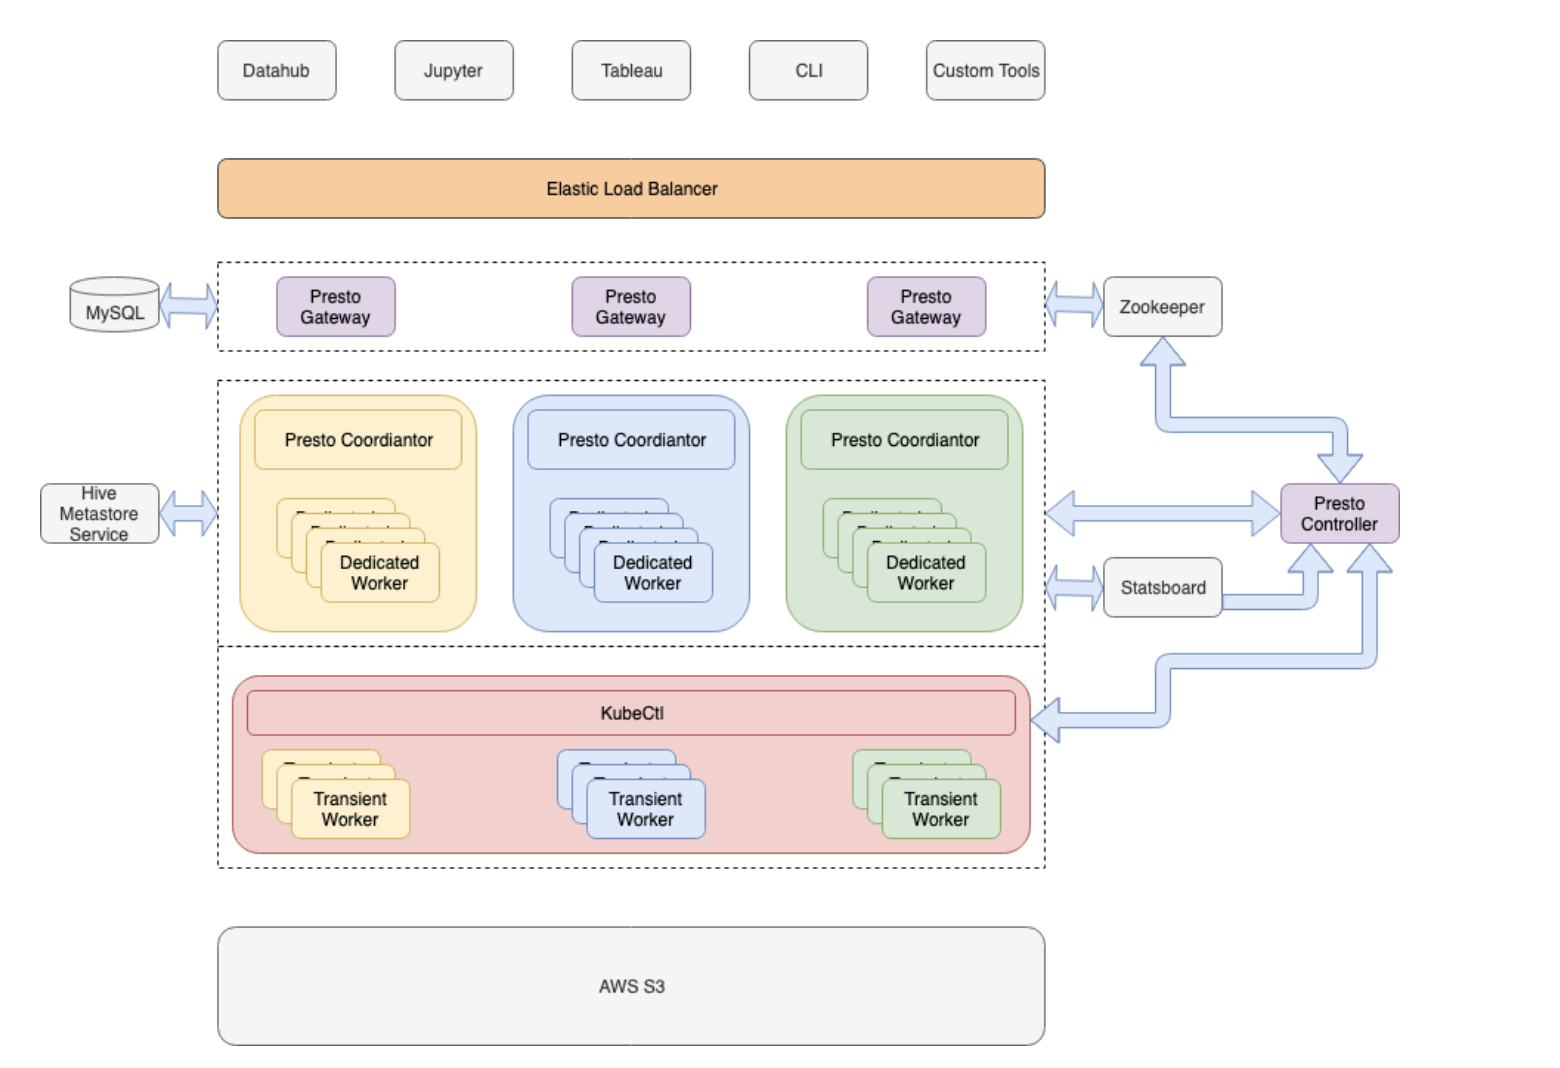
pinterest 架构:
参考资料:
Lyft资料:https://eng.lyft.com/presto-infrastructure-at-lyft-b10adb9db01pinterest资料:https://medium.com/pinterest-engineering/presto-at-pinterest-a8bda7515e52
【温馨提示】如需获取文章中使用到的镜像和部署包,可关注我的公众号【大数据与云原生技术分享】回复【
pgw】即可获取。如上面两个链接打不开,则需要借助”梯子“安全上网,”梯子“在公众号上也有推荐哦,回复【ai】即可获取推荐。
二、部署 mysql
Presto-gateway 使用 MySQL 来记录后端Presto集群和查询历史,所以我们需要先准备一台MySQL服务器,自建或者托管的RDS均可。这里使用mysql on k8s快速部署,不清楚的可以参考我这篇文章:【云原生】MySQL on k8s 环境部署
# 1、下载安装包,注意修改镜像地址
git clone https://gitee.com/hadoop-bigdata/mysql-on-k8s.git

# 2、先准备好镜像
docker pull docker.io/bitnami/mysql:8.0.30-debian-11-r15
docker tag docker.io/bitnami/mysql:8.0.30-debian-11-r15 myharbor.com/bigdata/mysql:8.0.30-debian-11-r15
# mysqld-exporter
docker pull docker.io/bitnami/mysqld-exporter:0.14.0-debian-11-r33
docker tag docker.io/bitnami/mysqld-exporter:0.14.0-debian-11-r33 myharbor.com/bigdata/mysqld-exporter:0.14.0-debian-11-r33

# 3、安装helm
wget https://get.helm.sh/helm-v3.9.4-linux-amd64.tar.gz
tar -xf helm-v3.9.4-linux-amd64.tar.gz
ln -s /opt/helm/linux-amd64/helm /usr/local/bin/helm

# 4、创建挂载目录,可以修改chat包里配置文件修改路径
mkdir -p /opt/bigdata/servers/mysql/data/data1

# 5、安装mysql
helm install mysql ./mysql-on-k8s -n mysql --create-namespace


# 5、卸载(不执行)
helm uninstall mysql -n mysql
kubectl delete pod -n mysql `kubectl get pod -n mysql |awk 'NR>1{print $1}'` --force
kubectl patch ns mysql -p '{"metadata":{"finalizers":null}}'
kubectl delete ns mysql --force
创建 presto-gateway 库
# 获取mysql root密码,一般企业里使用非root用户给应用使用。这里为了方便,就直接用root了。
MYSQL_ROOT_PASSWORD=$(kubectl get secret --namespace mysql mysql -o jsonpath="{.data.mysql-root-password}" | base64 -d)

# 登录mysql
kubectl exec -it mysql-primary-0 -n mysql -- mysql -h mysql-primary.mysql.svc.cluster.local -uroot -p"$MYSQL_ROOT_PASSWORD"
三、部署多套 presto 集群
这里部署也部署在k8s上,有不清楚的可以参考我之前的文章:【云原生】Presto/Trino on k8s 环境部署
trino 官网:https://trino.io/docs/current/installation/kubernetes.html
# 安装
#helm install trino ./presto-on-k8s -n presto --create-namespace
# 更新
#helm upgrade trino ./presto -n presto
# 也可以通过官方提供的chat部署,如下:
# docker pull trinodb/trino:latest,当然最新版本410,可能下载会很慢,关注我公众号【大数据与云原生技术分享】可获取离线镜像包。
helm repo add trino https://trinodb.github.io/charts
# 下载离线包
docker pull trino/trino && tar -xf trino-0.10.0.tgz
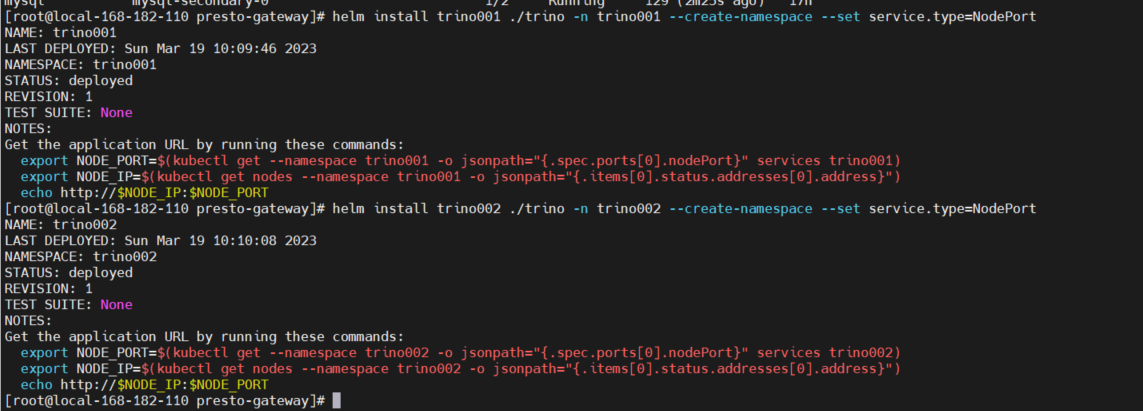
helm install trino001 ./trino -n trino001 --create-namespace --set service.type=NodePort
helm install trino002 ./trino -n trino002 --create-namespace --set service.type=NodePort
# 卸载
helm uninstall trino001 -n trino001
helm uninstall trino002 -n trino002
NOTES
[root@local-168-182-110 presto-gateway]# helm install trino001 ./trino -n trino001 --create-namespace --set service.type=NodePort
NAME: trino001
LAST DEPLOYED: Sun Mar 19 10:09:46 2023
NAMESPACE: trino001
STATUS: deployed
REVISION: 1
TEST SUITE: None
NOTES:
Get the application URL by running these commands:
  export NODE_PORT=$(kubectl get --namespace trino001 -o jsonpath="{.spec.ports[0].nodePort}" services trino001)
  export NODE_IP=$(kubectl get nodes --namespace trino001 -o jsonpath="{.items[0].status.addresses[0].address}")
  echo http://$NODE_IP:$NODE_PORT
[root@local-168-182-110 presto-gateway]# helm install trino002 ./trino -n trino002 --create-namespace --set service.type=NodePort
NAME: trino002
LAST DEPLOYED: Sun Mar 19 10:10:08 2023
NAMESPACE: trino002
STATUS: deployed
REVISION: 1
TEST SUITE: None
NOTES:
Get the application URL by running these commands:
  export NODE_PORT=$(kubectl get --namespace trino002 -o jsonpath="{.spec.ports[0].nodePort}" services trino002)
  export NODE_IP=$(kubectl get nodes --namespace trino002 -o jsonpath="{.items[0].status.addresses[0].address}")
  echo http://$NODE_IP:$NODE_PORT
[root@local-168-182-110 presto-gateway]#
查看
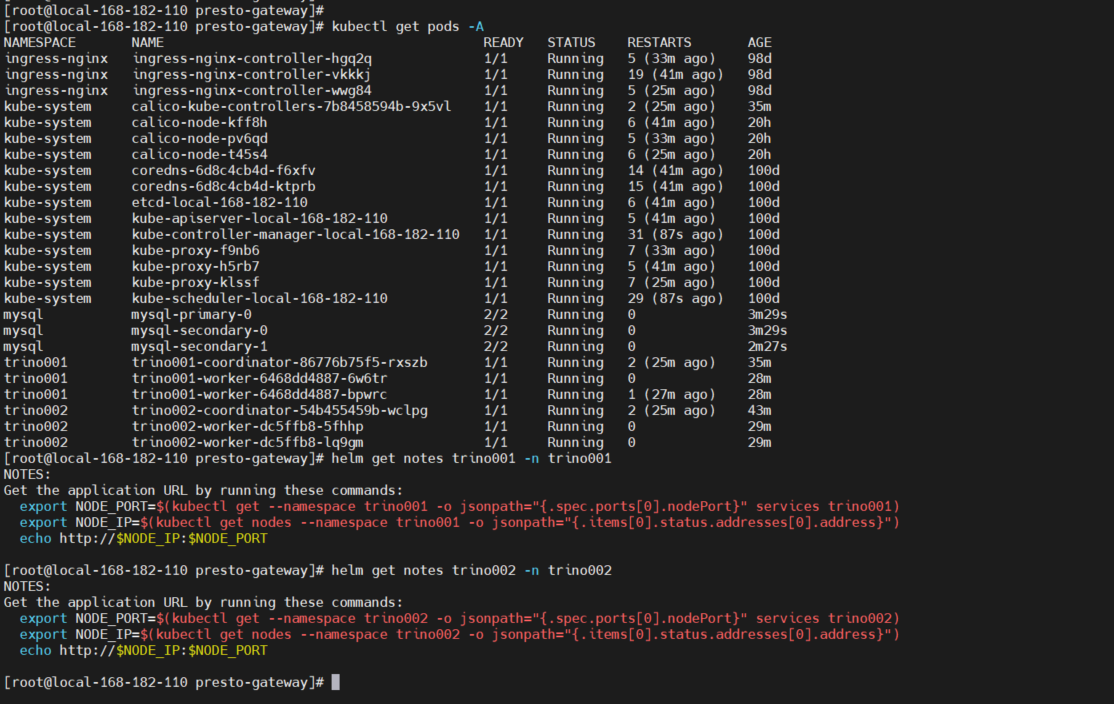
kubectl get pods -A
helm get notes trino001 -n trino001
helm get notes trino002 -n trino002
export NODE_PORT=$(kubectl get --namespace trino001 -o jsonpath="{.spec.ports[0].nodePort}" services trino001)
  export NODE_IP=$(kubectl get nodes --namespace trino001 -o jsonpath="{.items[0].status.addresses[0].address}")

https://$NODE_IP:$NODE_PORT
四、部署 presto-gateway 与简单使用
1)下载
git clone https://github.com/lyft/presto-gateway.git
2)Maven 编译
# 安装maven
wget https://dlcdn.apache.org/maven/maven-3/3.9.1/binaries/apache-maven-3.9.1-bin.tar.gz --no-check-certificate
tar -zvxf apache-maven-3.9.1-bin.tar.gz
ln -s `pwd`/apache-maven-3.9.1/bin/mvn /sbin/mvn

# 安装jdk
tar -xf jdk-8u212-linux-x64.tar.gz

# /etc/profile文件中追加如下内容:
echo "export JAVA_HOME=`pwd`/jdk1.8.0_212" >> /etc/profile
echo "export PATH=\$JAVA_HOME/bin:$PATH" >> /etc/profile
echo "export CLASSPATH=.:\$JAVA_HOME/lib/dt.jar:\$JAVA_HOME/lib/tools.jar" >> /etc/profile
# 加载生效
source /etc/profile

# 开始编译
cd presto-gateway
mvn clean install
3)修改配置
先更改 gateway-ha 目录下配置文件 gateway-ha-config.yml,先查询mysql信息,登录mysql创建数据库
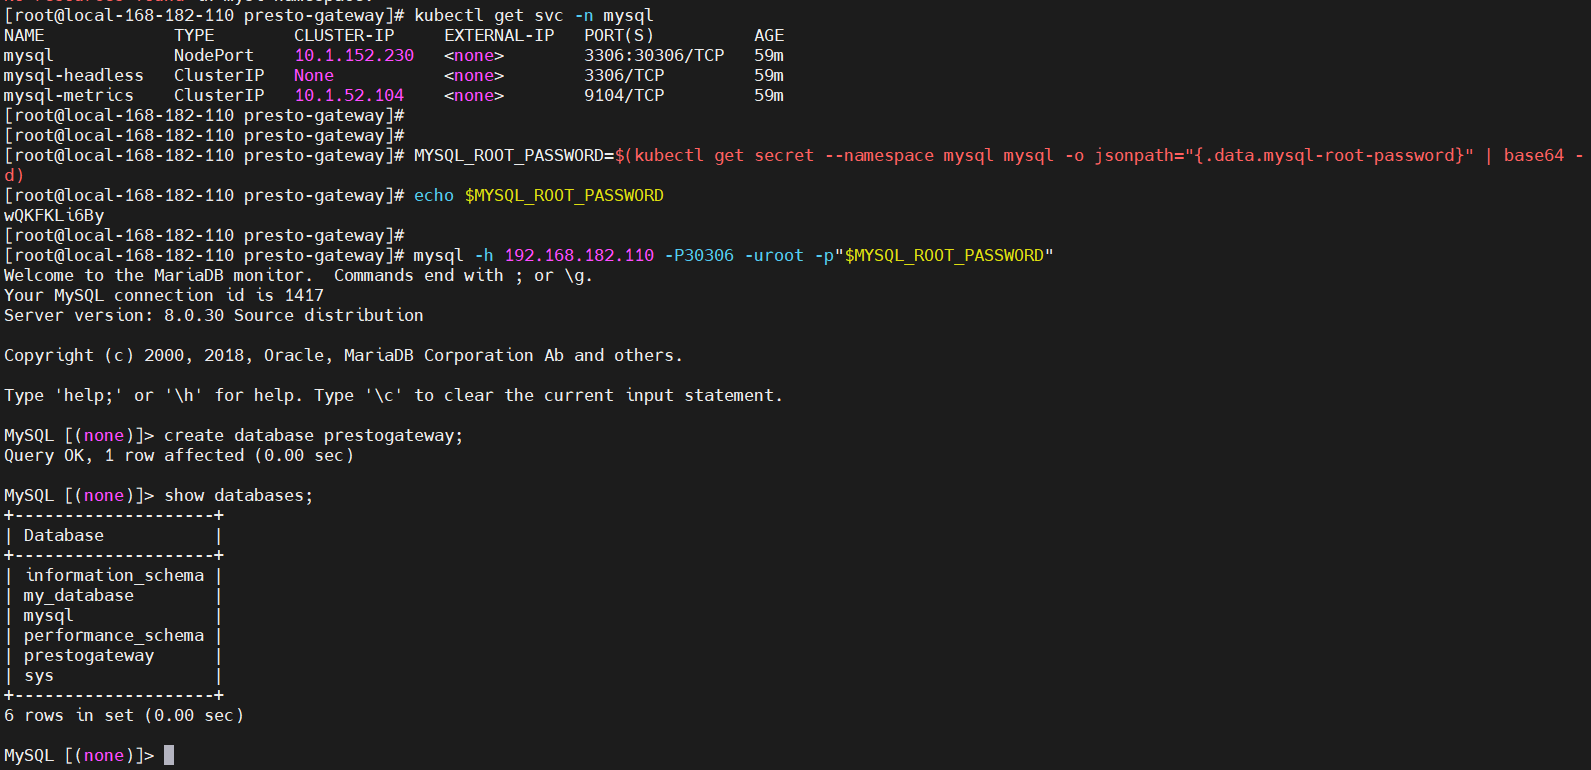
# 获取对外端口
kubectl get svc -n mysql

# 获取mysql root密码
MYSQL_ROOT_PASSWORD=$(kubectl get secret --namespace mysql mysql -o jsonpath="{.data.mysql-root-password}" | base64 -d)
echo $MYSQL_ROOT_PASSWORD

# 登录mysql
mysql -h 192.168.182.110 -P30306 -uroot -p"$MYSQL_ROOT_PASSWORD"
# 创建库
create database prestogateway;
# 查看
show databases;
修改配置 gateway-ha/gateway-ha-config.yml
dataStore:
  jdbcUrl: jdbc:mysql://192.168.182.110:30306/prestogateway
  user: root
  password: wQKFKLi6By
  driver: com.mysql.cj.jdbc.Driver
4)sql 初始化
# 获取mysql root密码
MYSQL_ROOT_PASSWORD=$(kubectl get secret --namespace mysql mysql -o jsonpath="{.data.mysql-root-password}" | base64 -d)

# 登录mysql
mysql -h 192.168.182.110 -P30306 -uroot -p"$MYSQL_ROOT_PASSWORD"

use prestogateway;

source ./gateway-ha/target/classes/gateway-ha-persistence.sql;
5)启动服务
# check检查配置
java -jar ./gateway-ha/target/gateway-ha-1.9.5-jar-with-dependencies.jar check ./gateway-ha/gateway-ha-config.yml
# 启动服务
nohup java -jar ./gateway-ha/target/gateway-ha-1.9.5-jar-with-dependencies.jar server ./gateway-ha/gateway-ha-config.yml &
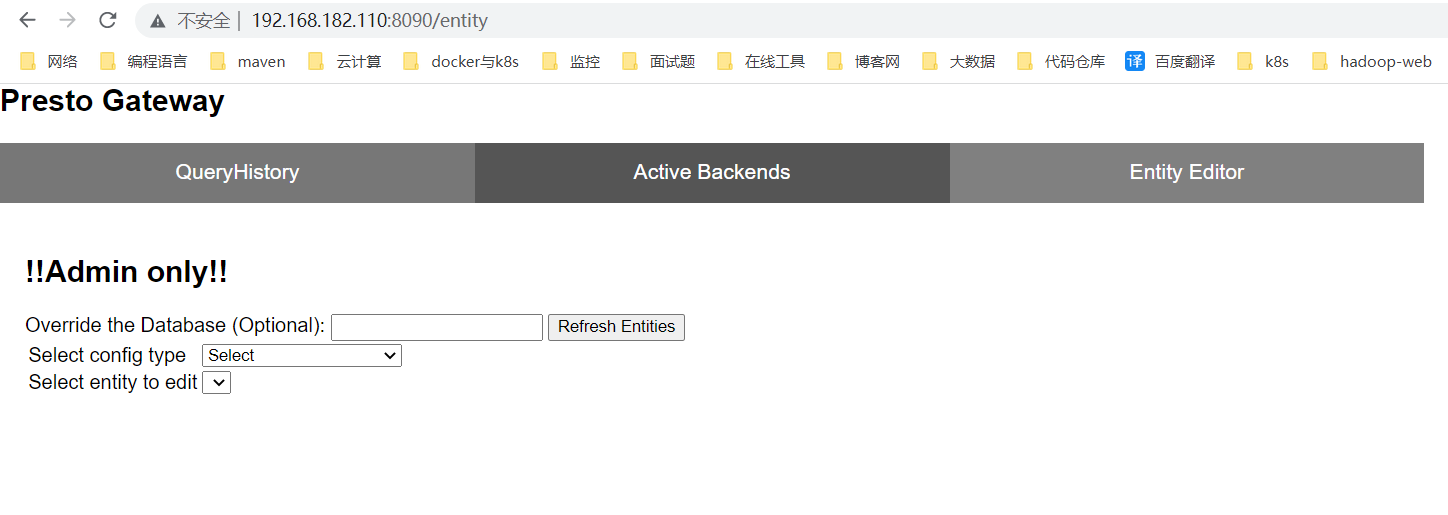
web 访问:http://<server-ip>:8090/entity
6)增加和修改presto集群
可以通过两种方式来将Presto集群添加进来,如果名字相同,则可以更新现有信息。
1、通过CURL命令
获取presto对我端口
kubectl get svc -n trino001
kubectl get svc -n trino002
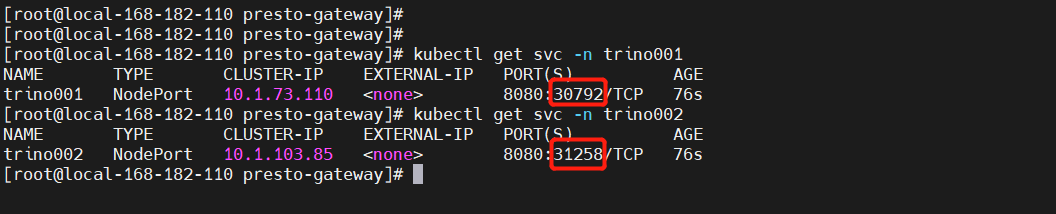
# 默认调度(routingGroup=adhoc)
curl -X POST http://localhost:8080/entity?entityType=GATEWAY_BACKEND \
 -d '{  "name": "adhoc001",
        "proxyTo": "http://192.168.182.110:30792",
        "active": true,
        "routingGroup": "adhoc"
    }'
curl -X POST http://localhost:8080/entity?entityType=GATEWAY_BACKEND \
 -d '{  "name": "adhoc002",
        "proxyTo": "http://192.168.182.110:31258",
        "active": true,
        "routingGroup": "adhoc"
    }'

# 配置presto1,presto2
curl -X POST http://localhost:8080/entity?entityType=GATEWAY_BACKEND \
 -d '{  "name": "presto1",
        "proxyTo": "http://192.168.182.110:30792",
        "active": true,
        "routingGroup": "presto1"
    }'

curl -X POST http://localhost:8080/entity?entityType=GATEWAY_BACKEND \
 -d '{  "name": "presto2",
        "proxyTo": "http://192.168.182.110:31258",
        "active": true,
        "routingGroup": "presto2"
    }'
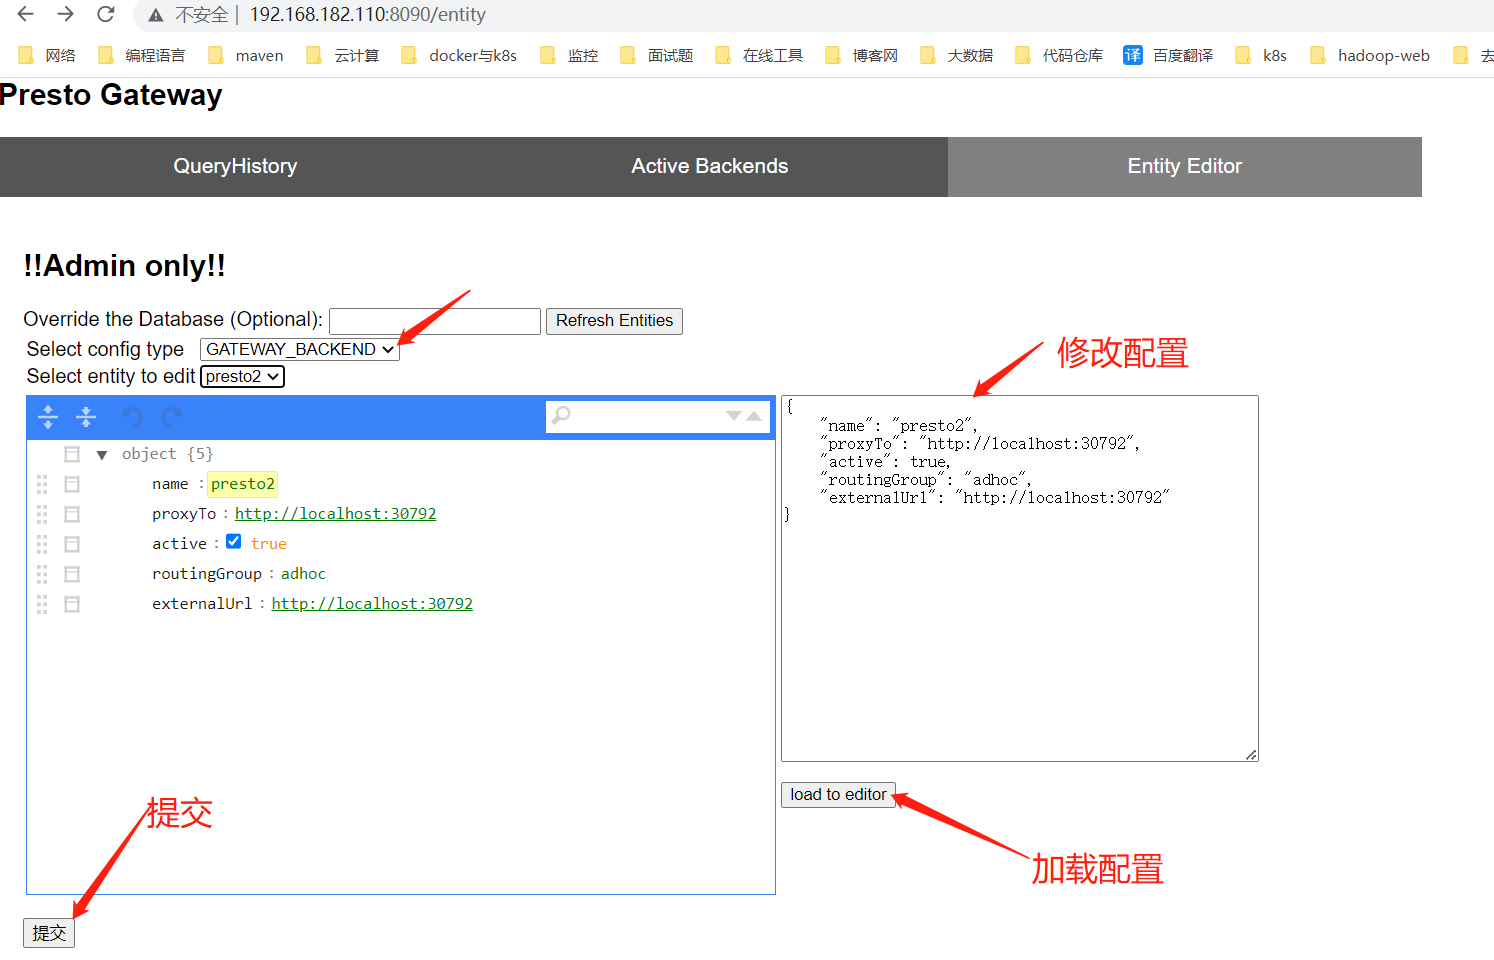
2、通过Web UI
地址:http://<server-ip>:8090/entity
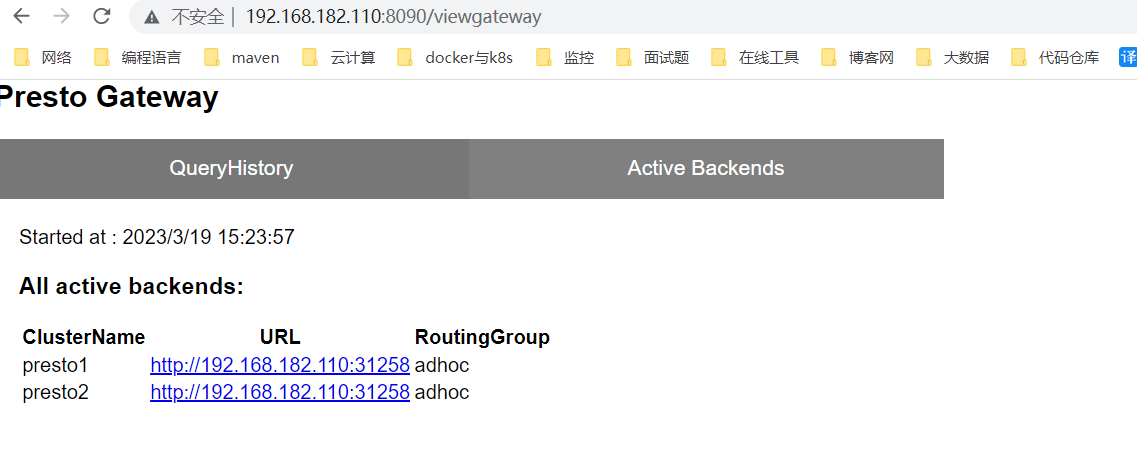
7)presto集群列表
curl -X GET http://localhost:8080/gateway/backend/active | python -m json.tool
8)上线和下线presto集群
# 下线
curl -X POST http://localhost:8080/gateway/backend/deactivate/presto2

# 上线
curl -X POST http://localhost:8080/gateway/backend/activate/presto2
9)删除presto集群
curl -X POST http://localhost:8080/gateway/backend/deactivate/presto1
10)路由规则
Presto-gateway提供了用户可以自定义路由规则的功能来重定向请求到不同集群,这个规则可以通过修改配置文件(gateway-ha/gateway-ha-config.yml)来设置。
routingRules:
  rulesEngineEnabled: true
  rulesConfigPath:"src/test/resources/rules/routing_rules.yml" # replace with path toyour rules config file
- 默认情况下(默认
rulesEngineEnabled是false),presto-gateway读取X-Trino-Routing-Group请求头来路由请求。如果没有指定这个报头,请求被发送到默认路由组(adhoc)。 - 路由规则引擎根据请求信息(如任何请求头)编写自定义逻辑来路由请求。路由规则与
presto-gateway应用程序代码分离到配置文件中,允许动态更改规则。
1、定义路由规则
为了更好的触发路由规则,我们使用了easy-rules(https://github.com/j-easy/easy-rules/wiki/defining-rules#composite-rules) 引擎。这些规则应该存储在YAML文件中。规则由name、description、condition和actions(操作列表)组成。如果特定规则的条件计算结果为true,则触发其动作。配置文件:src/test/resources/rules/routing_rules.yml
---
name: "presto1"
description: "if query from airflow, route to etl group"
priority: 0
condition: "request.getHeader(\"X-Trino-Source\") == \"presto1\""
actions:
  - "result.put(\"routingGroup\", \"presto1\")"
---
name: "presto2"
description: "if query from airflow with special label, route to etl-special group"

priority: 1
condition: "request.getHeader(\"X-Trino-Source\") == \"presto2\""
actions:
  - "result.put(\"routingGroup\", \"presto2\")"
【注意】请求头可以通过
HttpServletRequest或者nginx转发设置。每个规则必须至少有一个action,表示前面的condition满足后,要执行的步骤。例如上面的cetus_adhoc_search,定义表明如果请求来源于cetus,就转发路由给adhoc presto集群组处理。
优先级(priority):整数越低,优先级越高。如果不指定优先级,则默认为INT_MAX。
五、测试验证
1)下载 presto 客户端
# cli 客户端
wget https://repo1.maven.org/maven2/io/trino/trino-cli/410/trino-cli-410-executable.jar
chmod +x trino-cli-410-executable.jar

# jdbc客户端
wget https://repo1.maven.org/maven2/io/trino/trino-jdbc/410/trino-jdbc-410.jar
chmod +x trino-jdbc-410.jar
2)示例演示
1、通过CLI客户端访问presto-gateway
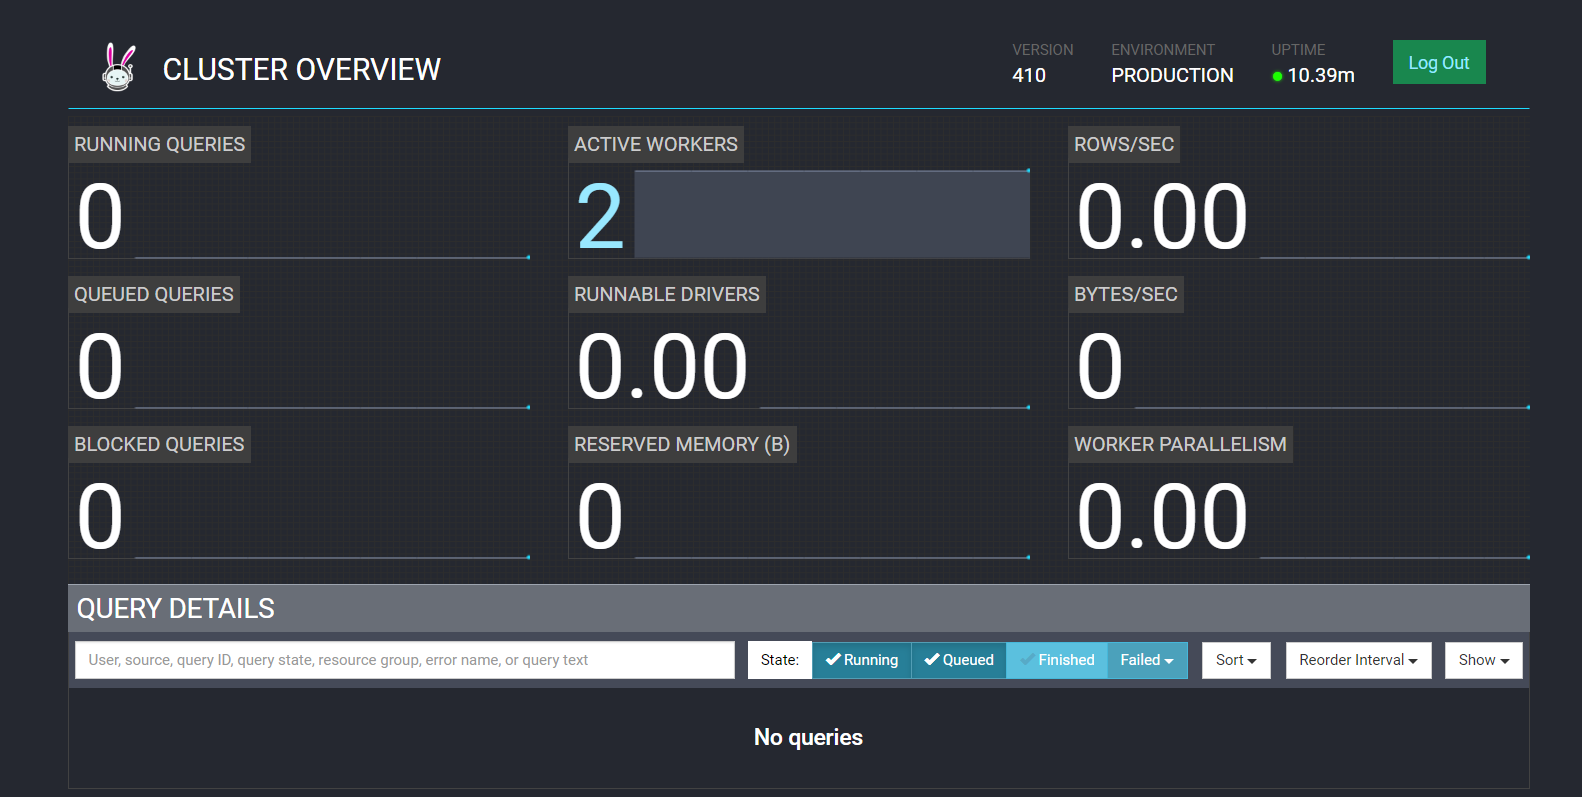
通过presto-gateway去查询presto集群信息
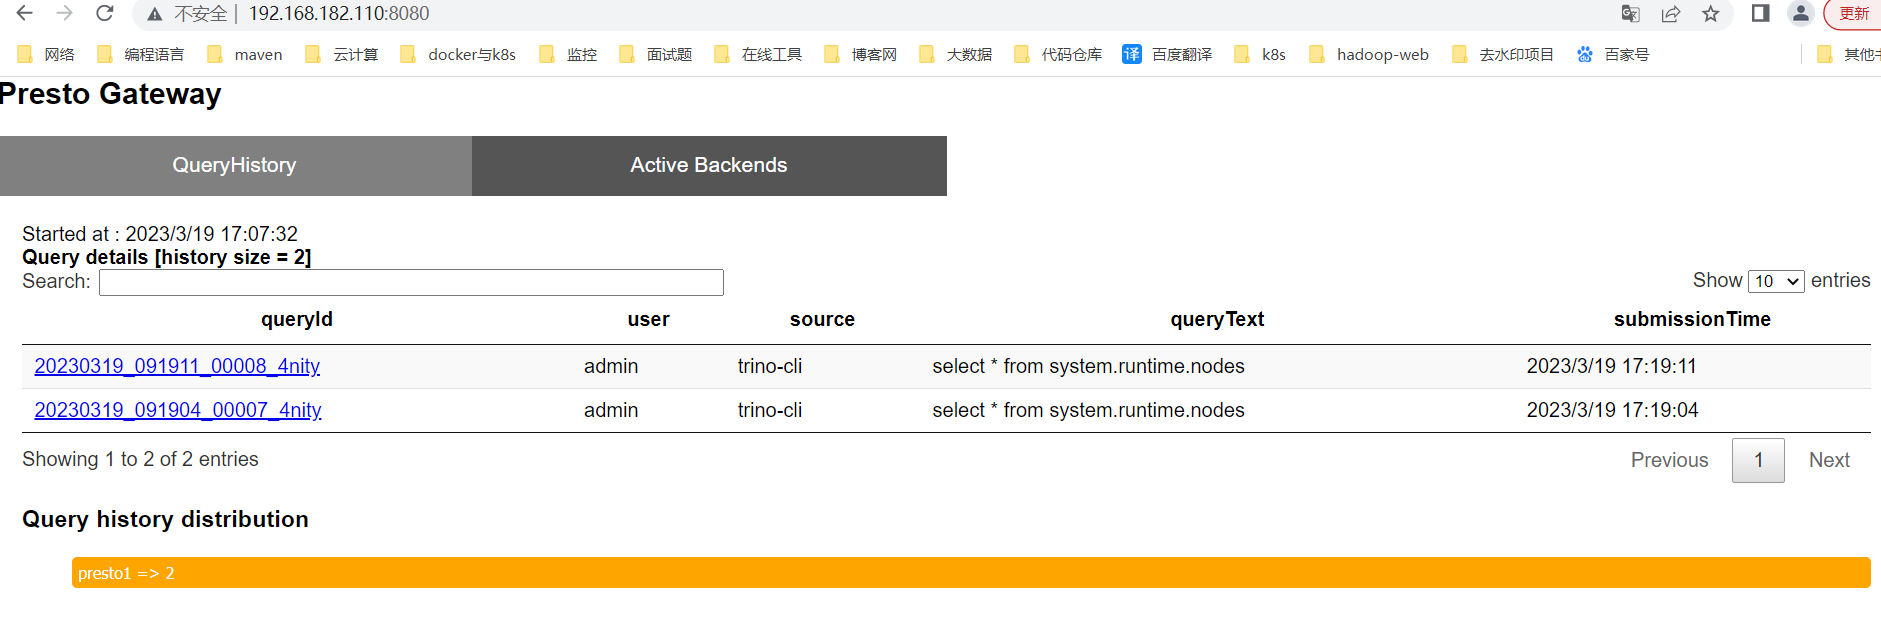
# https://gatewayhost:8080
./trino-cli-410-executable.jar --server http://192.168.182.110:8080  --user=admin --execute "select * from system.runtime.nodes;"


2、通过上下线来切换调用的集群
# 下线
curl -X POST http://localhost:8080/gateway/backend/deactivate/presto1

# 上线
curl -X POST http://localhost:8080/gateway/backend/activate/presto1
当然也可以通过添加header的方式进行定点调用。
【注意】如果未指定路由规则,则默认调度到adhoc,如果adhoc对应多个presto集群,则会负载均衡,多个集群会轮询调用。
Presto-gateway 讲解与实战操作就先到这里了,有任何疑问欢迎给我留言哦,后续会持续更新相关技术文章,有任何疑问欢迎留言或私信,也可以关注我的公众号【大数据与云原生技术分享】深入技术交流或私信咨询问题~
