Vue04
12.Vue2 脚手架模块化开发
目前开发模式的问题:
- 开发效率低
- 不够规范
- 维护和升级,可读性比较差
12.1基本介绍
12.2环境配置,搭建项目
-
搭建Vue脚手架工程,需要用到NPM(node package manager),npm是随node.js安装的一款包管理工具,类似Maven。所以我们需要先安装Node
-
为了更好兼容,这里我们安装node.js10.16.3,后面使用Vue3的脚手架工程搭建时再对Node升级
如果以前安装过node.js,为防止版本冲突,先卸载
-
下载node.js10.16.3 地址:https://nodejs.org/en/blog/release/v10.16.3/

-
安装node.js10.16.3,直接点击下一步即可
-
在命令窗口中输入命令
node -v验证是否安装成功C:\WINDOWS\system32>node -v v10.16.3 -
先删除以前的cli版本(不论之前有没有下载过):
npm uninstall vue-cli -gC:\WINDOWS\system32>npm uninstall vue-cli -g up to date in 0.032s -
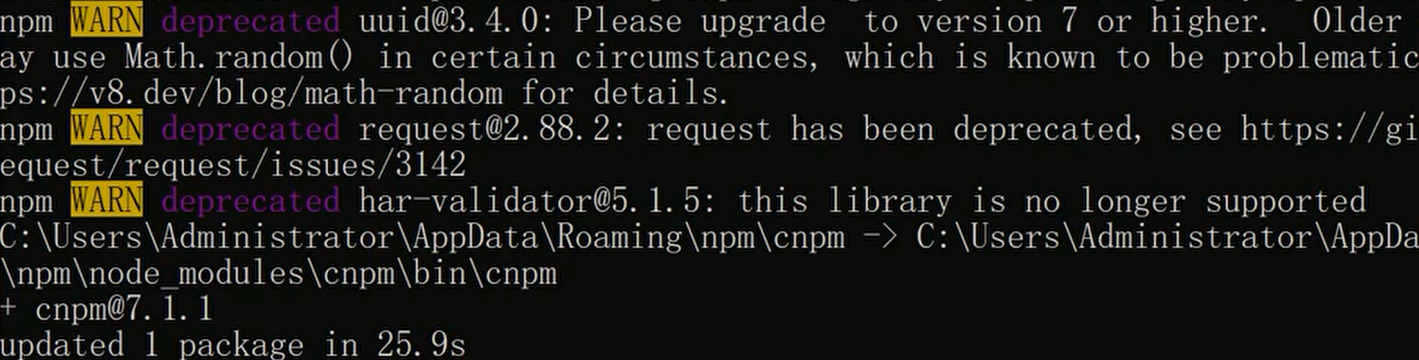
安装淘宝镜像-cnpm:
npm install -g cnpm --registry=https://registry.npm.taobao.orgnpm和cnpm的区别:
- 两者只是node中包管理器的不同,都可以使用
- npm是node官方的包管理器。cnpm淘宝定制的(gzip压缩支持)命令行工具,代替默认的npm
- 如果因为网络原因无法使用npm下载,就可以使用cnpm
- npm和cnpm只是下载的地址不同,cnpm从国内下载
-
安装webpack和webpack-cli,指令:
npm install [email protected] webpack-cli -Dwebpack是一个打包工具
-
安装
cnpm install -g @vue/[email protected] -
确认Vue-Cli版本
vue -V
-
在自定义的目录下,创建目录vue_project,并cmd到该目录
-
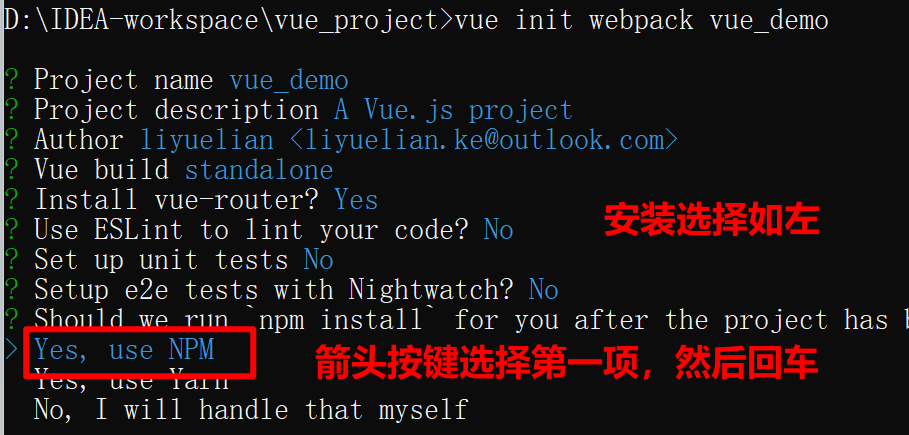
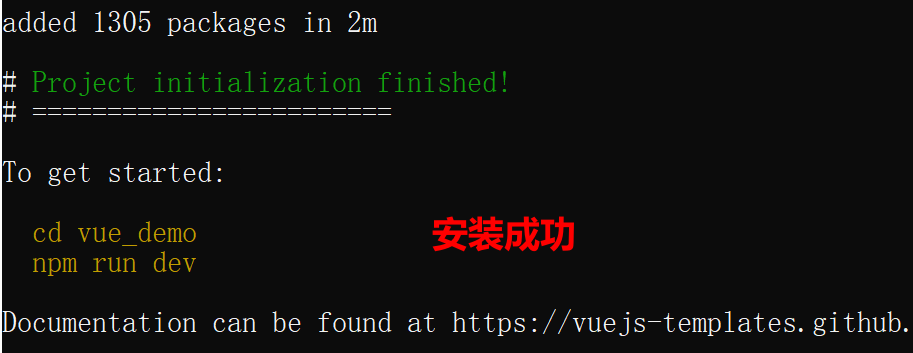
使用指令
vue init webpack 项目名来进行项目创建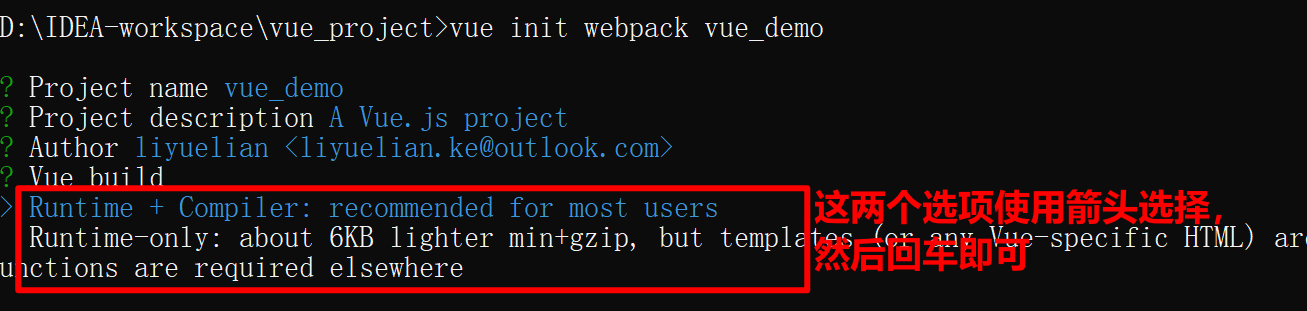
-
按照上图指示切换到你的项目目录下,然后执行命令
npm run dev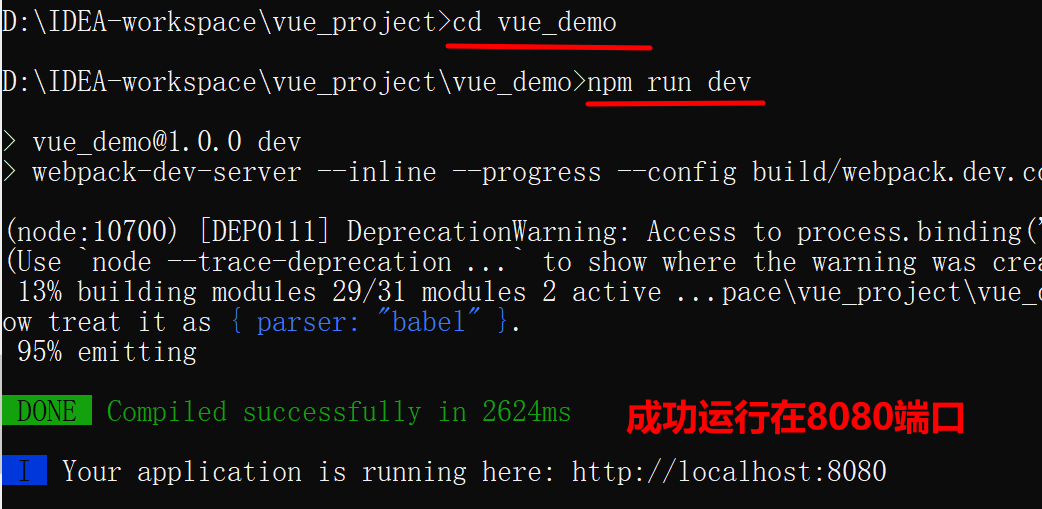
-
在浏览器访问
http://localhost:8080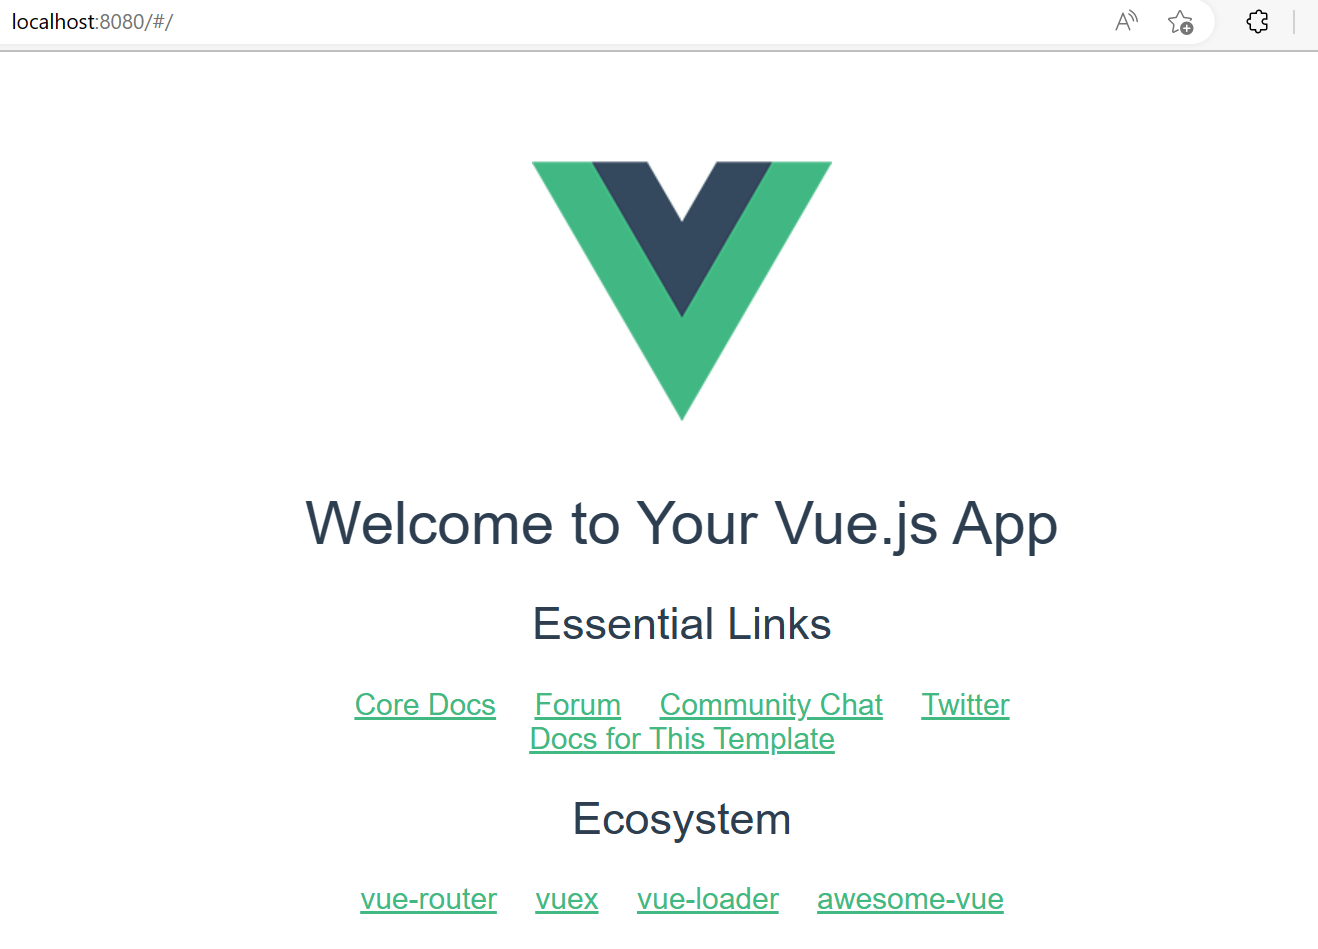
-
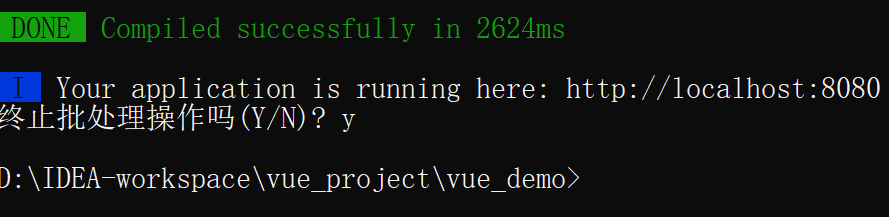
在控制台输入ctrl+c,可退出运行
12.3IDEA打开项目,运行项目
-
将Vue脚手架项目,直接拖到IDEA,即可打开(或者在idea中切换项目)
-
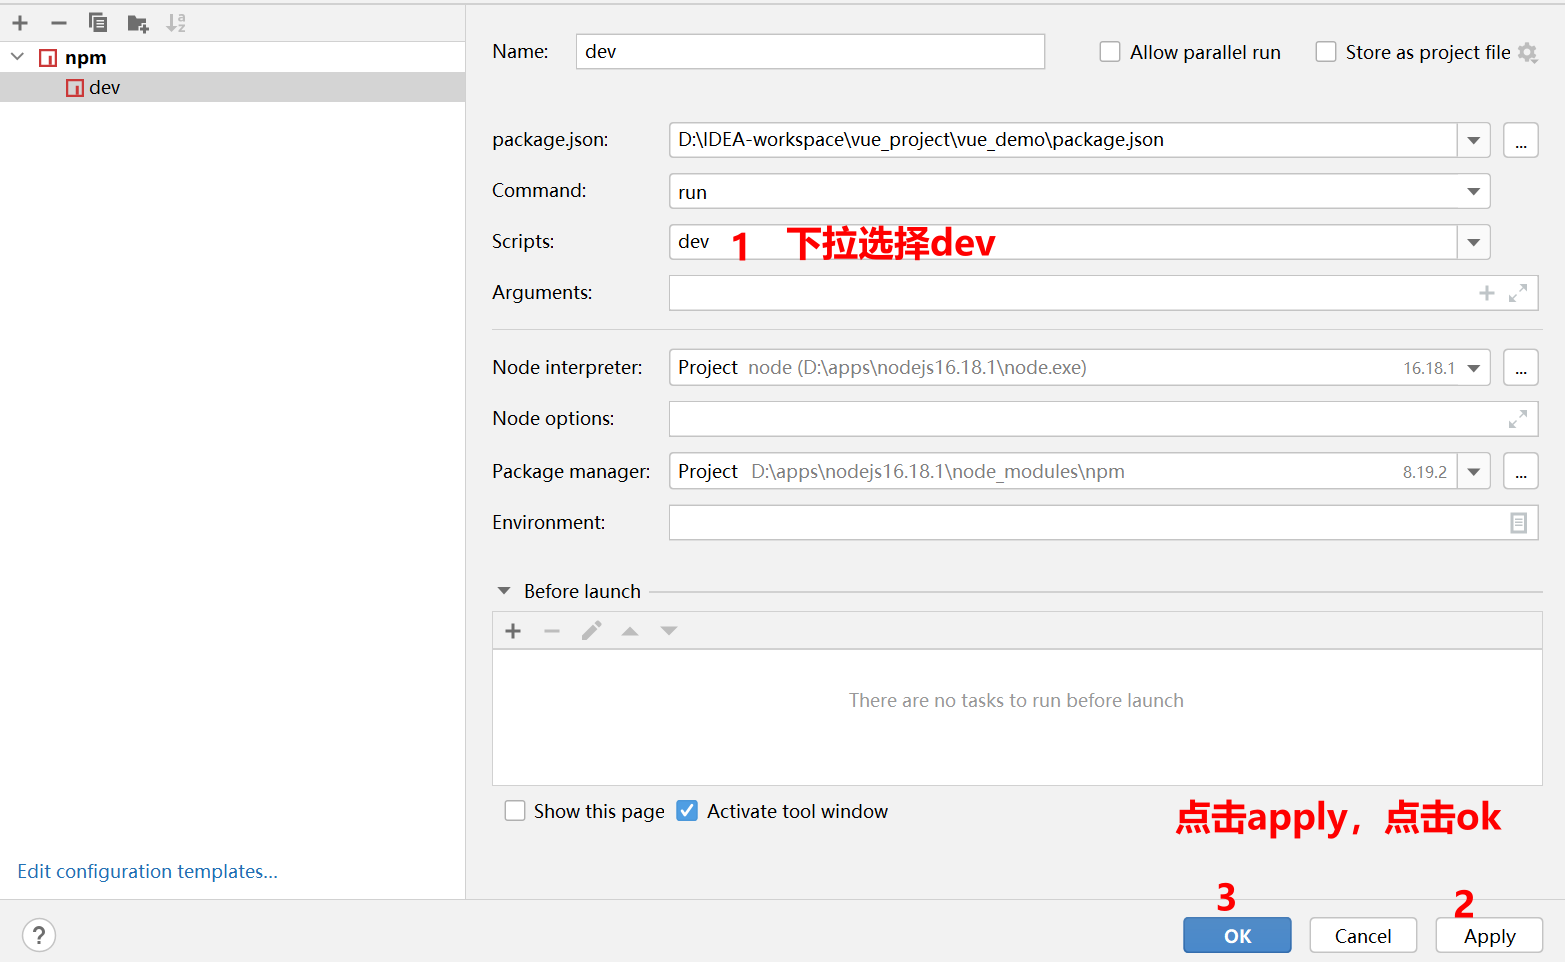
配置NPM
-
点击启动
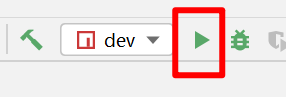
-
成功运行(键入ctrl+c停止运行)

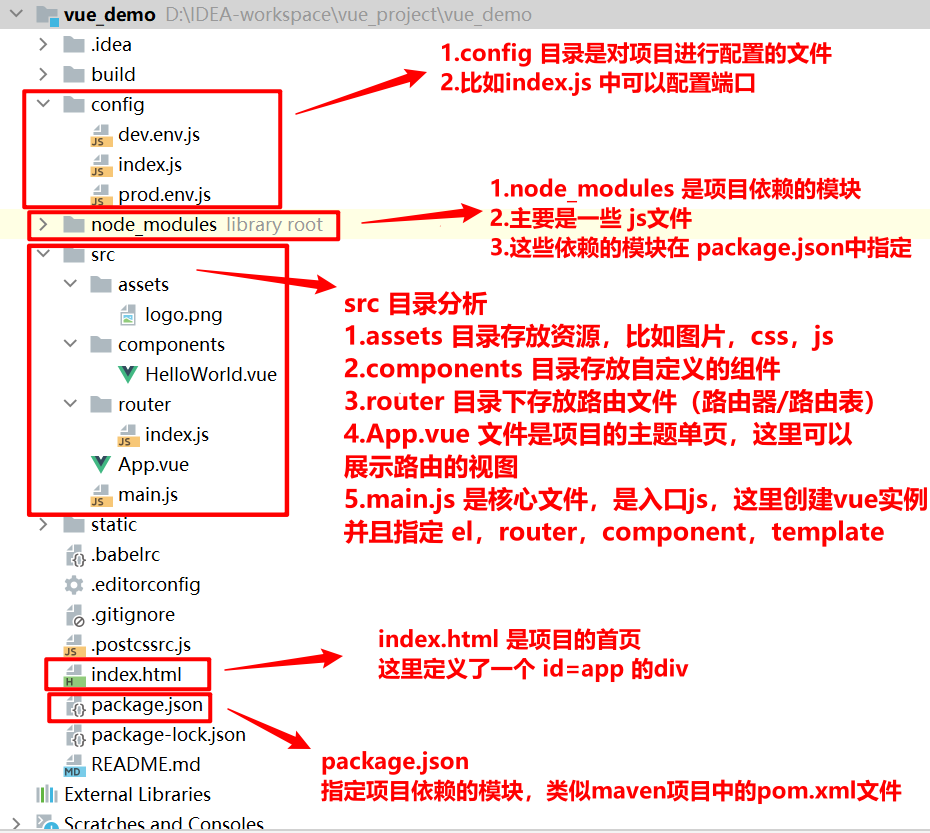
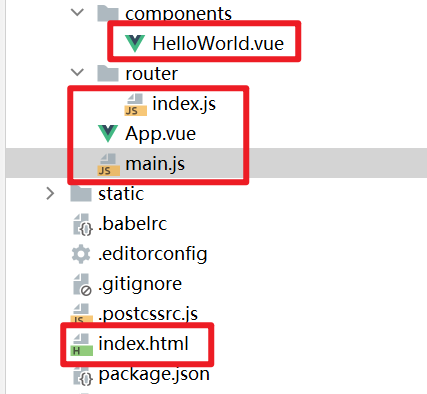
12.4vue项目结构分析
12.5vue请求执行流程
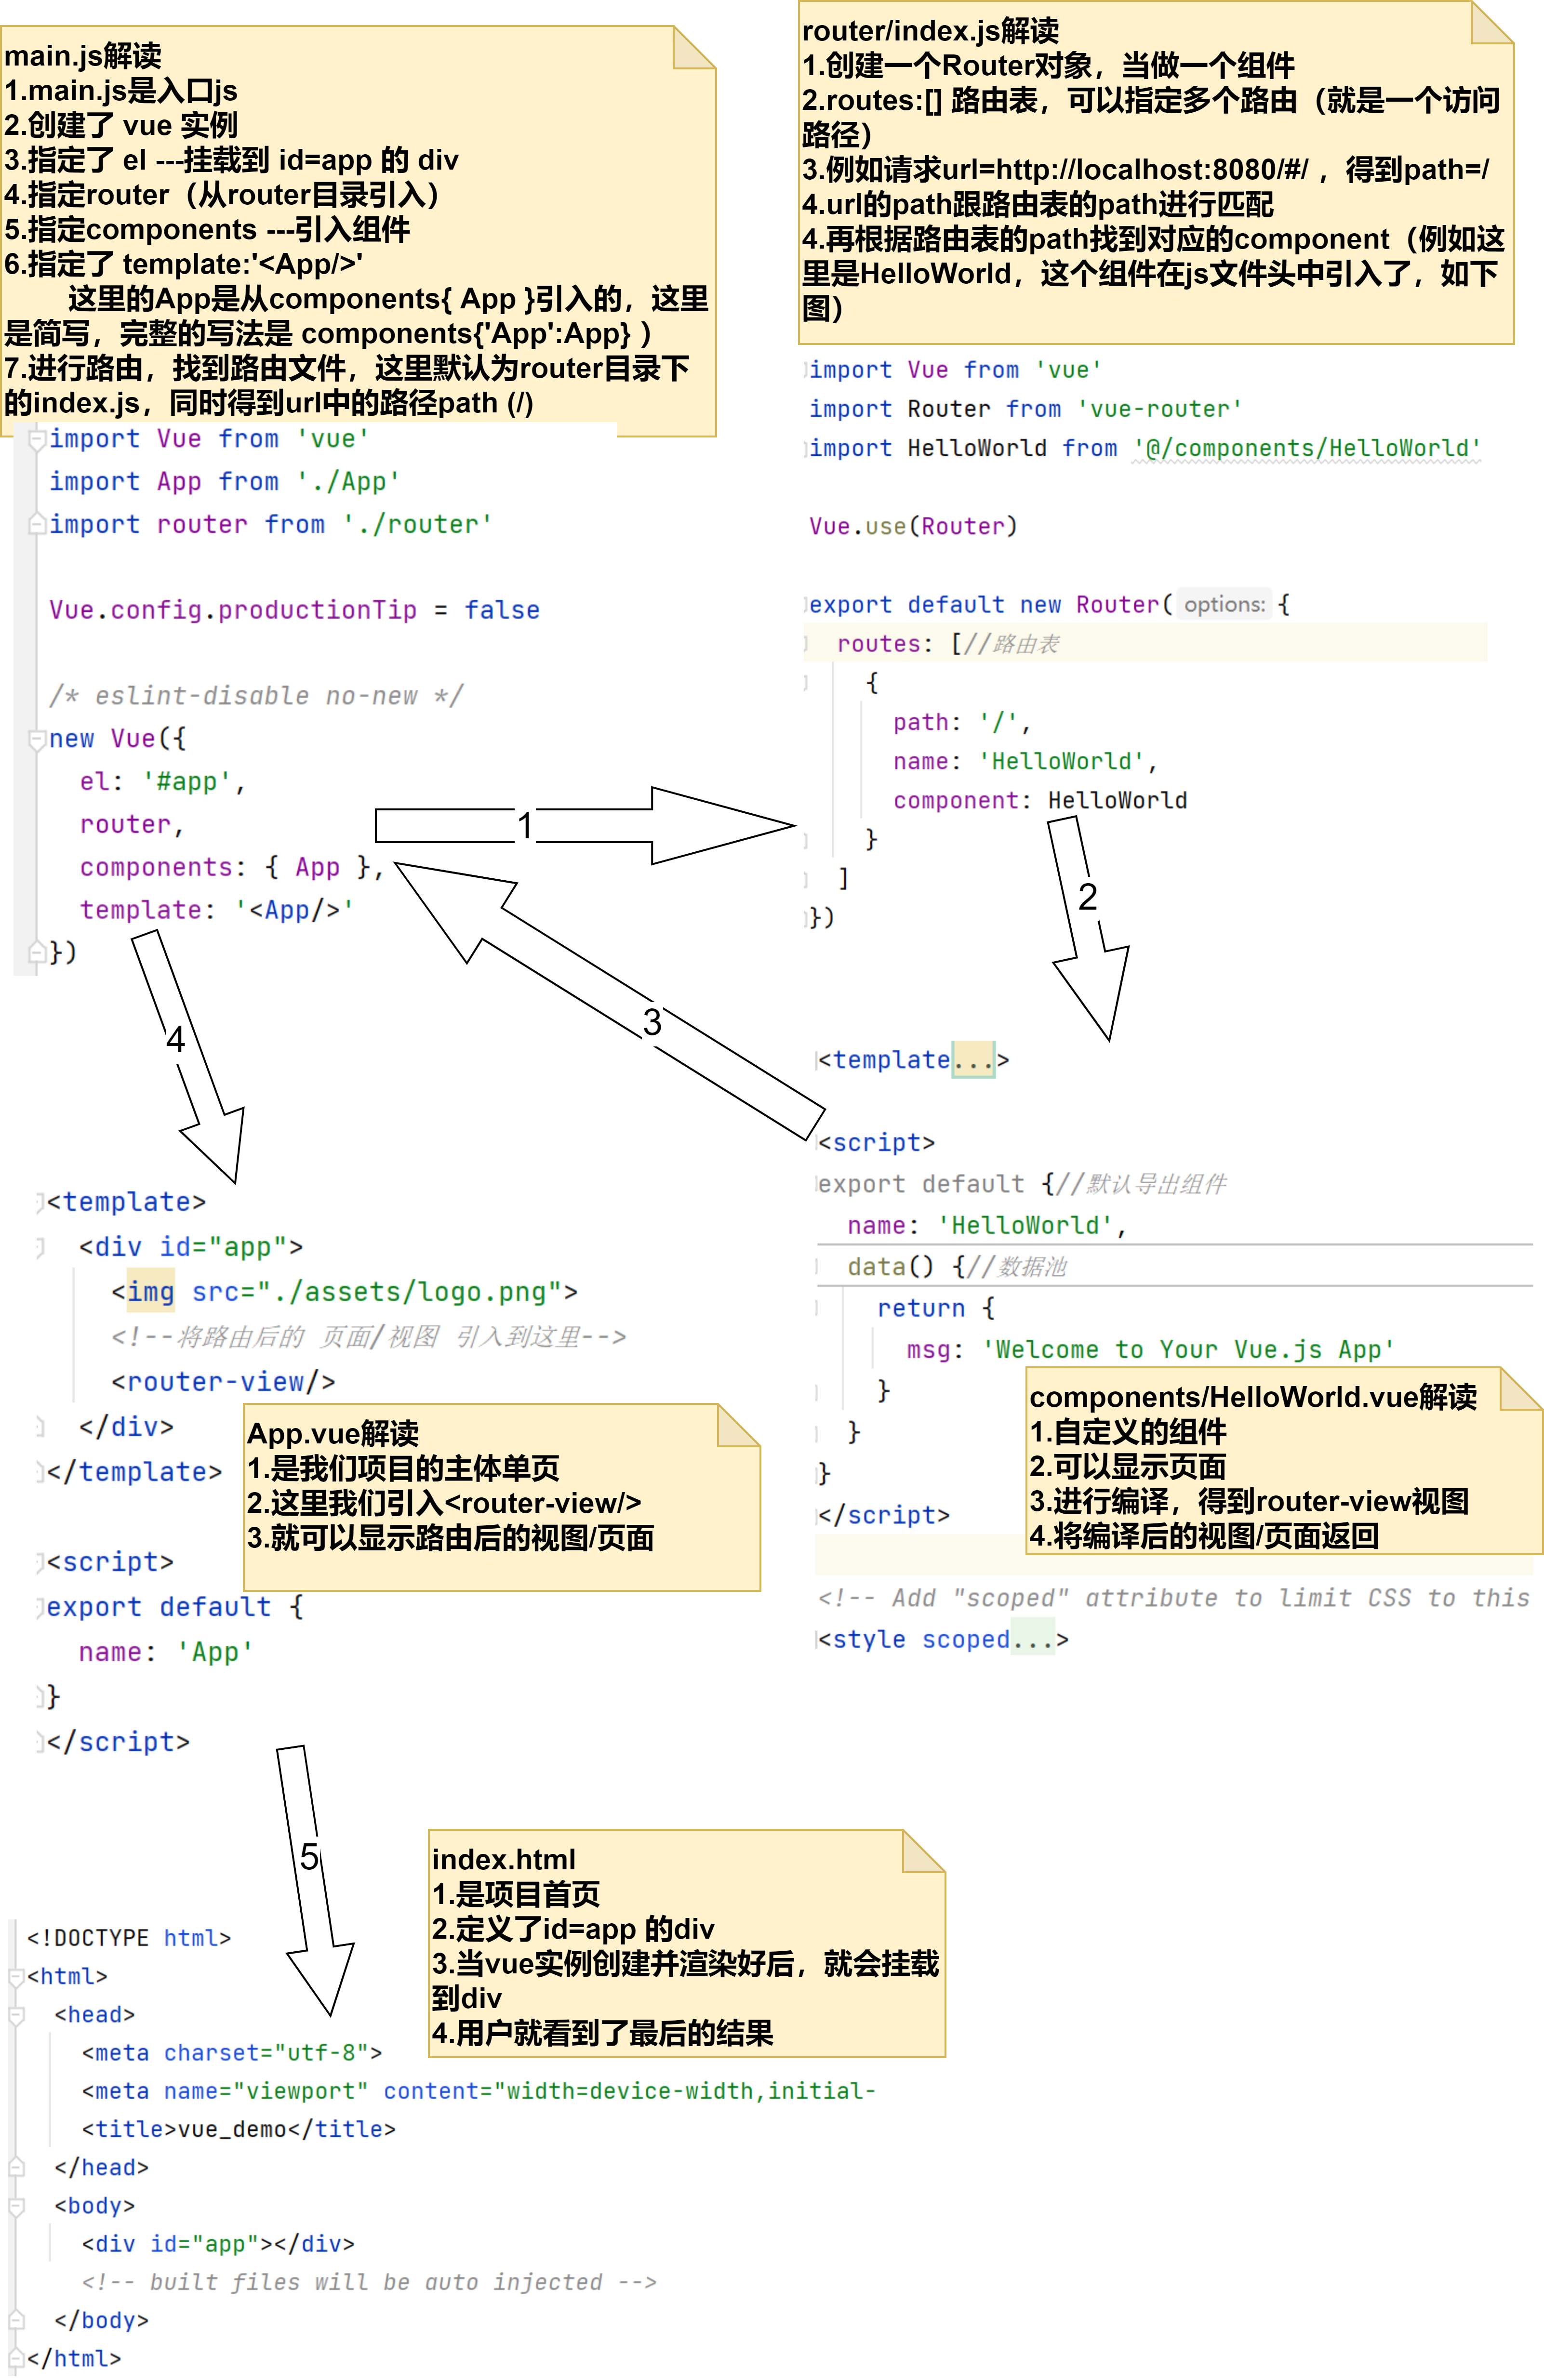
整个流程分析:
-
main.js:
从入口js——main.js开始。如果发现有router,就会到对应的router文件去(找到router/index.js)。
-
router/index.js:
获取请求的url,跟路由表的path进行匹配,如果匹配上,就会去找相应的组件
-
components/HelloWorld.vue:
找到组件后,就对该组件进行编译和渲染。组件处理完毕后,将结果返回给对应的main.js对应的router
-
main.js:
main.js得到router结果后,找到template,template里如果有router-view,就会把路由后的页面引入。然后当Vue实例的template也编译渲染后之后,相当于这个vue已经准备好了。
-
index.html:
此时将该实例挂载到index.html中,并进行显示。
在整个页面渲染的过程中,main.js是中心,也是连接各个组件,路由器的关键。因为Vue默认生成的项目代码,使用了很多简写,造成初学者理解困难,以下是完整main.js的写法:
// The Vue build version to load with the `import` command
// (runtime-only or standalone) has been set in webpack.base.conf with an alias.
import Vue from 'vue'
import App from './App'//完整写法是 import App from './App.vue'
import router from './router'//完整写法是 import App from './router/index.js'

Vue.config.productionTip = false

/* eslint-disable no-new */
new Vue({
  el: '#app',//这里的 #app 是挂载到index.html的 <div id="app"></div>
  router,//完整写法是 router:router 第二个 router 来自 import <这里> from './router'
  components: { App },//完整写法是 components:{ 'App' : App } 第二个 App 来自 import <这里> from './App'
  template: '<App/>'//这里的 '<App/>' 指的是components中 被省略的组件名字: 'App'
  // 也就是说,如果前面改为 components: { 'HelloApp': App }, 这里要写为 template: '<HelloApp/>'
})
12.6路由切换-练习
根据Vue请求执行流程,完成路由切换实例。要求访问http://localhost:8080/#/hello可以访问到一个页面,访问http://localhost:8080/#/可以访问到另一个页面。
只需要修改router/index.js,并在components目录下创建新的组件:
-
创建组件Hello.vue:
<template>
  <div><h1>{{ message }}</h1></div>

</template>

<script>
export default {
  name: "Hello",
  data() {//函数形式
    return {
      message: "Hello,Mary~~"
    }
  }
}
</script>

<style scoped>

</style>
HelloWorld.vue:
<template> <div class="hello"> <h1>{{ msg }}</h1> <h2>网站地址</h2> <a href="https://www.baidu.com" target="_blank">百度一下</a> </div> </template> <script> export default {//默认导出组件 name: 'HelloWorld', data() {//数据池 return { msg: '网站首页' } } } </script> <!-- Add "scoped" attribute to limit CSS to this component only --> <style scoped> a { color: #42b983; } </style> -
修改路由文件router/index.js:
import Vue from 'vue'
import Router from 'vue-router'
//@ 表示的是 src目录
import HelloWorld from '@/components/HelloWorld'
import Hello from "@/components/Hello"

Vue.use(Router)

export default new Router({
  routes: [//路由表
    {
      path: '/',
      name: 'HelloWorld',
      component: HelloWorld
    },
    {
      path: '/hello',
      name: 'Hello',
      component: Hello
    },
  ]
})

12.7路由切换-应用实例
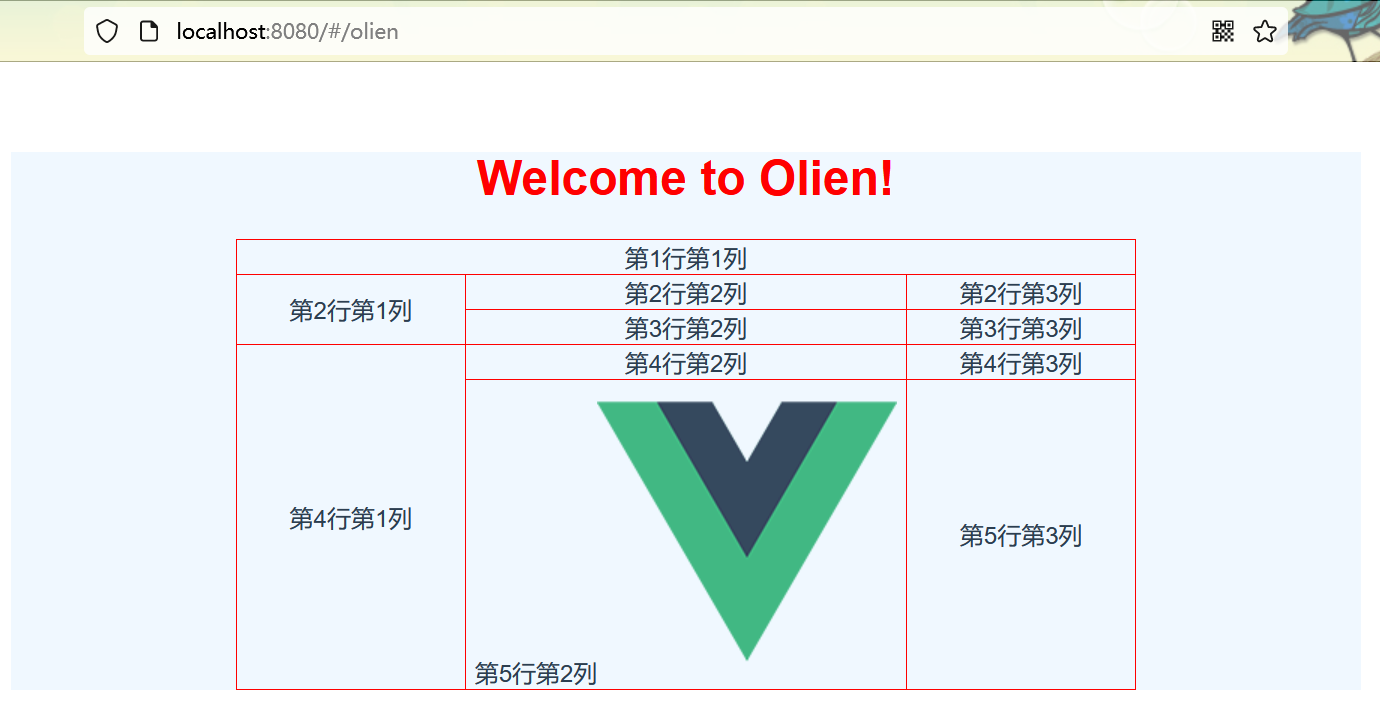
需求说明/图解,输入http://localhost:8080/#/olien,访问如下页面
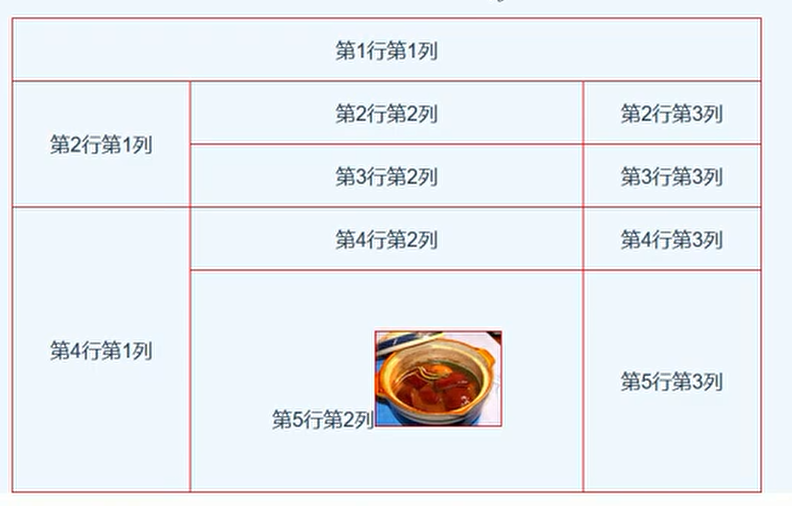
创建新的组件olien.vue:
<!--模板,表示页面视图 html-->
<template>
  <div>
    <h1>{{ meg }}</h1>
    <table>
      <tr>
        <td colspan="3">第1行第1列</td>
      </tr>
      <tr>
        <td rowspan="2">第2行第1列</td>
        <td>第2行第2列</td>
        <td>第2行第3列</td>
      </tr>
      <tr>
        <td>第3行第2列</td>
        <td>第3行第3列</td>
      </tr>
      <tr>
        <td rowspan="2">第4行第1列</td>
        <td>第4行第2列</td>
        <td>第4行第3列</td>
      </tr>
      <tr>
        <td>第5行第2列<img src="@/assets/logo.png"></td>
        <td>第5行第3列</td>
      </tr>
    </table>
  </div>
</template>

<!--定义数据和相关操作方法,是默认导出-->
<script>
export default {
  name: "olien",
  data() {
    return {
      meg: "Welcome to Olien!"
    }
  }
}
</script>

<!--css样式,修改模板页面视图-->
<style scoped>
div {
  width: 900px;
  background-color: aliceblue;
  /*0表示上下边距,auto表示左右居中*/
  margin: 0 auto;
}

h1 {
  color: red;
}

table, tr, td {
  margin: auto;
  width: 600px;
  border: 1px solid red;
  border-collapse: collapse;
}
</style>
配置router:
import Vue from 'vue'
import Router from 'vue-router'
//@ 表示的是 src目录
import olien from '@/components/olien'

Vue.use(Router)

export default new Router({
  routes: [//路由表
    ...
    ...,
    {//配置一组新路由
      path: '/olien',
      name: 'olien',
      component: olien
    }
  ]
})
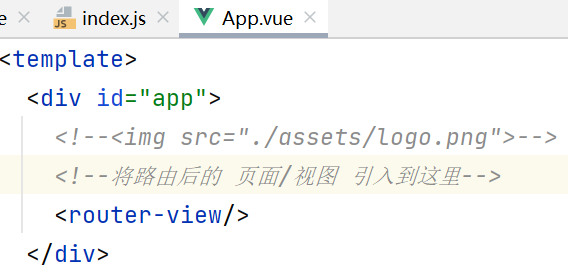
由于不想在/olien页面的上方出现默认logo,只需要将该图片在App.vue中拿掉,根据不同的组件需要,放到组件中即可:
页面展示:
 标签:Vue04,vue,App,day07,js,Vue,router,import
From: https://www.cnblogs.com/liyuelian/p/17044939.html
标签:Vue04,vue,App,day07,js,Vue,router,import
From: https://www.cnblogs.com/liyuelian/p/17044939.html