首发:运维有术
本指南将逐步引导您完成以下关键任务:
- 安装 Redis:使用 StatefulSet 部署 Redis。
- 自动或手动配置 Redis 集群:使用命令行工具初始化 Redis 集群。
- Redis 性能测试:使用 Redis 自带的 Benchmark 工具进行性能测试。
- Redis 图形化管理:安装并配置 RedisInsight。
通过本指南,您将掌握在 K8s 上部署和管理 Redis 集群的必备技能。让我们开始这场 Redis 集群部署之旅。
实战服务器配置(架构1:1复刻小规模生产环境,配置不同)
| 主机名 | IP | CPU | 内存 | 系统盘 | 数据盘 | 用途 |
|---|---|---|---|---|---|---|
| ksp-registry | 192.168.9.90 | 4 | 8 | 40 | 200 | Harbor 镜像仓库 |
| ksp-control-1 | 192.168.9.91 | 4 | 8 | 40 | 100 | KubeSphere/k8s-control-plane |
| ksp-control-2 | 192.168.9.92 | 4 | 8 | 40 | 100 | KubeSphere/k8s-control-plane |
| ksp-control-3 | 192.168.9.93 | 4 | 8 | 40 | 100 | KubeSphere/k8s-control-plane |
| ksp-worker-1 | 192.168.9.94 | 8 | 16 | 40 | 100 | k8s-worker/CI |
| ksp-worker-2 | 192.168.9.95 | 8 | 16 | 40 | 100 | k8s-worker |
| ksp-worker-3 | 192.168.9.96 | 8 | 16 | 40 | 100 | k8s-worker |
| ksp-storage-1 | 192.168.9.97 | 4 | 8 | 40 | 400+ | ElasticSearch/Longhorn/Ceph/NFS |
| ksp-storage-2 | 192.168.9.98 | 4 | 8 | 40 | 300+ | ElasticSearch/Longhorn/Ceph |
| ksp-storage-3 | 192.168.9.99 | 4 | 8 | 40 | 300+ | ElasticSearch/Longhorn/Ceph |
| ksp-gpu-worker-1 | 192.168.9.101 | 4 | 16 | 40 | 100 | k8s-worker(GPU NVIDIA Tesla M40 24G) |
| ksp-gpu-worker-2 | 192.168.9.102 | 4 | 16 | 40 | 100 | k8s-worker(GPU NVIDIA Tesla P100 16G) |
| ksp-gateway-1 | 192.168.9.103 | 2 | 4 | 40 | 自建应用服务代理网关/VIP:192.168.9.100 | |
| ksp-gateway-2 | 192.168.9.104 | 2 | 4 | 40 | 自建应用服务代理网关/VIP:192.168.9.100 | |
| ksp-mid | 192.168.9.105 | 4 | 8 | 40 | 100 | 部署在 k8s 集群之外的服务节点(Gitlab 等) |
| 合计 | 15 | 68 | 152 | 600 | 2100+ |
实战环境涉及软件版本信息
- 操作系统:openEuler 22.03 LTS SP3 x86_64
- KubeSphere:v3.4.1
- Kubernetes:v1.28.8
- KubeKey: v3.1.1
- Redis: 7.2.6
- RedisInsight:2.60
1. 部署方案规划
1.1 部署架构图

1.2 准备持久化存储
本实战环境使用 NFS 作为 K8s 集群的持久化存储,新集群可以参考探索 Kubernetes 持久化存储之 NFS 终极实战指南 部署 NFS 存储。
1.3 前提说明
Redis 集群所有资源部署在命名空间 opsxlab内。
2. 部署 Redis 服务
2.1 创建 ConfigMap
- 创建 Redis 配置文件
请使用 vi 编辑器,创建资源清单文件 redis-cluster-cm.yaml,并输入以下内容:
apiVersion: v1
kind: ConfigMap
metadata:
  name: redis-cluster-config
data:
  redis-config: |
    appendonly yes
    protected-mode no
    dir /data
    port 6379
    cluster-enabled yes
    cluster-config-file /data/nodes.conf
    cluster-node-timeout 5000
    masterauth PleaseChangeMe2024
    requirepass PleaseChangeMe2024
说明: 配置文件仅启用了密码认证,未做优化,生产环境请根据需要调整。
- 创建资源
执行下面的命令,创建 ConfigMap 资源。
kubectl apply -f redis-cluster-cm.yaml -n opsxlab
- 验证资源
执行下面的命令,查看 ConfigMap 创建结果。
$ kubectl get cm -n opsxlab
NAME                   DATA   AGE
kube-root-ca.crt       1      100d
redis-cluster-config   1      115s
2.2 创建 Redis
本文使用 StatefulSet 部署 Redis 服务,需要创建 StatefulSet 和 HeadLess 两种资源。
- 创建资源清单
请使用 vi 编辑器,创建资源清单文件 redis-cluster-sts.yaml,并输入以下内容:
---
apiVersion: apps/v1
kind: StatefulSet
metadata:
  name: redis-cluster
  labels:
    app.kubernetes.io/name: redis-cluster
spec:
  serviceName: redis-headless
  replicas: 6
  selector:
    matchLabels:
      app.kubernetes.io/name: redis-cluster
  template:
    metadata:
      labels:
        app.kubernetes.io/name: redis-cluster
    spec:
      affinity:
        podAntiAffinity:
          preferredDuringSchedulingIgnoredDuringExecution:
          - weight: 100
            podAffinityTerm:
              labelSelector:
                matchExpressions:
                - key: app.kubernetes.io/name
                  operator: In
                  values:
                  - redis-cluster
              topologyKey: kubernetes.io/hostname
      containers:
        - name: redis
          image: 'redis:7.2.6'
          command:
            - "redis-server"
          args:
            - "/etc/redis/redis.conf"
            - "--protected-mode"
            - "no"
            - "--cluster-announce-ip"
            - "$(POD_IP)"
          env:
            - name: POD_IP
              valueFrom:
                fieldRef:
                  fieldPath: status.podIP
          ports:
            - name: redis-6379
              containerPort: 6379
              protocol: TCP
          volumeMounts:
            - name: config
              mountPath: /etc/redis
            - name: redis-cluster-data
              mountPath: /data
          resources:
            limits:
              cpu: '2'
              memory: 4Gi
            requests:
              cpu: 50m
              memory: 500Mi
      volumes:
        - name: config
          configMap:
            name: redis-cluster-config
            items:
              - key: redis-config
                path: redis.conf
  volumeClaimTemplates:
    - metadata:
        name: redis-cluster-data
      spec:
        accessModes: [ "ReadWriteOnce" ]
        storageClassName: "nfs-sc"
        resources:
          requests:
            storage: 5Gi

---
apiVersion: v1
kind: Service
metadata:
  name: redis-headless
  labels:
    app.kubernetes.io/name: redis-cluster
spec:
  ports:
    - name: redis-6379
      protocol: TCP
      port: 6379
      targetPort: 6379
  selector:
    app.kubernetes.io/name: redis-cluster
  clusterIP: None
  type: ClusterIP
注意: POD_IP 是重点,如果不配置会导致线上的 POD 重启换 IP 后,集群状态无法自动同步。
- 创建资源
执行下面的命令,创建资源。
kubectl apply -f redis-cluster-sts.yaml -n opsxlab
- 验证资源
执行下面的命令,查看 StatefulSet、Pod、Service 创建结果。
$ kubectl get sts,pod,svc -n opsxlab
NAME                             READY   AGE
statefulset.apps/redis-cluster   6/6     72s

NAME                  READY   STATUS    RESTARTS   AGE
pod/redis-cluster-0   1/1     Running   0          72s
pod/redis-cluster-1   1/1     Running   0          63s
pod/redis-cluster-2   1/1     Running   0          54s
pod/redis-cluster-3   1/1     Running   0          43s
pod/redis-cluster-4   1/1     Running   0          40s
pod/redis-cluster-5   1/1     Running   0          38s

NAME                     TYPE        CLUSTER-IP   EXTERNAL-IP   PORT(S)    AGE
service/redis-headless   ClusterIP   None         <none>        6379/TCP   36s
2.3 创建 k8s 集群外部访问服务
我们采用 NodePort 方式在 Kubernetes 集群外发布 Redis 服务,指定的端口为 31379。
请使用 vi 编辑器,创建资源清单文件 redis-cluster-svc-external.yaml,并输入以下内容:
kind: Service
apiVersion: v1
metadata:
  name: redis-cluster-external
  labels:
    app: redis-cluster-external
spec:
  ports:
    - protocol: TCP
      port: 6379
      targetPort: 6379
      nodePort: 31379
  selector:
    app.kubernetes.io/name: redis-cluster
  type: NodePort
- 创建资源
执行下面的命令,创建 Service 资源。
kubectl apply -f redis-cluster-svc-external.yaml -n opsxlab
- 验证资源
执行下面的命令,查看 Service 创建结果。
$ kubectl get svc -o wide -n opsxlab
NAME                     TYPE        CLUSTER-IP     EXTERNAL-IP   PORT(S)          AGE     SELECTOR
redis-cluster-external   NodePort    10.233.22.96   <none>        6379:31379/TCP   14s     app.kubernetes.io/name=redis-cluster
redis-headless           ClusterIP   None           <none>        6379/TCP         2m57s   app.kubernetes.io/name=redis-cluster
3. 创建 Redis 集群
Redis POD 创建完成后,不会自动创建 Redis 集群,需要手工执行集群初始化的命令,有自动创建和手工创建两种方式,二选一,建议选择自动。
3.1 自动创建 Redis 集群
执行下面的命令,自动创建 3 个 master 和 3 个 slave 的集群,中间需要输入一次 yes。
- 执行命令
kubectl exec -it redis-cluster-0 -n opsxlab -- redis-cli -a PleaseChangeMe2024 --cluster create --cluster-replicas 1 $(kubectl get pods -n opsxlab -l app.kubernetes.io/name=redis-cluster -o jsonpath='{range.items[*]}{.status.podIP}:6379 {end}')
- 正确执行后,输出结果如下 :
$ kubectl exec -it redis-cluster-0 -n opsxlab -- redis-cli -a PleaseChangeMe2024 --cluster create --cluster-replicas 1 $(kubectl get pods -n opsxlab -l app.kubernetes.io/name=redis-cluster -o jsonpath='{range.items[*]}{.status.podIP}:6379 {end}')
Warning: Using a password with '-a' or '-u' option on the command line interface may not be safe.
>>> Performing hash slots allocation on 6 nodes...
Master[0] -> Slots 0 - 5460
Master[1] -> Slots 5461 - 10922
Master[2] -> Slots 10923 - 16383
Adding replica 10.233.96.17:6379 to 10.233.94.214:6379
Adding replica 10.233.68.250:6379 to 10.233.96.22:6379
Adding replica 10.233.94.231:6379 to 10.233.68.251:6379
M: da376da9577b14e4100c87d3acc53aebf57358b7 10.233.94.214:6379
   slots:[0-5460] (5461 slots) master
M: a3094b24d44430920f9250d4a6d8ce2953852f13 10.233.96.22:6379
   slots:[5461-10922] (5462 slots) master
M: 185fd2d0bbb0cd9c01fa82fa496a1082f16b9ce0 10.233.68.251:6379
   slots:[10923-16383] (5461 slots) master
S: 9ce470afe3490662fb1670ba16fad2e87e02b191 10.233.94.231:6379
   replicates 185fd2d0bbb0cd9c01fa82fa496a1082f16b9ce0
S: b57fb0717160eab39ccd67f6705a592bd5482429 10.233.96.17:6379
   replicates da376da9577b14e4100c87d3acc53aebf57358b7
S: bed82c46554a0ebf638117437d884c01adf1003f 10.233.68.250:6379
   replicates a3094b24d44430920f9250d4a6d8ce2953852f13
Can I set the above configuration? (type 'yes' to accept): yes
>>> Nodes configuration updated
>>> Assign a different config epoch to each node
>>> Sending CLUSTER MEET messages to join the cluster
Waiting for the cluster to join
...
>>> Performing Cluster Check (using node 10.233.94.214:6379)
M: da376da9577b14e4100c87d3acc53aebf57358b7 10.233.94.214:6379
   slots:[0-5460] (5461 slots) master
   1 additional replica(s)
S: 9ce470afe3490662fb1670ba16fad2e87e02b191 10.233.94.231:6379
   slots: (0 slots) slave
   replicates 185fd2d0bbb0cd9c01fa82fa496a1082f16b9ce0
S: b57fb0717160eab39ccd67f6705a592bd5482429 10.233.96.17:6379
   slots: (0 slots) slave
   replicates da376da9577b14e4100c87d3acc53aebf57358b7
M: a3094b24d44430920f9250d4a6d8ce2953852f13 10.233.96.22:6379
   slots:[5461-10922] (5462 slots) master
   1 additional replica(s)
S: bed82c46554a0ebf638117437d884c01adf1003f 10.233.68.250:6379
   slots: (0 slots) slave
   replicates a3094b24d44430920f9250d4a6d8ce2953852f13
M: 185fd2d0bbb0cd9c01fa82fa496a1082f16b9ce0 10.233.68.251:6379
   slots:[10923-16383] (5461 slots) master
   1 additional replica(s)
[OK] All nodes agree about slots configuration.
>>> Check for open slots...
>>> Check slots coverage...
[OK] All 16384 slots covered.
3.2 手动创建 Redis 集群
手动配置 3 个 Master 和 3 个 Slave 的集群(此步骤只为了记录手动配置集群的过程,实际环境建议用自动创建的方式)。
一共创建了 6 个 Redis pod,集群主-> 从配置的规则为 0->3,1->4,2->5。
由于命令太长,配置过程中,没有采用自动获取 IP 的方式,使用手工查询 pod IP 并进行相关配置。
- 查询 Redis pod 分配的 IP
$ kubectl get pods -n opsxlab -o wide | grep redis
redis-cluster-0   1/1     Running   0          18s   10.233.94.233   ksp-worker-1   <none>           <none>
redis-cluster-1   1/1     Running   0          16s   10.233.96.29    ksp-worker-3   <none>           <none>
redis-cluster-2   1/1     Running   0          13s   10.233.68.255   ksp-worker-2   <none>           <none>
redis-cluster-3   1/1     Running   0          11s   10.233.94.209   ksp-worker-1   <none>           <none>
redis-cluster-4   1/1     Running   0          8s    10.233.96.23    ksp-worker-3   <none>           <none>
redis-cluster-5   1/1     Running   0          5s    10.233.68.4     ksp-worker-2   <none>           <none>
- 创建 3 个 Master 节点的集群
# 下面的命令中,三个 IP 地址分别为 redis-cluster-0 redis-cluster-1 redis-cluster-2 对应的IP, 中间需要输入一次yes

$ kubectl exec -it redis-cluster-0 -n opsxlab -- redis-cli -a PleaseChangeMe2024 --cluster create 10.233.94.233:6379 10.233.96.29:6379 10.233.68.255:6379

Warning: Using a password with '-a' or '-u' option on the command line interface may not be safe.
>>> Performing hash slots allocation on 3 nodes...
Master[0] -> Slots 0 - 5460
Master[1] -> Slots 5461 - 10922
Master[2] -> Slots 10923 - 16383
M: 1f4df418ac310b6d14a7920a105e060cda58275a 10.233.94.233:6379
   slots:[0-5460] (5461 slots) master
M: bd1a8e265fa78e93b456b9e59cbefc893f0d2ab1 10.233.96.29:6379
   slots:[5461-10922] (5462 slots) master
M: 149ffd5df2cae9cfbc55e3aff69c9575134ce162 10.233.68.255:6379
   slots:[10923-16383] (5461 slots) master
Can I set the above configuration? (type 'yes' to accept): yes
>>> Nodes configuration updated
>>> Assign a different config epoch to each node
>>> Sending CLUSTER MEET messages to join the cluster
Waiting for the cluster to join
.
>>> Performing Cluster Check (using node 10.233.94.233:6379)
M: 1f4df418ac310b6d14a7920a105e060cda58275a 10.233.94.233:6379
   slots:[0-5460] (5461 slots) master
M: bd1a8e265fa78e93b456b9e59cbefc893f0d2ab1 10.233.96.29:6379
   slots:[5461-10922] (5462 slots) master
M: 149ffd5df2cae9cfbc55e3aff69c9575134ce162 10.233.68.255:6379
   slots:[10923-16383] (5461 slots) master
[OK] All nodes agree about slots configuration.
>>> Check for open slots...
>>> Check slots coverage...
[OK] All 16384 slots covered.
- 为每个 Master 添加 Slave 节点(共三组)
# 第一组 redis0 -> redis3
kubectl exec -it redis-cluster-0 -n opsxlab -- redis-cli -a PleaseChangeMe2024 --cluster add-node 10.233.94.209:6379 10.233.94.233:6379 --cluster-slave --cluster-master-id 1f4df418ac310b6d14a7920a105e060cda58275a

# 参数说明
# 10.233.94.233:6379 任意一个 master 节点的 ip 地址,一般用 redis-cluster-0 的 IP 地址
# 10.233.94.209:6379 添加到某个 Master 的 Slave 节点的 IP 地址
# --cluster-master-id 添加 Slave 对应 Master 的 ID,如果不指定则随机分配到任意一个主节点
- 正确执行后,输出结果如下 :(以第一组 0->3 为例)
$ kubectl exec -it redis-cluster-0 -n opsxlab -- redis-cli -a PleaseChangeMe2024 --cluster add-node 10.233.94.209:6379 10.233.94.233:6379 --cluster-slave --cluster-master-id 1f4df418ac310b6d14a7920a105e060cda58275a

Warning: Using a password with '-a' or '-u' option on the command line interface may not be safe.
>>> Adding node 10.233.94.209:6379 to cluster 10.233.94.233:6379
>>> Performing Cluster Check (using node 10.233.94.233:6379)
M: 1f4df418ac310b6d14a7920a105e060cda58275a 10.233.94.233:6379
   slots:[0-5460] (5461 slots) master
M: bd1a8e265fa78e93b456b9e59cbefc893f0d2ab1 10.233.96.29:6379
   slots:[5461-10922] (5462 slots) master
M: 149ffd5df2cae9cfbc55e3aff69c9575134ce162 10.233.68.255:6379
   slots:[10923-16383] (5461 slots) master
[OK] All nodes agree about slots configuration.
>>> Check for open slots...
>>> Check slots coverage...
[OK] All 16384 slots covered.
>>> Send CLUSTER MEET to node 10.233.94.209:6379 to make it join the cluster.
Waiting for the cluster to join

>>> Configure node as replica of 10.233.94.233:6379.
[OK] New node added correctly.
- 依次执行另外两组的配置(结果略)
# 第二组 redis1 -> redis4
kubectl exec -it -it redis-cluster-0 -n opsxlab -- redis-cli -a PleaseChangeMe2024 --cluster add-node 10.233.96.23:6379 10.233.94.233:6379 --cluster-slave --cluster-master-id bd1a8e265fa78e93b456b9e59cbefc893f0d2ab1

# 第三组 redis2 -> redis5
kubectl exec -it redis-cluster-0 -n opsxlab -- redis-cli -a PleaseChangeMe2024 --cluster add-node 10.233.68.4:6379 10.233.94.233:6379 --cluster-slave --cluster-master-id 149ffd5df2cae9cfbc55e3aff69c9575134ce162
3.3 验证集群状态
- 执行命令
kubectl exec -it redis-cluster-0 -n opsxlab -- redis-cli -a PleaseChangeMe2024 --cluster check $(kubectl get pods -n opsxlab -l app.kubernetes.io/name=redis-cluster -o jsonpath='{range.items[0]}{.status.podIP}:6379{end}')
- 正确执行后,输出结果如下 :
$ kubectl exec -it redis-cluster-0 -n opsxlab -- redis-cli -a PleaseChangeMe2024 --cluster check $(kubectl get pods -n opsxlab -l app.kubernetes.io/name=redis-cluster -o jsonpath='{range.items[0]}{.status.podIP}:6379{end}')

Warning: Using a password with '-a' or '-u' option on the command line interface may not be safe.
10.233.94.233:6379 (1f4df418...) -> 0 keys | 5461 slots | 1 slaves.
10.233.68.255:6379 (149ffd5d...) -> 0 keys | 5461 slots | 1 slaves.
10.233.96.29:6379 (bd1a8e26...) -> 0 keys | 5462 slots | 1 slaves.
[OK] 0 keys in 3 masters.
0.00 keys per slot on average.
>>> Performing Cluster Check (using node 10.233.94.233:6379)
M: 1f4df418ac310b6d14a7920a105e060cda58275a 10.233.94.233:6379
   slots:[0-5460] (5461 slots) master
   1 additional replica(s)
S: 577675e83c2267d625bf7b408658bfa8b5690feb 10.233.96.23:6379
   slots: (0 slots) slave
   replicates bd1a8e265fa78e93b456b9e59cbefc893f0d2ab1
M: 149ffd5df2cae9cfbc55e3aff69c9575134ce162 10.233.68.255:6379
   slots:[10923-16383] (5461 slots) master
   1 additional replica(s)
S: 288bd84283237dcfaa7f27f1e1d0148488649d97 10.233.68.4:6379
   slots: (0 slots) slave
   replicates 149ffd5df2cae9cfbc55e3aff69c9575134ce162
M: bd1a8e265fa78e93b456b9e59cbefc893f0d2ab1 10.233.96.29:6379
   slots:[5461-10922] (5462 slots) master
   1 additional replica(s)
S: a5fc4eeebb4c345d783f7b9d2b8695442e4cdf07 10.233.94.209:6379
   slots: (0 slots) slave
   replicates 1f4df418ac310b6d14a7920a105e060cda58275a
[OK] All nodes agree about slots configuration.
>>> Check for open slots...
>>> Check slots coverage...
[OK] All 16384 slots covered.
4. 集群功能测试
4.1 压力测试
使用 Redis 自带的压力测试工具,测试 Redis 集群是否可用,并简单测试性能。
测试 set 场景:
使用 set 命令,发送100000次请求,每个请求包含一个键值对,其中键是随机生成的,值的大小是100字节,同时有20个客户端并发执行。
$ kubectl exec -it redis-cluster-0 -n opsxlab -- redis-benchmark -h 192.168.9.91 -p 31379 -a PleaseChangeMe2024 -t set -n 100000 -c 20 -d 100 --cluster
Cluster has 3 master nodes:

Master 0: dd42f52834303001a9e4c3036164ab0a11d4f3e1 10.233.94.243:6379
Master 1: e263c18891f96b6af4a4a7d842d8099355ec4654 10.233.96.41:6379
Master 2: 59944b8a38ecf0da5c1940676c9f7ac7fd9a926c 10.233.68.3:6379

====== SET ======
  100000 requests completed in 1.50 seconds
  20 parallel clients
  100 bytes payload
  keep alive: 1
  cluster mode: yes (3 masters)
  node [0] configuration:
    save: 3600 1 300 100 60 10000
    appendonly: yes
  node [1] configuration:
    save: 3600 1 300 100 60 10000
    appendonly: yes
  node [2] configuration:
    save: 3600 1 300 100 60 10000
    appendonly: yes
  multi-thread: yes
  threads: 3

Latency by percentile distribution:
0.000% <= 0.039 milliseconds (cumulative count 32)
50.000% <= 0.183 milliseconds (cumulative count 50034)
75.000% <= 0.311 milliseconds (cumulative count 76214)
87.500% <= 0.399 milliseconds (cumulative count 87628)
93.750% <= 0.495 milliseconds (cumulative count 94027)
96.875% <= 0.591 milliseconds (cumulative count 96978)
98.438% <= 0.735 milliseconds (cumulative count 98440)
99.219% <= 1.071 milliseconds (cumulative count 99219)
99.609% <= 1.575 milliseconds (cumulative count 99610)
99.805% <= 2.375 milliseconds (cumulative count 99805)
99.902% <= 3.311 milliseconds (cumulative count 99903)
99.951% <= 5.527 milliseconds (cumulative count 99952)
99.976% <= 9.247 milliseconds (cumulative count 99976)
99.988% <= 11.071 milliseconds (cumulative count 99988)
99.994% <= 22.751 milliseconds (cumulative count 99994)
99.997% <= 23.039 milliseconds (cumulative count 99997)
99.998% <= 23.119 milliseconds (cumulative count 99999)
99.999% <= 23.231 milliseconds (cumulative count 100000)
100.000% <= 23.231 milliseconds (cumulative count 100000)

Cumulative distribution of latencies:
17.186% <= 0.103 milliseconds (cumulative count 17186)
55.606% <= 0.207 milliseconds (cumulative count 55606)
74.870% <= 0.303 milliseconds (cumulative count 74870)
88.358% <= 0.407 milliseconds (cumulative count 88358)
94.386% <= 0.503 milliseconds (cumulative count 94386)
97.230% <= 0.607 milliseconds (cumulative count 97230)
98.247% <= 0.703 milliseconds (cumulative count 98247)
98.745% <= 0.807 milliseconds (cumulative count 98745)
98.965% <= 0.903 milliseconds (cumulative count 98965)
99.148% <= 1.007 milliseconds (cumulative count 99148)
99.254% <= 1.103 milliseconds (cumulative count 99254)
99.358% <= 1.207 milliseconds (cumulative count 99358)
99.465% <= 1.303 milliseconds (cumulative count 99465)
99.532% <= 1.407 milliseconds (cumulative count 99532)
99.576% <= 1.503 milliseconds (cumulative count 99576)
99.619% <= 1.607 milliseconds (cumulative count 99619)
99.648% <= 1.703 milliseconds (cumulative count 99648)
99.673% <= 1.807 milliseconds (cumulative count 99673)
99.690% <= 1.903 milliseconds (cumulative count 99690)
99.734% <= 2.007 milliseconds (cumulative count 99734)
99.755% <= 2.103 milliseconds (cumulative count 99755)
99.883% <= 3.103 milliseconds (cumulative count 99883)
99.939% <= 4.103 milliseconds (cumulative count 99939)
99.945% <= 5.103 milliseconds (cumulative count 99945)
99.959% <= 6.103 milliseconds (cumulative count 99959)
99.966% <= 7.103 milliseconds (cumulative count 99966)
99.974% <= 9.103 milliseconds (cumulative count 99974)
99.986% <= 10.103 milliseconds (cumulative count 99986)
99.989% <= 11.103 milliseconds (cumulative count 99989)
99.993% <= 12.103 milliseconds (cumulative count 99993)
99.998% <= 23.103 milliseconds (cumulative count 99998)
100.000% <= 24.111 milliseconds (cumulative count 100000)

Summary:
  throughput summary: 66533.60 requests per second
  latency summary (msec):
          avg       min       p50       p95       p99       max
        0.243     0.032     0.183     0.519     0.927    23.231
其它场景(结果略)
- ping
kubectl exec -it redis-cluster-0 -n opsxlab -- redis-benchmark -h 192.168.9.91 -p 31379 -a PleaseChangeMe2024 -t ping -n 100000 -c 20 -d 100 --cluster
- get
kubectl exec -it redis-cluster-0 -n opsxlab -- redis-benchmark -h 192.168.9.91 -p 31379 -a PleaseChangeMe2024 -t get -n 100000 -c 20 -d 100 --cluster
4.2 故障切换测试
测试前查看集群状态(以一组 Master/Slave 为例)
......
M: e6b176bc1d53bac7da548e33d5c61853ecbe1890 10.233.96.51:6379
   slots:[5461-10922] (5462 slots) master
   1 additional replica(s)
S: e7f5d965fc592373b01b0a0b599f00b8883cdf7d 10.233.68.1:6379
   slots: (0 slots) slave
   replicates e6b176bc1d53bac7da548e33d5c61853ecbe1890
- 测试场景1: 手动删除一个 Master 的 Slave,观察 Slave Pod 是否会自动重建并加入原有 Master。
删除 Slave 后,查看集群状态。
......
M: e6b176bc1d53bac7da548e33d5c61853ecbe1890 10.233.96.51:6379
   slots:[5461-10922] (5462 slots) master
   1 additional replica(s)
S: e7f5d965fc592373b01b0a0b599f00b8883cdf7d 10.233.68.8:6379
   slots: (0 slots) slave
   replicates e6b176bc1d53bac7da548e33d5c61853ecbe1890
结果: 原有 Slave IP 为 10.233.68.1,删除后自动重建,IP 变更为 10.233.68.8,并自动加入原有的 Master。
- 测试场景2: 手动删除 Master ,观察 Master Pod 是否会自动重建并重新变成 Master。
删除 Master 后,查看集群状态。
......
M: e6b176bc1d53bac7da548e33d5c61853ecbe1890 10.233.96.68:6379
   slots:[5461-10922] (5462 slots) master
   1 additional replica(s)
S: e7f5d965fc592373b01b0a0b599f00b8883cdf7d 10.233.68.8:6379
   slots: (0 slots) slave
   replicates e6b176bc1d53bac7da548e33d5c61853ecbe1890
结果: 原有 Master IP 为 10.233.96.51,删除后自动重建, IP 变更为 10.233.96.68,并重新变成 Master。
以上测试内容,仅是简单的故障切换测试,生产环境请增加更多的测试场景。
5. 安装管理客户端
大部分开发、运维人员还是喜欢图形化的 Redis 管理工具,所以介绍一下 Redis 官方提供的图形化工具 RedisInsight。
由于 RedisInsight 默认并不提供登录验证功能,因此,在系统安全要求比较高的环境会有安全风险,请慎用!个人建议生产环境使用命令行工具。
5.1 编辑资源清单
- 创建资源清单
请使用 vi 编辑器,创建资源清单文件 redisinsight-deploy.yaml,并输入以下内容:
apiVersion: apps/v1
kind: Deployment
metadata:
  name: redisinsight
  labels:
    app.kubernetes.io/name: redisinsight
spec:
  replicas: 1
  selector:
    matchLabels:
      app.kubernetes.io/name: redisinsight
  template:
    metadata:
      labels:
        app.kubernetes.io/name: redisinsight
    spec:
      containers:
        - name: redisinsight
          image: registry.opsxlab.cn:8443/redis/redisinsight:2.60
          ports:
            - name: redisinsight
              containerPort: 5540
              protocol: TCP
          resources:
            limits:
              cpu: '2'
              memory: 4Gi
            requests:
              cpu: 100m
              memory: 500Mi
- 创建外部访问服务
我们采用 NodePort 方式在 K8s 集群中对外发布 RedisInsight 服务,指定的端口为 31380。
请使用 vi 编辑器,创建资源清单文件 redisinsight-svc-external.yaml,并输入以下内容:
kind: Service
apiVersion: v1
metadata:
  name: redisinsight-external
  labels:
    app: redisinsight-external
spec:
  ports:
    - name: redisinsight
      protocol: TCP
      port: 5540
      targetPort: 5540
      nodePort: 31380
  selector:
    app.kubernetes.io/name: redisinsight
  type: NodePort
5.2 部署 RedisInsight
- 创建资源
执行下面的命令,创建 RedisInsight 资源。
kubectl apply -f redisinsight-deploy.yaml -n opsxlab
kubectl apply -f redisinsight-svc-external.yaml -n opsxlab
- 验证资源
执行下面的命令,查看 Deployment、Pod、Service 创建结果。
$ kubectl get deploy,pod,svc -n opsxlab
5.3 控制台初始化
打开 RedisInsight 控制台,http://192.168.9.91:31380
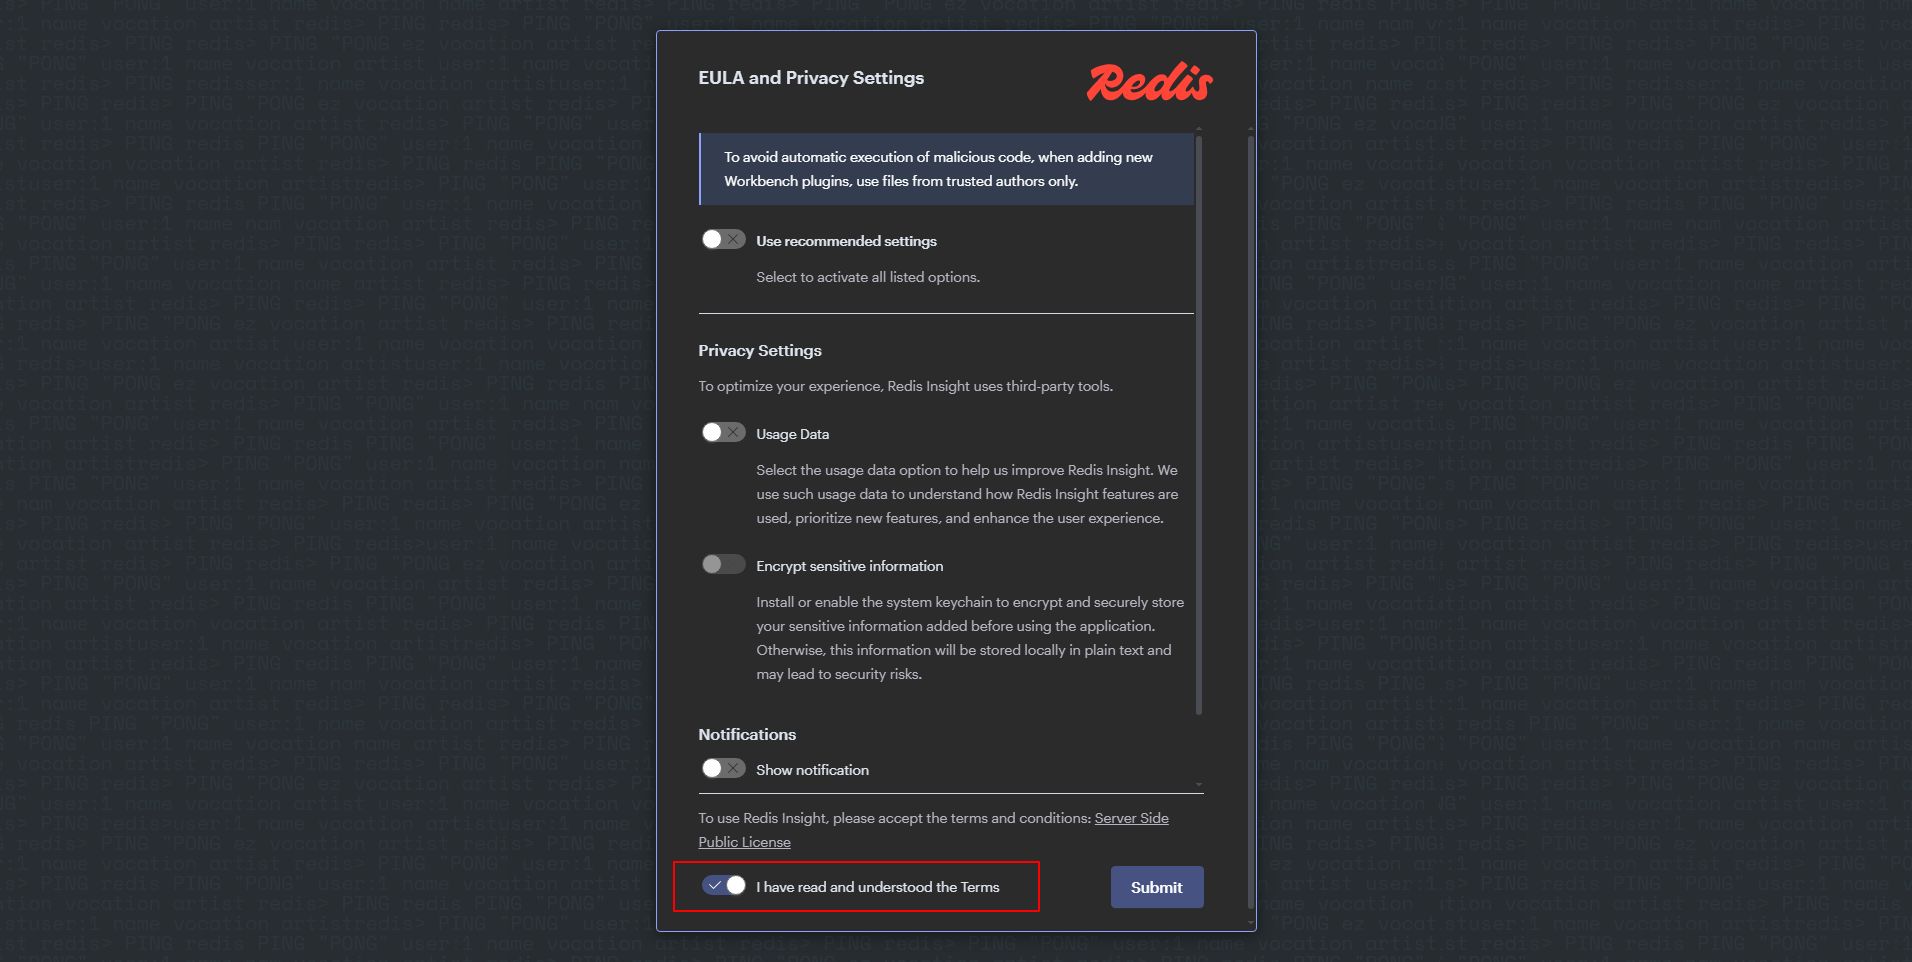
进入默认配置页面,只勾选最后一个按钮,点击 Submit。
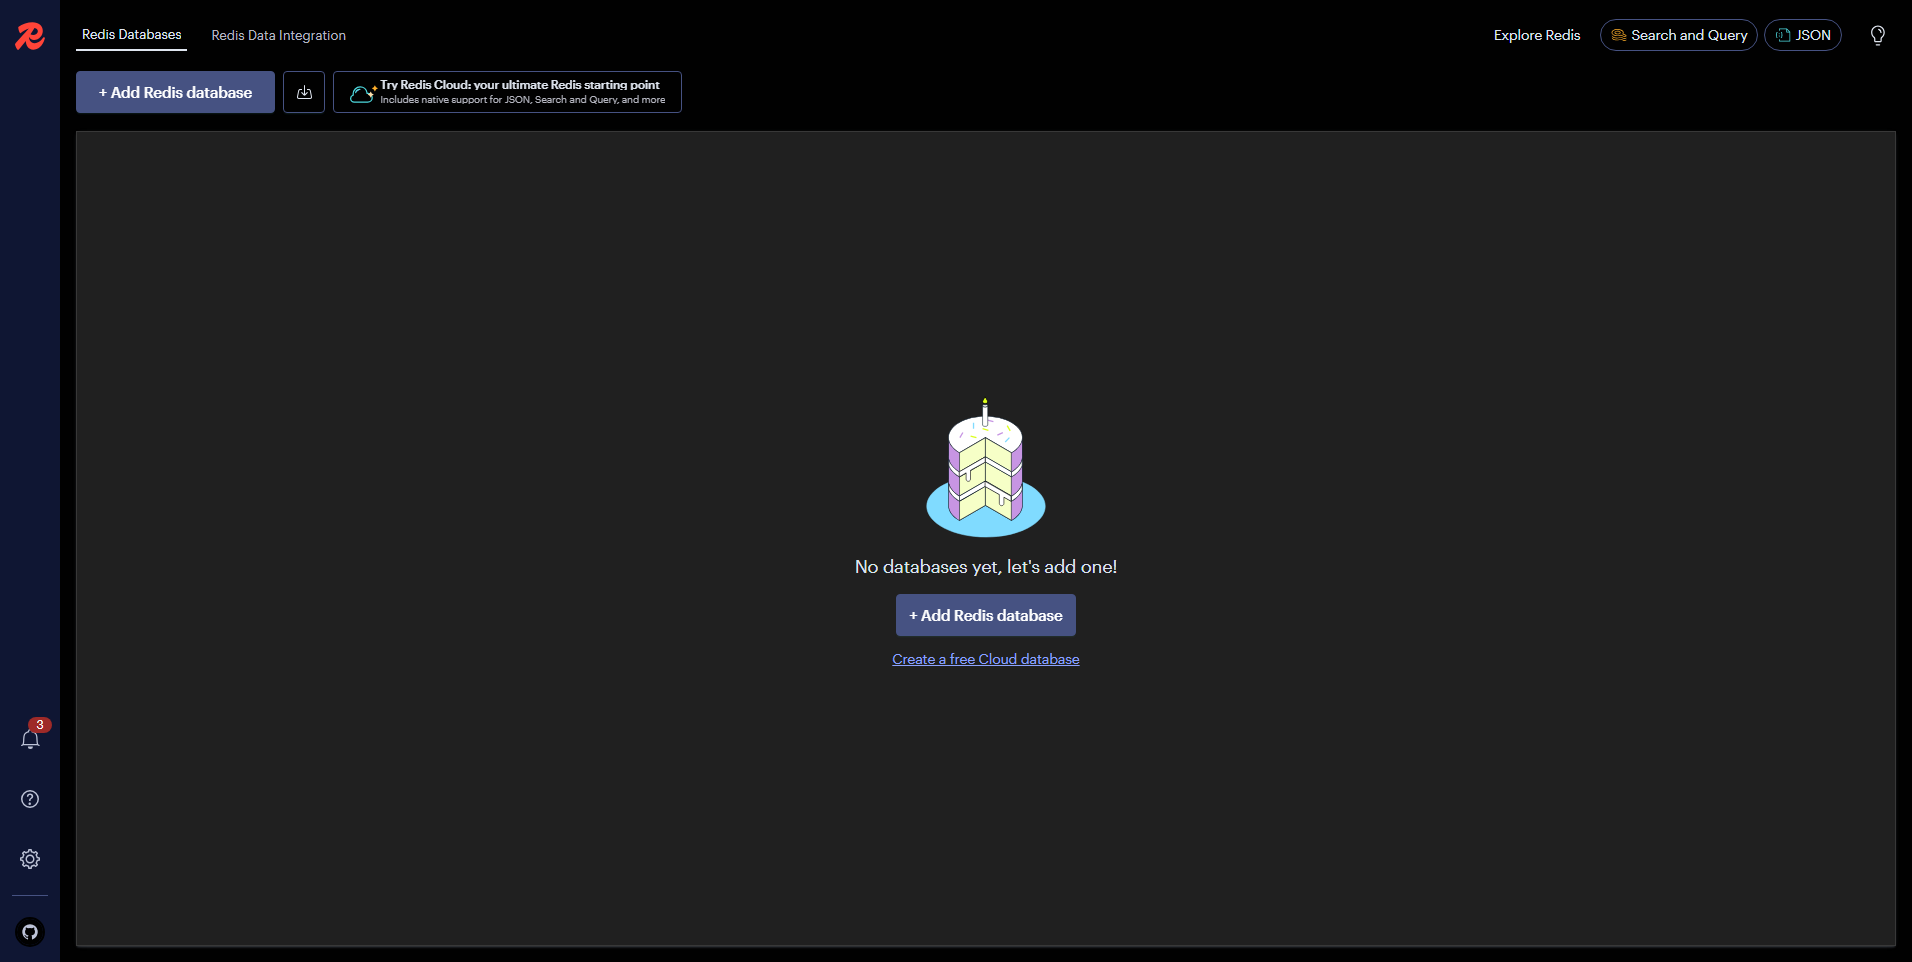
添加 Redis 数据库: 点击「Add Redis database」。
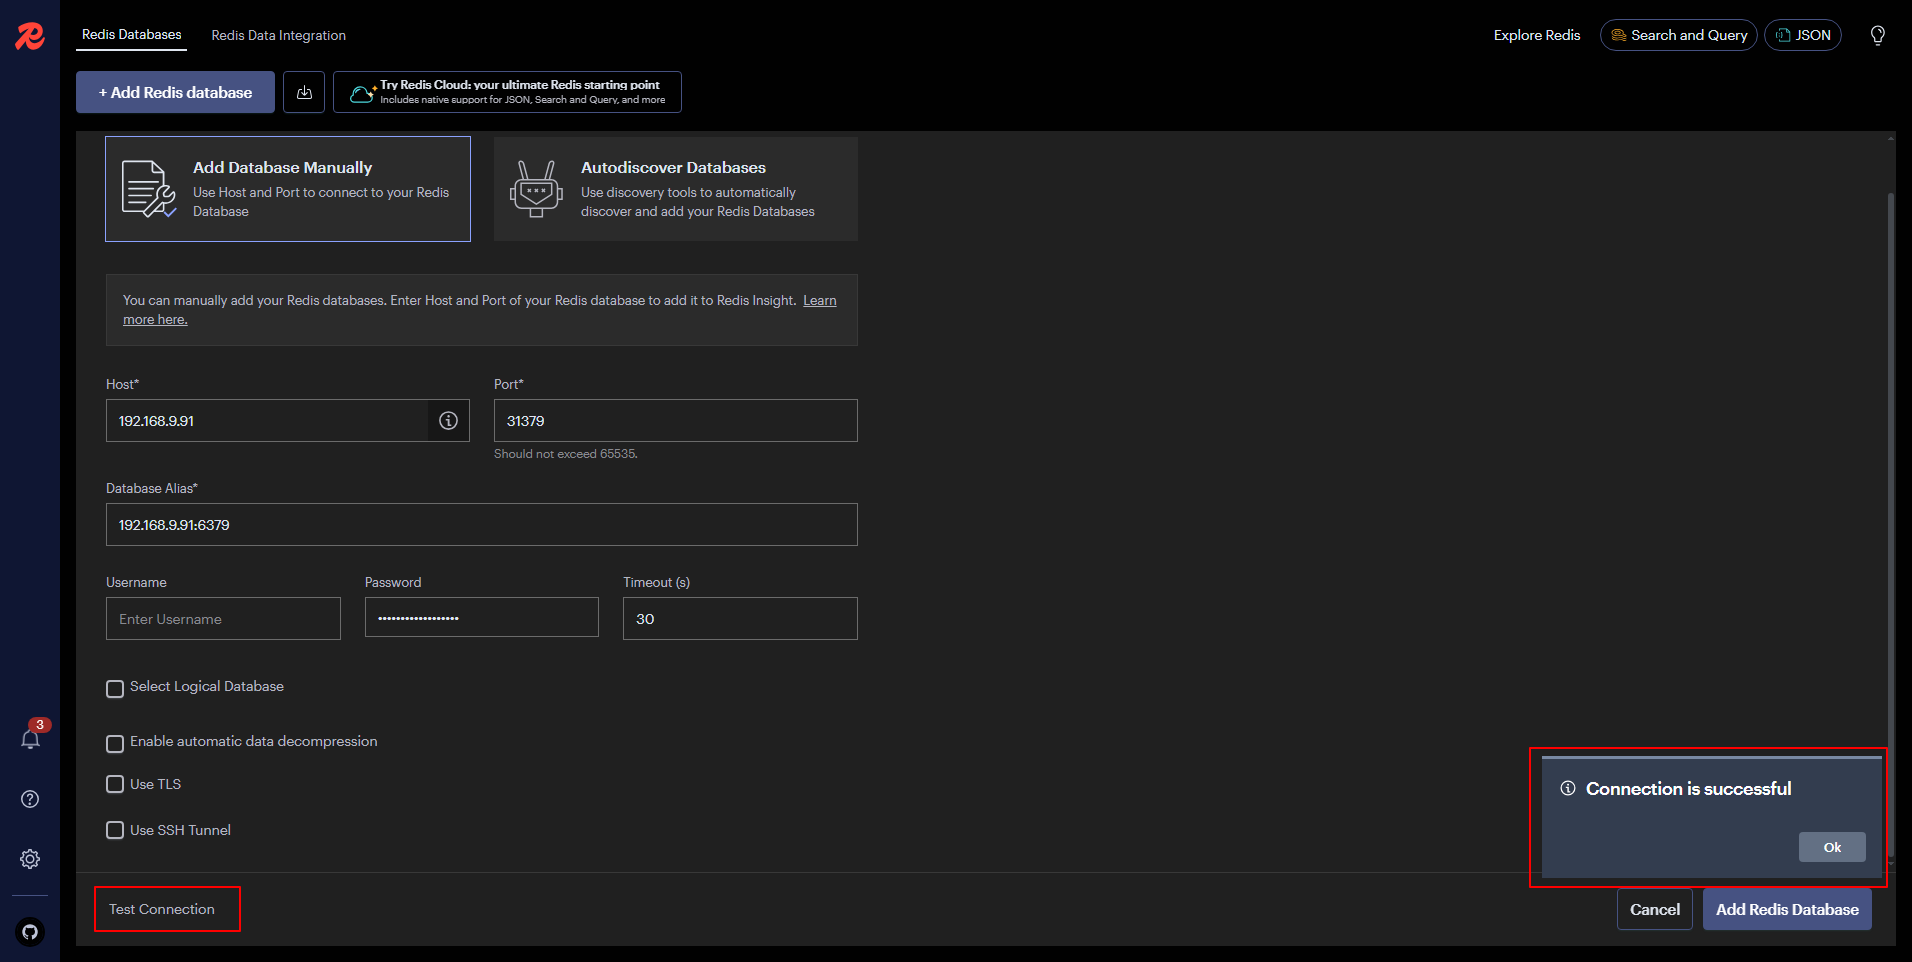
选择「Add Database Manually」,按提示填写信息。
-
Host: 填写 K8s 集群任意节点IP,这里使用 Control-1 节点的 IP
-
Port: Redis 服务对应的 Nodeport 端口
-
Database Alias: 随便写,就是一个标识
-
Password: 连接 Redis 的密码

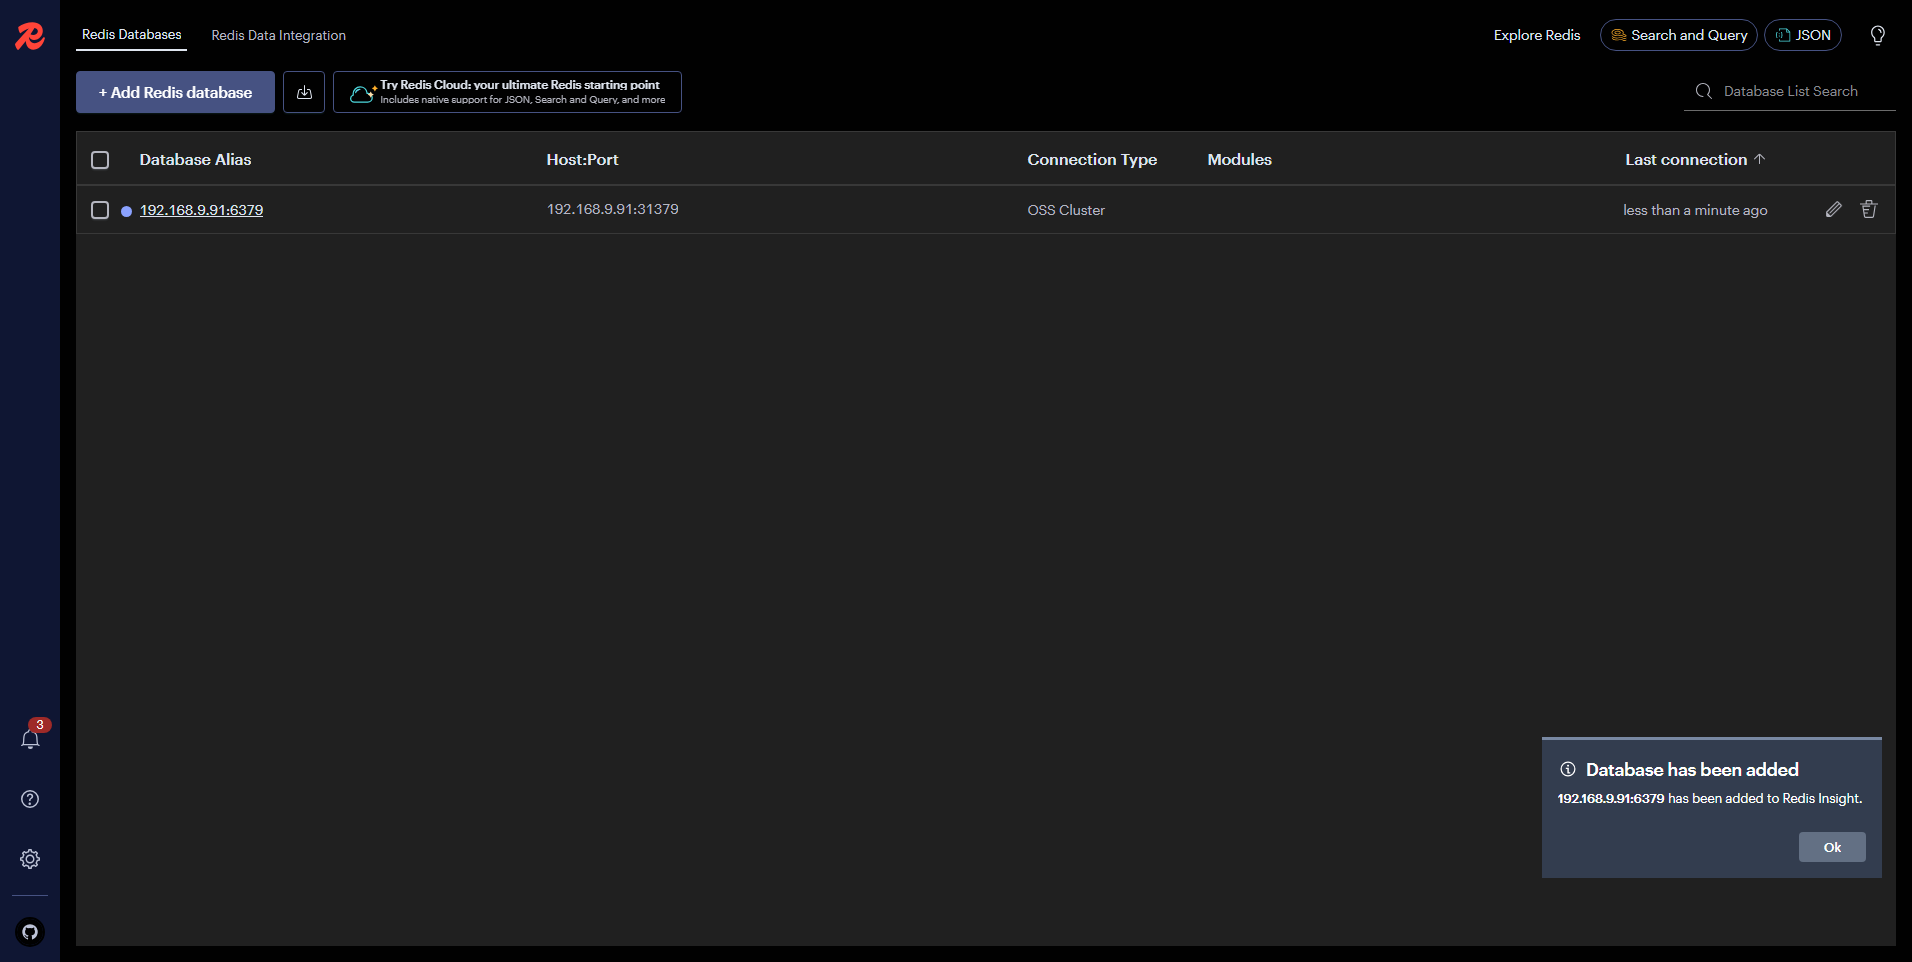
点击「Test Connection」,验证 Redis 是否可以连接。确认无误后,点击「Add Redis Database」。
5.4 控制台概览
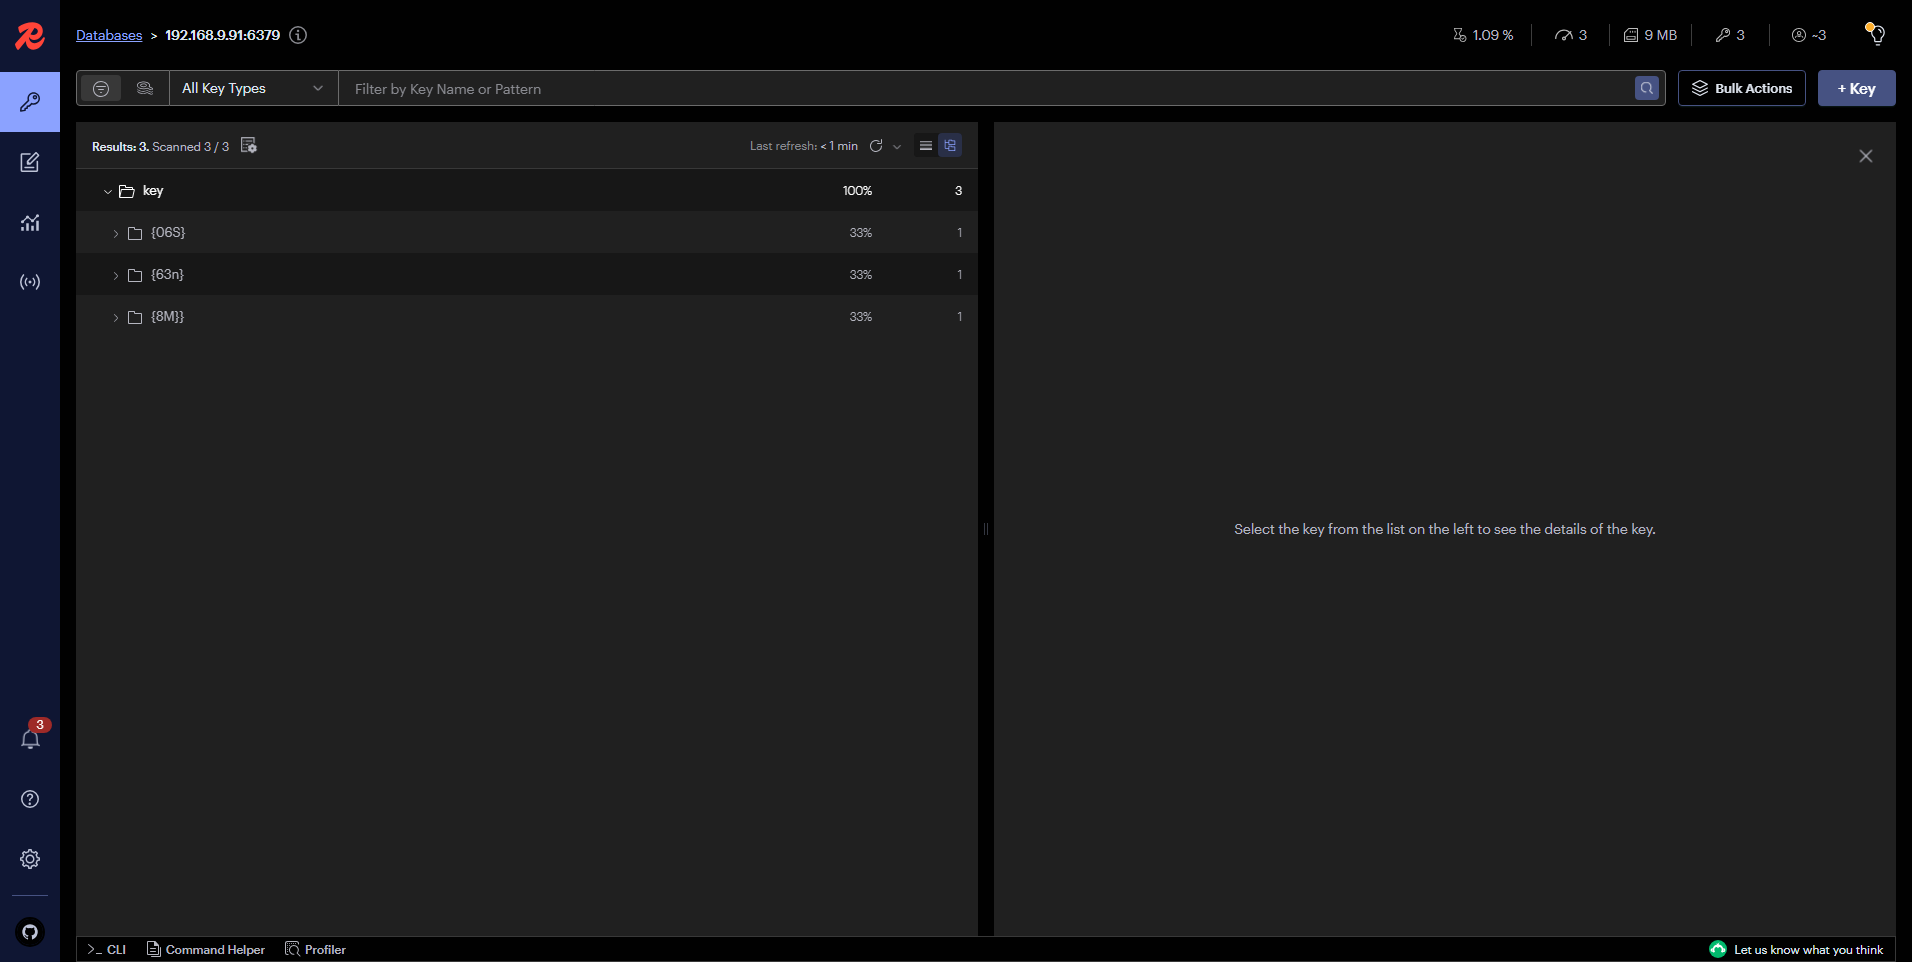
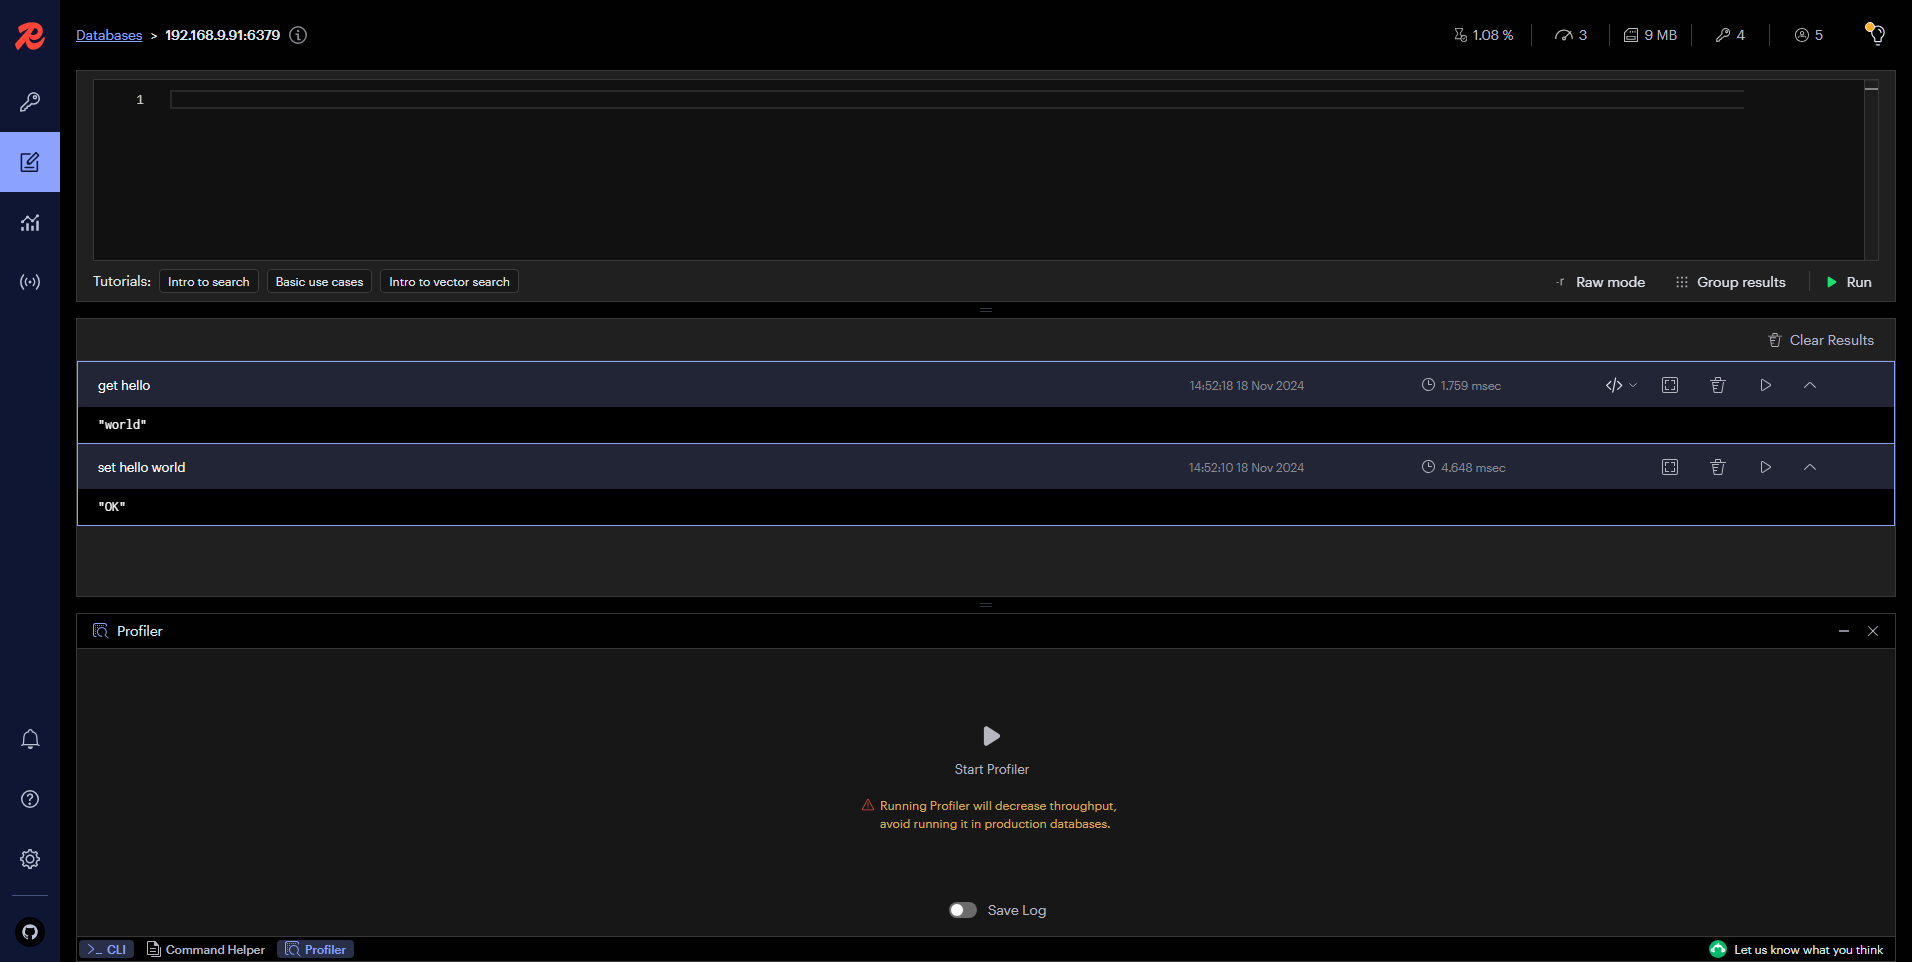
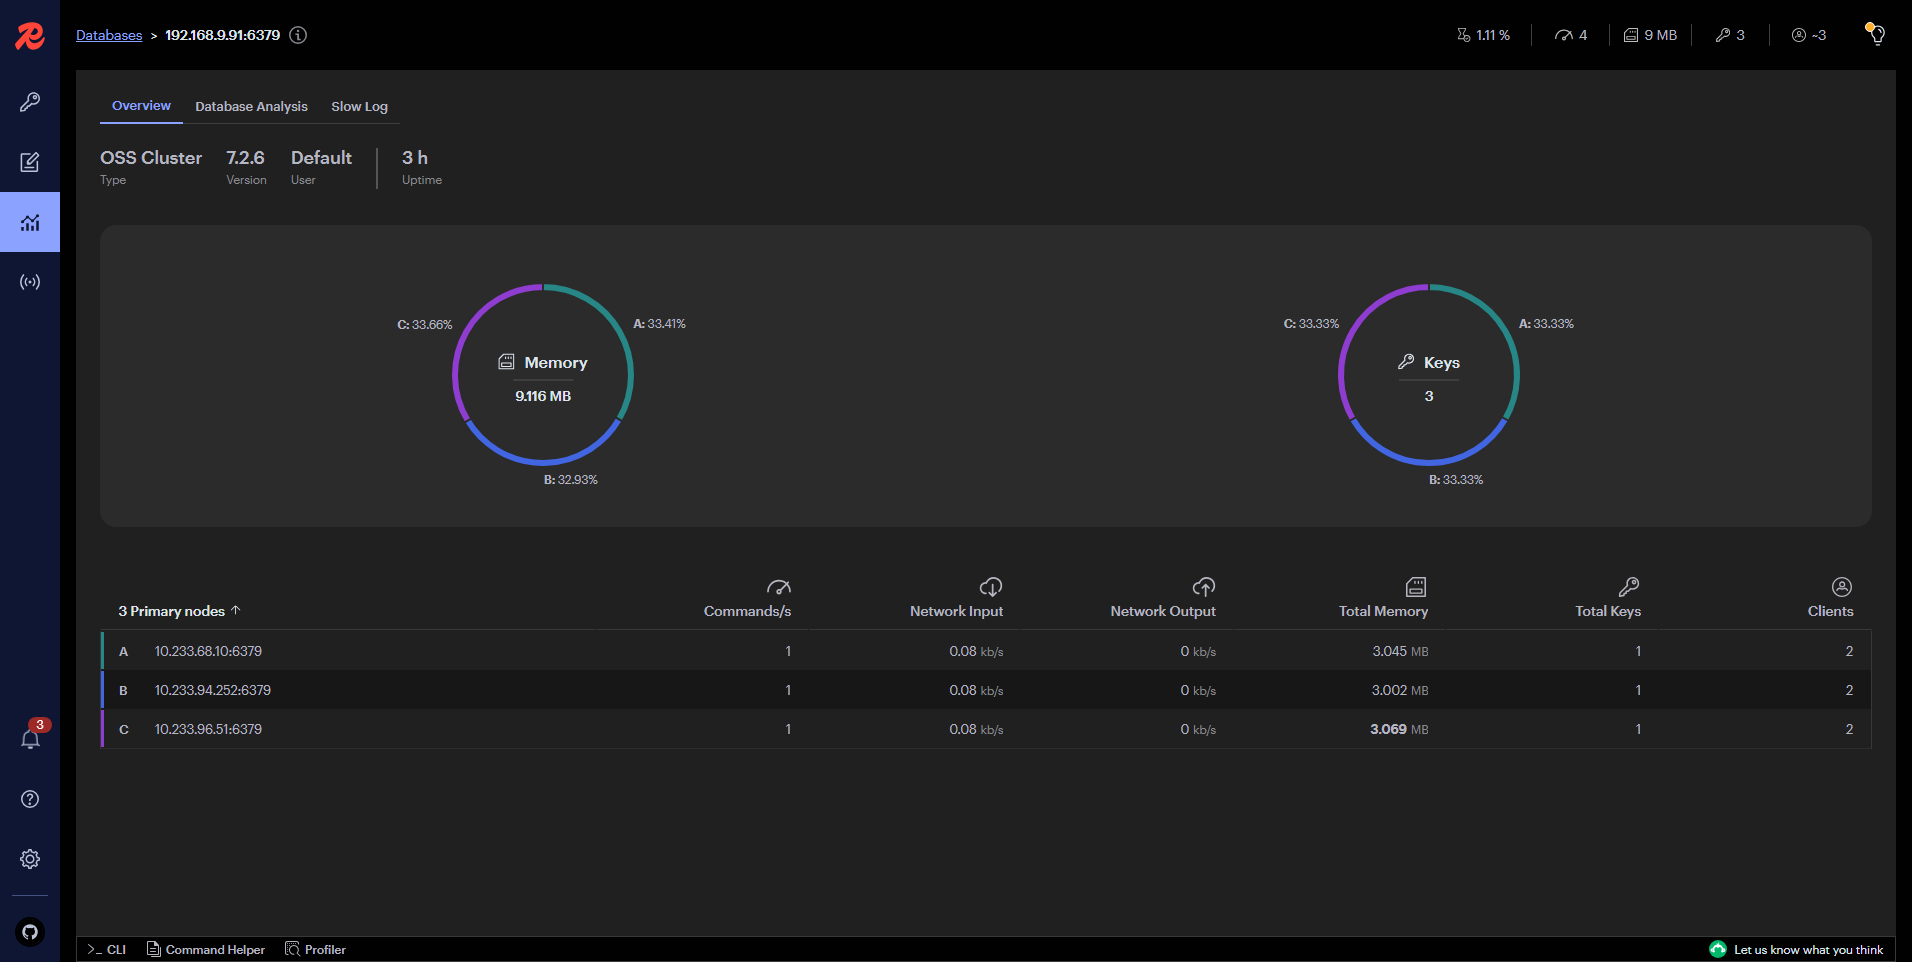
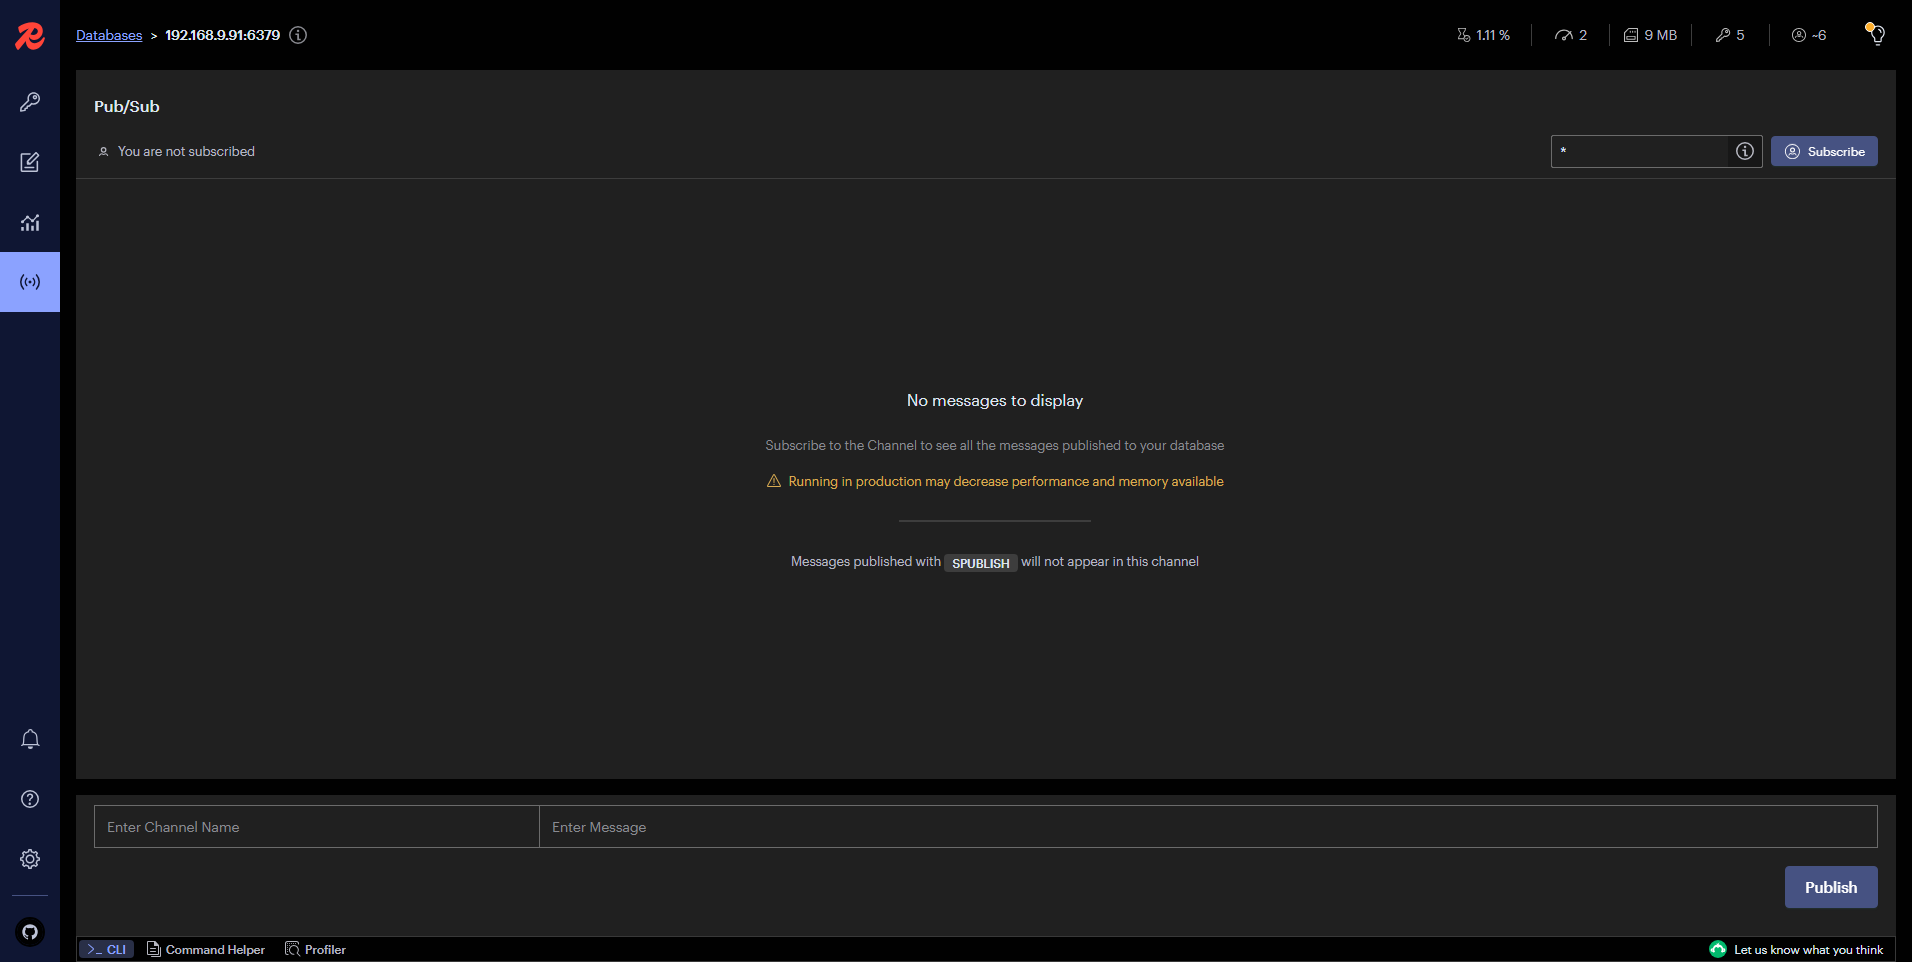
下面用几张图简单展示一下 RedisInsight v2.60 版本管理控制台的功能,总体感觉管理功能比 V1 版本少了很多。
在 Redis Databases 列表页,点击新添加的 Redis 数据库,进入 Redis 管理页面。
- 概览
- Workbench(可以执行 Redis 管理命令)
- Analytics
- Pub-Sub
更多管理功能请自行摸索。
免责声明:
- 笔者水平有限,尽管经过多次验证和检查,尽力确保内容的准确性,但仍可能存在疏漏之处。敬请业界专家大佬不吝指教。
- 本文所述内容仅通过实战环境验证测试,读者可学习、借鉴,但严禁直接用于生产环境。由此引发的任何问题,作者概不负责!
近期活动推荐
