下载软件包
首先请下载
p10404530_112030_Linux-x86-64_1of7.zip
p10404530_112030_Linux-x86-64_2of7.zip
这里我已上传百度盘
链接:http://pan.baidu.com/s/1c2KCrr6 密码:x3g0
环境:
建议硬件环境

软件环境:
[root@oracle ~]# cat /etc/redhat-release #版本
CentOS release 6.7 (Final)
[root@oracle ~]# /etc/init.d/iptables stop #防火墙
[root@oracle ~]# getenforce #selinux
Disabled
[root@oracle ~]# hostname -I #本机ip
192.168.56.166
[root@oracle ~]# cat /etc/sysconfig/i18n #字符集请调整为英文,否则后期乱码
LANG="en_US.UTF-8"
SYSFONT="latarcyrheb-sun16"
[root@oracle ~]# echo $LANG
en_US.UTF-8
很多时候觉得网上文档坑,很大一部分就是因为环境不一样!为了和本文档环境保持一致,请安装一下几个包组yum groupinstall "Compatibility libraries" "Base" "Development tools" "debugging Tools"
创建用户和组
[root@oracle ~]# groupadd oinstall
[root@oracle ~]# groupadd dba
[root@oracle ~]# useradd -g oinstall -G dba oracle
[root@oracle ~]# echo 123456 |passwd --stdin oracle
Changing password for user oracle.
passwd: all authentication tokens updated successfully.
创建Oracle目录文件夹
[root@oracle ~]# mkdir -p /u01/app
[root@oracle ~]# chown -R oracle:oinstall /u01
[root@oracle ~]# chmod -R 755 /u01
修改host解析
[root@oracle ~]# vim /etc/hosts
[root@oracle ~]# cat /etc/hosts
127.0.0.1 localhost localhost.localdomain localhost4 localhost4.localdomain4
::1 localhost localhost.localdomain localhost6 localhost6.localdomain6
192.168.56.166 oracle
修改全局变量
[root@oracle ~]# cat >> /etc/profile << EOF
>
> if [ \$USER = "oracle" ];then
> if [ \$SHELL = "/bin/ksh" ];then
> ulimit -p 16384
> ulimit -n 65536
> else
> ulimit -u 16384 -n 65536
> fi
> fi
> EOF
修改oracle用户,局部变量
[root@oracle ~]# cat >> /home/oracle/.bash_profile <<EOF
>
> HISTTIMEFORMAT='[%F %T]'
> ORACLE_BASE=/u01/app
> ORACLE_SID=orcl
> ORACLE_HOME=\$ORACLE_BASE/oracle/product/11.2.0.3/db_1
> NLS_LANG=AMERICAN_CHINA.ZHS16GBK
> LD_LIBRARY_PATH=\$ORACLE_HOME/lib:/lib:/usr/lib
> PATH=\$ORACLE_HOME/bin:\$PATH
>
> export ORACLE_BASE ORACLE_HOME ORACLE_SID NLS_LANG PATH
> EOF
修改内核
[root@oracle ~]# cat >> /etc/sysctl.conf <<EOF
>
>
> kernel.shmmni = 4096
> kernel.sem = 250 32000 100 128
> fs.file-max = 6815744
> net.ipv4.ip_local_port_range = 9000 65500
> net.core.rmem_default = 262144
> net.core.rmem_max = 4194304
> net.core.wmem_default= 262144
> net.core.wmem_max = 1048576
> fs.aio-max-nr = 1048576
> EOF
内核生效
[root@oracle ~]# sysctl -p
net.ipv4.ip_forward = 0
net.ipv4.conf.default.rp_filter = 1
net.ipv4.conf.default.accept_source_route = 0
kernel.sysrq = 0
kernel.core_uses_pid = 1
net.ipv4.tcp_syncookies = 1
kernel.msgmnb = 65536
kernel.msgmax = 65536
kernel.shmmax = 68719476736
kernel.shmall = 4294967296
kernel.shmmni = 4096
kernel.sem = 250 32000 100 128
fs.file-max = 6815744
net.ipv4.ip_local_port_range = 9000 65500
net.core.rmem_default = 262144
net.core.rmem_max = 4194304
net.core.wmem_default = 262144
net.core.wmem_max = 1048576
fs.aio-max-nr = 1048576
修改文件描述符
[root@oracle ~]# cat >> /etc/security/limits.conf <<EOF
> oracle soft nproc 2047
> oracle hard nproc 16384
> oracle soft nofile 1024
> oracle hard nofile 65536
> EOF
修改登录有关的配置文件
[root@oracle ~]# cat >> /etc/pam.d/login <<EOF
> session required /lib64/security/pam_limits.so
> EOF
配置本地yum源,主要是为了安装desktop包组省时间
[root@oracle ~]# mount /dev/cdrom /mnt
[root@oracle ~]# cd /etc/yum.repos.d/
[root@oracle yum.repos.d]# mkdir test
[root@oracle yum.repos.d]# mv * test/
mv: cannot move `test' to a subdirectory of itself, `test/test'
[root@oracle yum.repos.d]# echo '[local]
> name=local
> baseurl=file:///mnt
> enable=1
> gpgcheck=0' > /etc/yum.repos.d/CentOS.repo
[root@oracle yum.repos.d]# cat CentOS.repo
[local]
name=local
baseurl=file:///mnt
enable=1
gpgcheck=0

安装包组
yum groupinstall desktop -y
yum install -y xorg-x11-utils
上传安装包
[root@oracle oracle]# pwd
/tmp/oracle
[root@oracle oracle]# ls
p10404530_112030_Linux-x86-64_1of7.zip p10404530_112030_Linux-x86-64_2of7.zip
解压安装包
[root@oracle oracle]# unzip -q p10404530_112030_Linux-x86-64_1of7.zip
[root@oracle oracle]# unzip -q p10404530_112030_Linux-x86-64_2of7.zip
[root@oracle oracle]# ls
database p10404530_112030_Linux-x86-64_1of7.zip p10404530_112030_Linux-x86-64_2of7.zip
在window系统上:
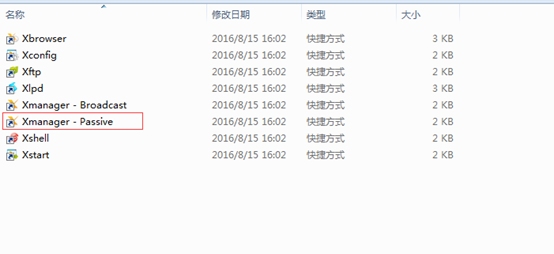
要求显卡性能稍微好点的机器上安装Xmanager Enterprise 5,并运行
Xmanager - Passive
xshell开启转发X11连接
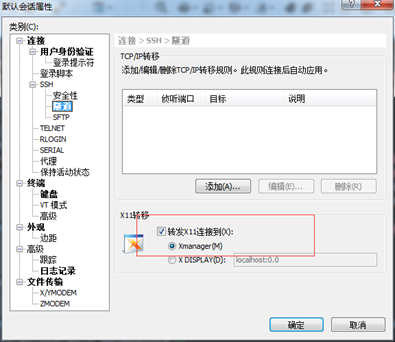
我这里物理机的ip是192.168.56.1,虚拟机的ip是192.168.56.166

回到linux命令行
[root@oracle oracle]# export DISPLAY=192.168.56.1:0.0
[root@oracle oracle]# su - oracle
[oracle@oracle ~]$ cd /tmp/oracle/database/
doc/ install/ response/ rpm/ sshsetup/ stage/
[oracle@oracle ~]$ cd /tmp/oracle/database/
[oracle@oracle database]$ ls
doc install response rpm runInstaller sshsetup stage welcome.html
[oracle@oracle database]$ ./runInstaller
Starting Oracle Universal Installer...
Checking Temp space: must be greater than 120 MB. Actual 10870 MB Passed
Checking swap space: must be greater than 150 MB. Actual 1023 MB Passed
Checking monitor: must be configured to display at least 256 colors. Actual 16777216 Passed
Preparing to launch Oracle Universal Installer from /tmp/OraInstall2016-08-24_01-25-55PM. Please wait ...
windows出现这个界面,代表成功了一半
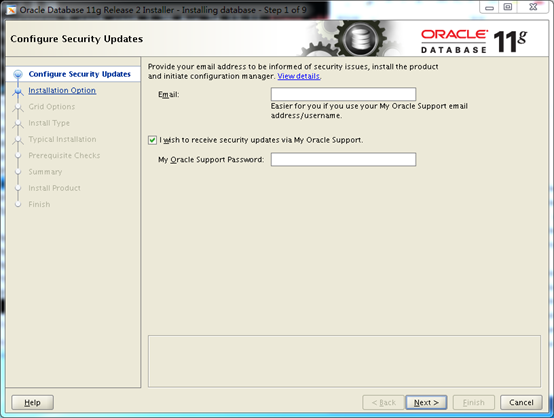
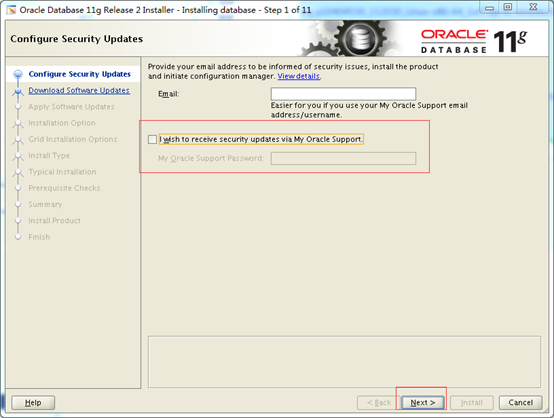
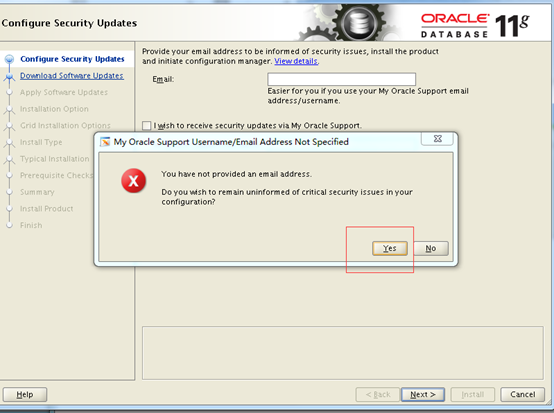

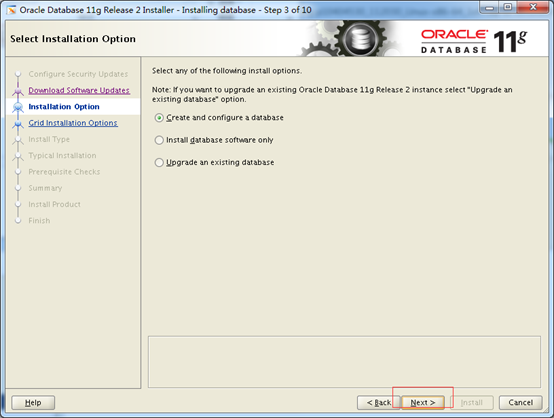
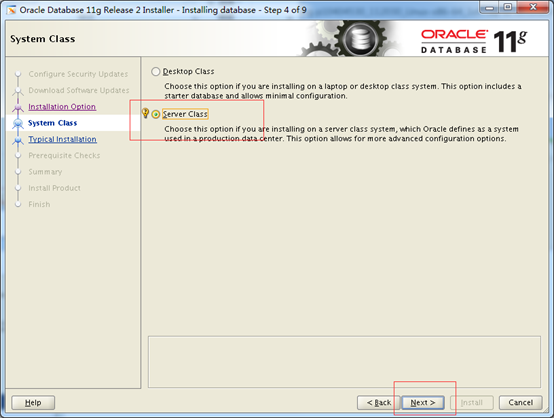


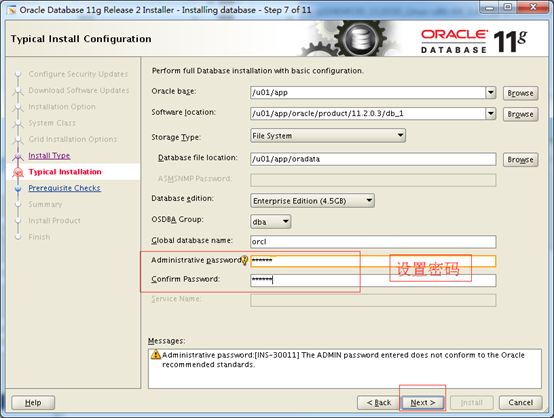
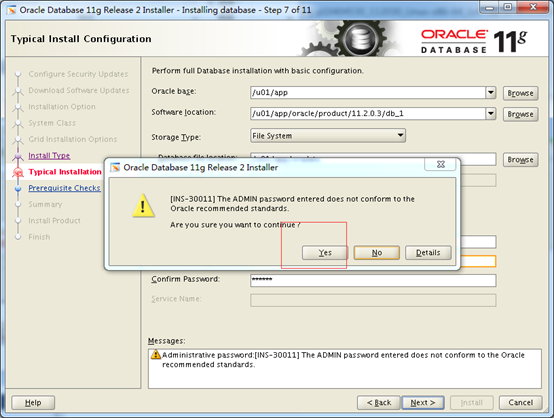
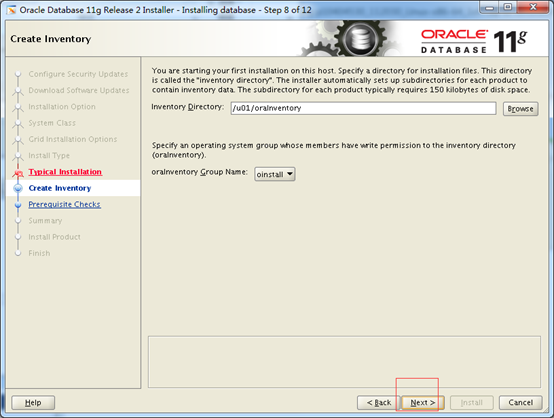
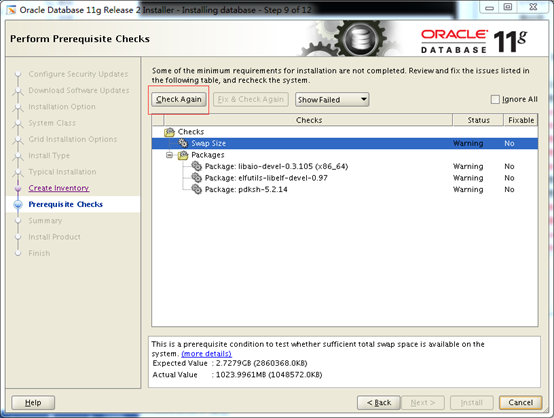
这里就是检测安装环境的,所以建议物理内存1.5G以上,swap相同大小,然后安装所缺依赖包
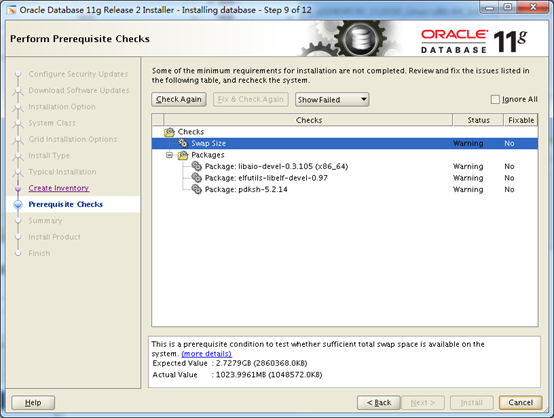
安装所缺的依赖包
yum install -y libaio-devel
yum install -y elfutils-libelf-devel
rpm -ivh pdksh-5.2.14-30.x86_64.rpm 这个需要自己下载后,rpm安装
增加虚拟内存的方
[root@oracle ~]# cd /tmp/
[root@oracle tmp]# dd if=/dev/zero of=swap bs=1M count=2048
2048+0 records in
2048+0 records out
2147483648 bytes (2.1 GB) copied, 6.54602 s, 328 MB/s
[root@oracle tmp]# mkswap -f /tmp/swap
Setting up swapspace version 1, size = 2097148 KiB
no label, UUID=4489a8de-8638-4cb5-aa5e-c41afc7abec3
[root@oracle tmp]# swapon /tmp/swap
[root@oracle tmp]# free -m
total used free shared buffers cached
Mem: 1862 1788 73 0 27 1499
-/+ buffers/cache: 261 1600
Swap: 3071 0 3071
虚拟机内存增加完成
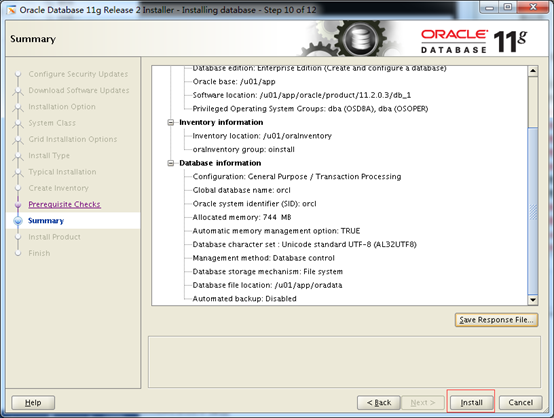
检查通过自动出现这个界面,

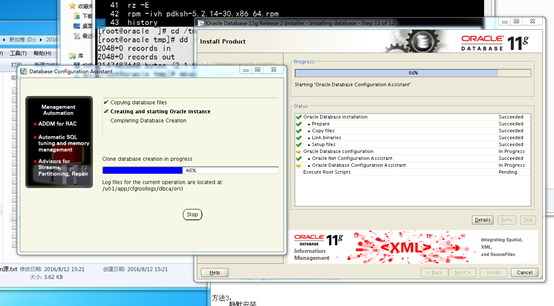
出现这个界面,请等待它自动完成!
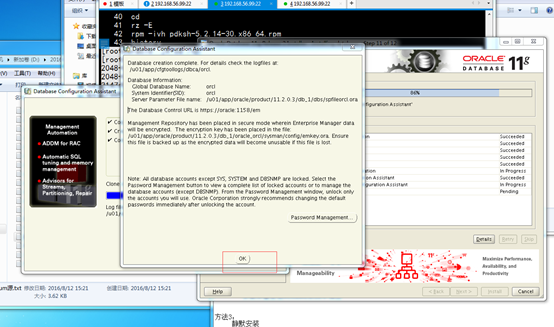
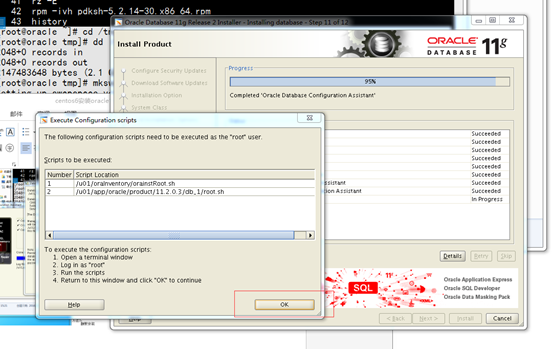
照着提示,用root身份运行提示的两个脚本之后点ok
最后点击close
命令行验证
[root@oracle tmp]# netstat -lntup|grep 1521
tcp 0 0 :::1521 :::* LISTEN 13629/tnslsnr
登录oracle
[root@oracle tmp]# su - oracle
[oracle@oracle ~]$ sqlplus / as sysdba
提示符为用户名
vi $ORACLE_HOME/sqlplus/admin/glogin.sql
set sqlprompt"_user>"
安装rlwrap(安装后可以进行命令翻查)
tar zxvf rlwrap-0.37.tar.gz
cd rlwrap-0.37
./configure && make && make install
vi .bash_profile
alias sqlplus='rlwrap sqlplus'
alias rman='rlwrap rman'
安装sqlora8 (php连接oracle需要)
需要先配置好ORACLE相关变量
./configure --prefix=/usr/local/libsqlora8\
--with-oraclehome=/u01/app/oracle/product/11.2.0.3/db_1 \
--with-oraversion=11.2.0.3.0 \
--enable-64bit
make && make install
参考视频地址http://edu.51cto.com/course/course_id-2885.html
