Jpeg算法压缩
JPEG格式图片文件背后的算法:
- 色彩空间转换(Color Space Conversion"),将RGB转换为YUV色彩空间,YUV的数据更好处理
- 色度缩减采样(Chromenance Downsampling),将蓝红色度层的“分辨率”变小,因为人眼对颜色不敏感
- 离散余弦变换(Discrete Cosine Transform),找出人眼不敏感的高频信息
- 量化(Quantization),删除人眼不敏感的高频信息
- 游程编码与霍夫曼编码(Run-length Encoding & Huffman Encoding),通用数据压缩
arm-linux环境下的安装
-
前往源代码管理网站下载安装

-
解压安装
-
配置+编译+安装
-
./configure
./configure --prefix=home/hemy/workspace/libjpeg_dir/libjpeg --host=arm-linux

-
make
命令行输入 make ,执行脚本文件
make -
make install
编译通过后,输入 make install 执行安装
make install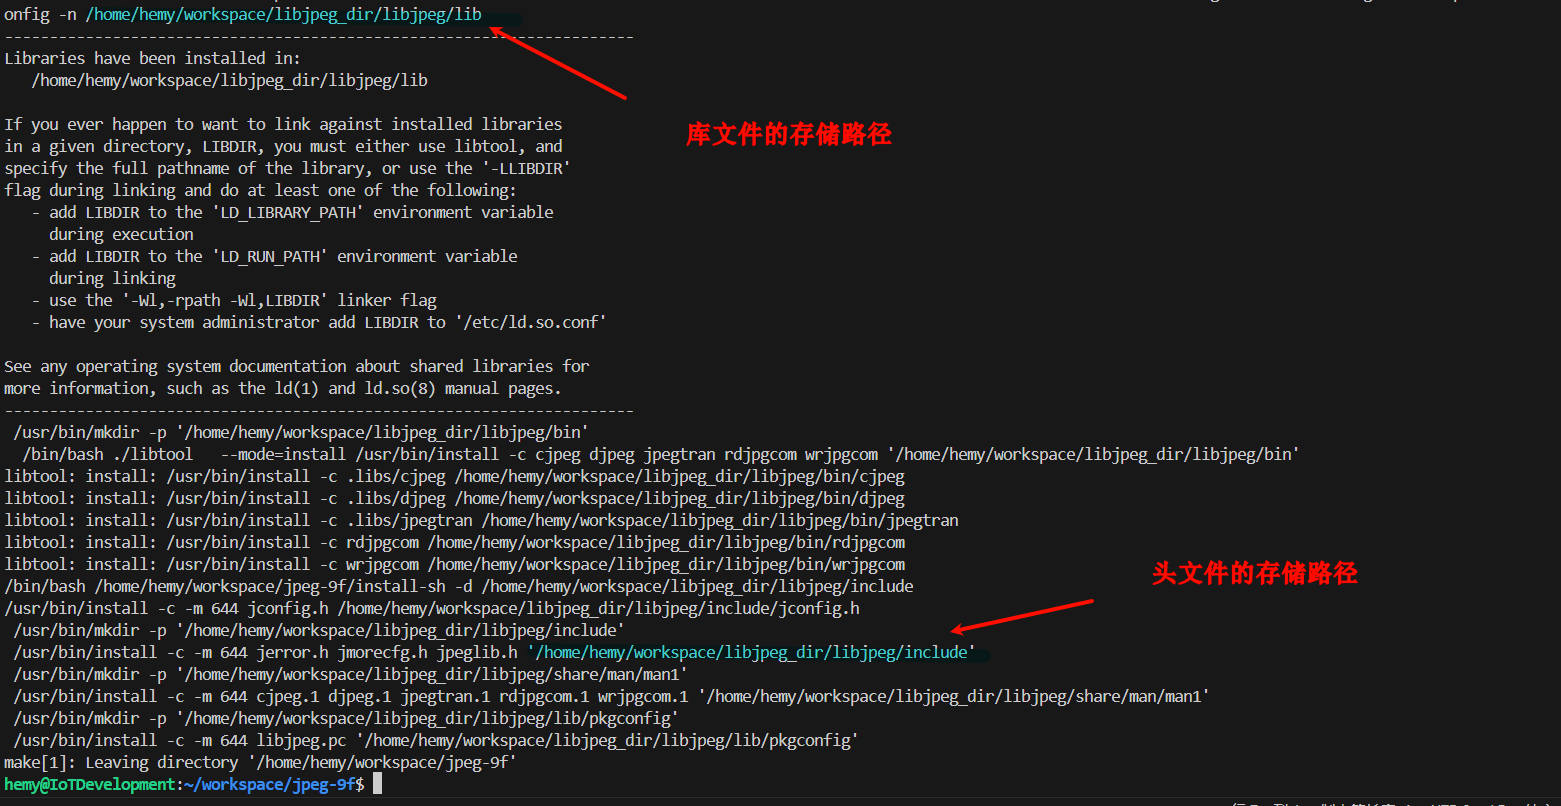
-
-
安装完成后拷贝
libjpegd的头文件和库文件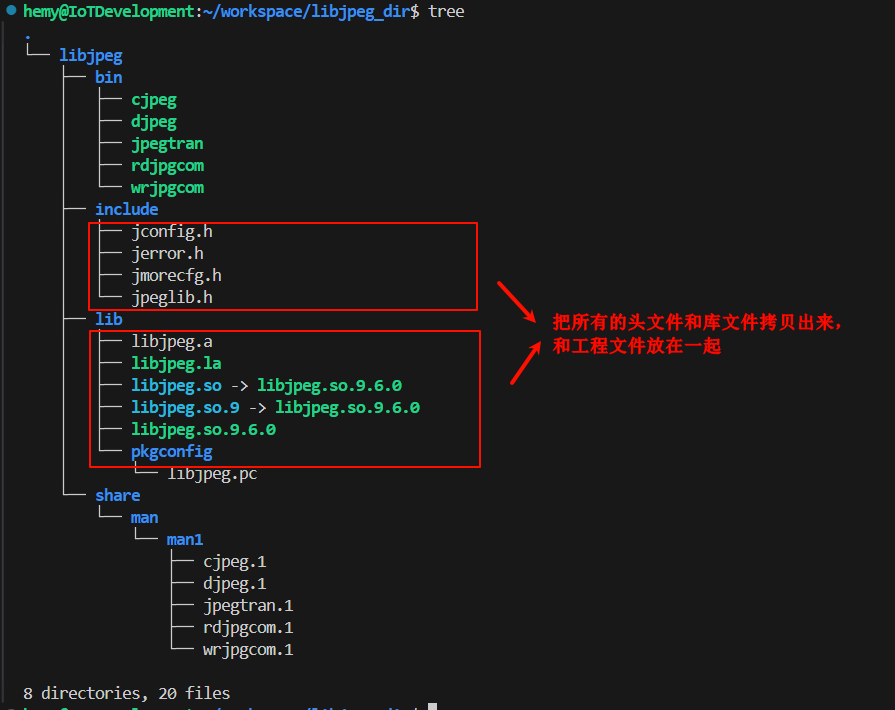
- 将
include文件夹和lib文件夹与自己的工程文件放入同一个路径,方便工程维护
- 将
jpeglib库的使用
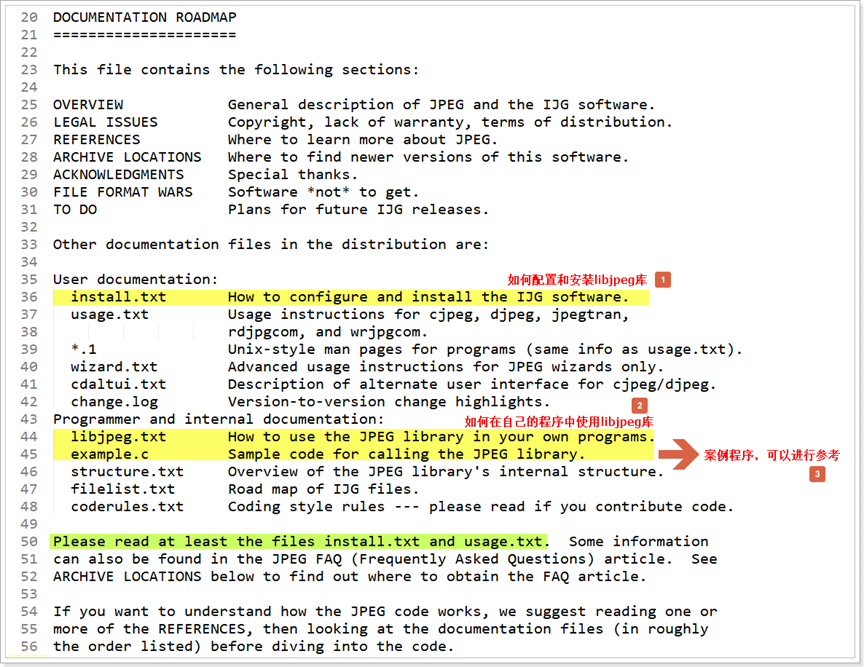
阅读README 阅读
install.txtlibjpeg.txtexample.c
jpg图片解压流程
-
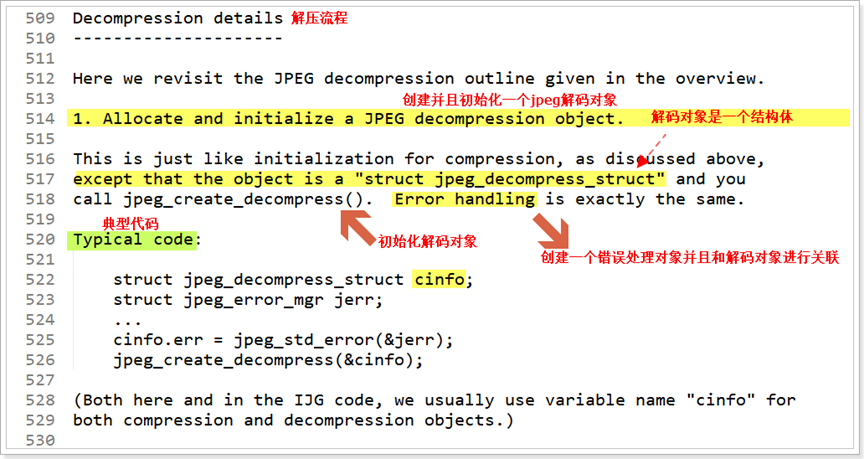
创建解码对象,并且对解码对象进行初始化,另外需要创建错误处理对象,并和解码对象进行关联。
-
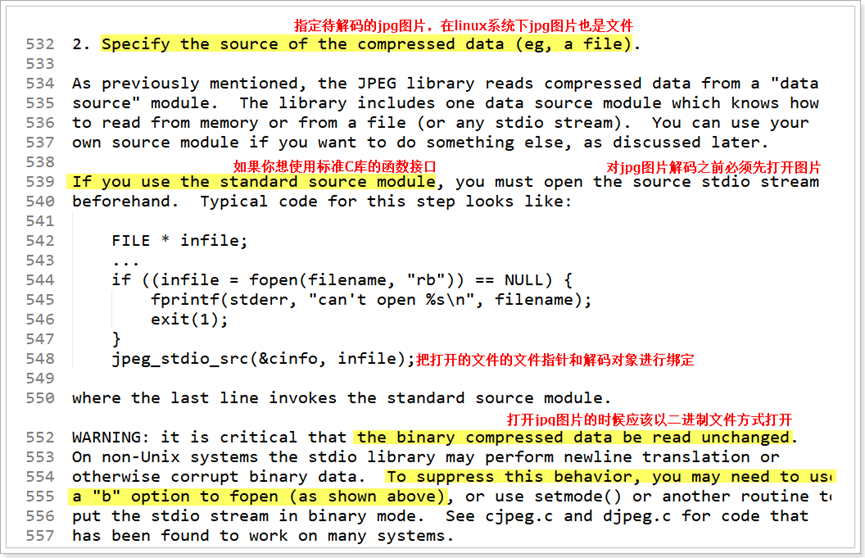
打开待解码的jpg图片,使用fopen的时候需要添加选项”b”,以二进制方式打开文件!
-
读取待解码图片的文件头,并把图像信息和解码对象进行关联,通过解码对象对jpg图片进行解码

-
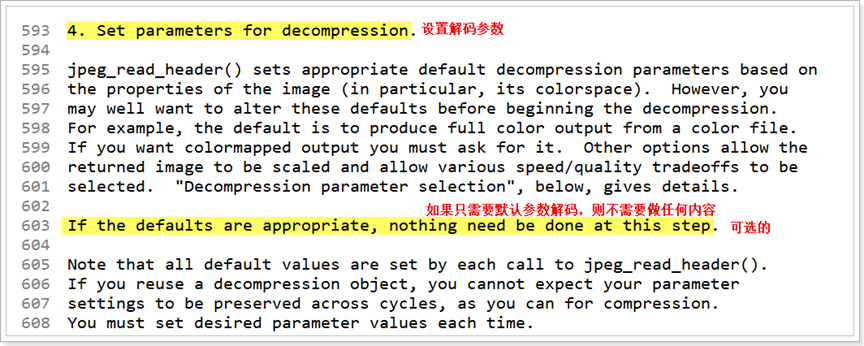
可以选择设置解码参数,如果打算以默认参数对jpg图片进行解码,则可以省略该步骤!
-
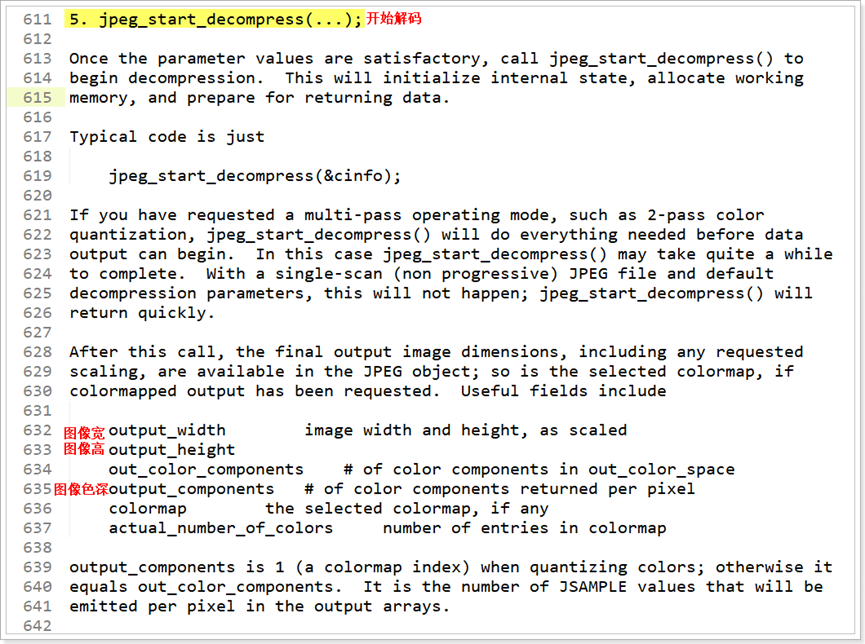
开始对jpg图片进行解码,调用函数之后开始解码,可以得到图像宽、图像高等信息!
-
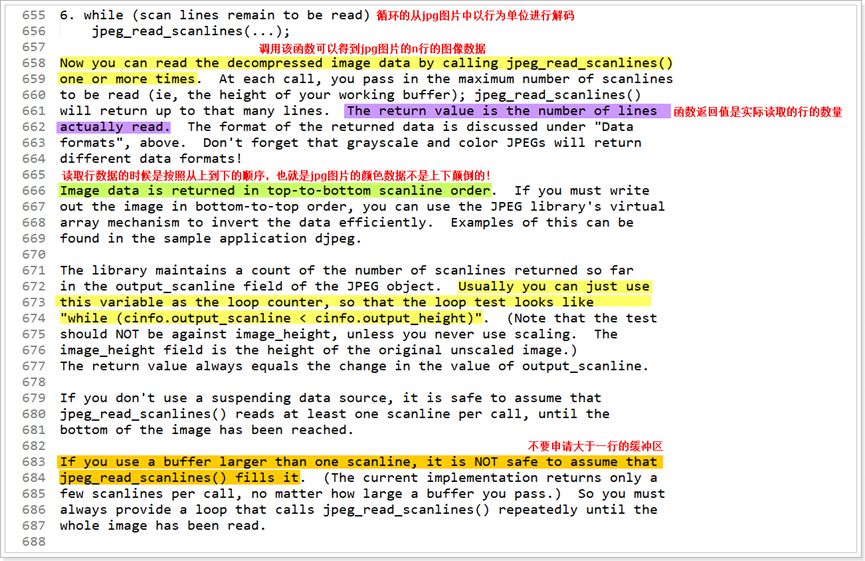
开始设计一个循环,在循环中每次读取1行的图像数据,并写入到LCD中,注意:转换算法需要用户自己设计。
-
在所有的图像数据都已经解码完成后,则调用函数完成解码即可,然后释放相关资源!
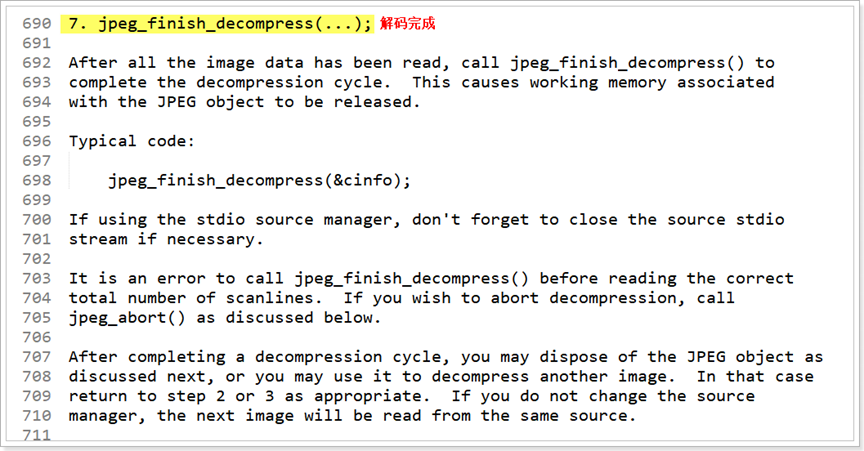
-
释放解码对象

jpg图片压缩流程
-
分配和初始化JPEG压缩对象
- 使用
jpeg_compress_struct结构体保存JPEG压缩所需的信息。 - 初始化一个
jpeg_error_mgr结构体,用于处理错误信息。 - 调用
jpeg_create_compress函数创建并初始化压缩对象。
- 使用
-
指定压缩后数据的输出目标
- 打开目标文件,并将文件流赋值给
jpeg_stdio_dest函数,以便将压缩后的数据写入文件。
- 打开目标文件,并将文件流赋值给
-
设置压缩参数
- 设置图像的宽度、高度、颜色通道数和颜色空间等参数。
- 使用
jpeg_set_defaults函数设置默认压缩参数。 - 使用
jpeg_set_quality函数设置压缩质量。
-
开始压缩
- 调用
jpeg_start_compress函数开始压缩过程。
- 调用
-
逐行写入图像数据
- 使用
jpeg_write_scanlines函数逐行写入图像数据。
- 使用
-
完成压缩
- 在写入所有图像数据后,调用
jpeg_finish_compress函数完成压缩过程。
- 在写入所有图像数据后,调用
-
释放资源
- 调用
jpeg_destroy_compress函数释放JPEG压缩对象及其相关资源。
- 调用
以上是使用libjpeg库进行JPEG压缩的基本流程。在实际应用中,可以根据需要调整压缩参数以及处理压缩过程中可能出现的错误情况。
代码实现
- 解码JPEG文件并在LCD屏幕的指定位置显示
//解码JPEG文件并在LCD屏幕的指定位置显示。
/***************************************************************************************
*
*   @名称   : read_JPEG_file
*   @描述   : 解码JPEG文件并在LCD屏幕的指定位置显示。
*   @参数   :
*             - filename: 指向JPEG文件路径的字符串指针。
*             - start_x: 图像开始显示的LCD屏幕上的x坐标。
*             - start_y: 图像开始显示的LCD屏幕上的y坐标。
*   @返回值 : 如果图像成功显示,则返回1;如果发生错误,则返回0。
*   @日期   : 2024/05/17
*   @作者   : sanjiudemiao@163.com
*   @版本   :
*             1. 2024/05/18 - 优化接口,添加了额外的参数,以更好地控制图像定位。
*
*   @注意   : 此函数设计用于在LCD屏幕上显示分辨率为800x480以内的JPEG图像。
*             如果JPEG图像恰好是800x480,必须将'start_x'和'start_y'设置为0,以避免段错误。
*             函数假设LCD屏幕缓冲区'lcd_mp'已正确初始化并可访问。
*
***************************************************************************************/
int read_JPEG_file (int *lcd_mp,char * filename,int start_x,int start_y)
{
  //参数有效性分析,判断LCD内存映射的地址是否有效
	if(NULL == lcd_mp)
	{
		printf("lcd mp is invaild\n");
		return 0;
	}
  /* This struct contains the JPEG decompression parameters and pointers to
   * working space (which is allocated as needed by the JPEG library).
   */
  struct jpeg_decompress_struct cinfo;
  /* We use our private extension JPEG error handler.
   * Note that this struct must live as long as the main JPEG parameter
   * struct, to avoid dangling-pointer problems.
   */
  struct jpeg_error_mgr jerr;
  /* More stuff */
  FILE * infile;			/* source file */
  unsigned char * buffer;		/* Output row buffer */
  int row_stride;			/* physical row width in output buffer */

  /* In this example we want to open the input file before doing anything else,
   * so that the setjmp() error recovery below can assume the file is open.
   * VERY IMPORTANT: use "b" option to fopen() if you are on a machine that
   * requires it in order to read binary files.
   */

  if ((infile = fopen(filename, "rb")) == NULL) {
    fprintf(stderr, "can't open %s\n", filename);
    return 0;
  }

  /* Step 1: allocate and initialize JPEG decompression object */

  /* We set up the normal JPEG error routines, then override error_exit. */
  cinfo.err = jpeg_std_error(&jerr);

  /* Now we can initialize the JPEG decompression object. */
  jpeg_create_decompress(&cinfo);

  /* Step 2: specify data source (eg, a file) */

  jpeg_stdio_src(&cinfo, infile);

  /* Step 3: read file parameters with jpeg_read_header() */

  (void) jpeg_read_header(&cinfo, TRUE);
  /* We can ignore the return value from jpeg_read_header since
   *   (a) suspension is not possible with the stdio data source, and
   *   (b) we passed TRUE to reject a tables-only JPEG file as an error.
   * See libjpeg.txt for more info.
   */

  /* Step 4: set parameters for decompression */

  /* In this example, we don't need to change any of the defaults set by
   * jpeg_read_header(), so we do nothing here.
   */

  /* Step 5: Start decompressor */

  (void) jpeg_start_decompress(&cinfo);
  /* We can ignore the return value since suspension is not possible
   * with the stdio data source.
   */

  /* We may need to do some setup of our own at this point before reading
   * the data.  After jpeg_start_decompress() we have the correct scaled
   * output image dimensions available, as well as the output colormap
   * if we asked for color quantization.
   * In this example, we need to make an output work buffer of the right size.
   */
  /* JSAMPLEs per row in output buffer */
  row_stride = cinfo.output_width * cinfo.output_components;  //计算一行的大小

  /* Make a one-row-high sample array that will go away when done with image */
  buffer = calloc(1,row_stride);

  /* Step 6: while (scan lines remain to be read) */
  /*           jpeg_read_scanlines(...); */

  /* Here we use the library's state variable cinfo.output_scanline as the
   * loop counter, so that we don't have to keep track ourselves.
   */
  int data = 0;


	if(cinfo.output_width > 800 || cinfo.output_height > 480)
	{
	printf("[%s] width or height is too long\n", filename);
	return 0;
	}

  while (cinfo.output_scanline < cinfo.output_height)
  {
    /* jpeg_read_scanlines expects an array of pointers to scanlines.
     * Here the array is only one element long, but you could ask for
     * more than one scanline at a time if that's more convenient.
     */
    (void) jpeg_read_scanlines(&cinfo, &buffer, 1); //从上到下,从左到右  RGB RGB RGB RGB

  	for (int i = 0; i < cinfo.output_width; ++i)  //012 345
  	{
  		data |= buffer[3*i]<<16;	//R
		  data |= buffer[3*i+1]<<8;	//G
		  data |= buffer[3*i+2];  	//B

		//把像素点写入到LCD的指定位置
		lcd_mp[800*start_y + start_x + 800*(cinfo.output_scanline-1) + i] = data;

		data = 0;
  	}

  }

  /* Step 7: Finish decompression */

  (void) jpeg_finish_decompress(&cinfo);
  /* We can ignore the return value since suspension is not possible
   * with the stdio data source.
   */

  /* Step 8: Release JPEG decompression object */

  /* This is an important step since it will release a good deal of memory. */
  jpeg_destroy_decompress(&cinfo);

  /* After finish_decompress, we can close the input file.
   * Here we postpone it until after no more JPEG errors are possible,
   * so as to simplify the setjmp error logic above.  (Actually, I don't
   * think that jpeg_destroy can do an error exit, but why assume anything...)
   */
  fclose(infile);

  /* At this point you may want to check to see whether any corrupt-data
   * warnings occurred (test whether jerr.pub.num_warnings is nonzero).
   */

  /* And we're done! */
  return 1;
}
- 将BMP图像文件转换为JPEG格式并保存到指定文件。
//将BMP图像文件转换为JPEG格式并保存到指定文件。
/***************************************************************************************
*
*   @名称   : write_JPEG_file
*   @描述   : 将BMP图像文件转换为JPEG格式并保存到指定文件。
*   @参数   :
*             - filename: 指向将要保存JPEG文件路径的字符串指针。
*             - quality: 整数,指定JPEG图像的质量,范围从0(最差质量,最大压缩)到100(最佳质量,最小压缩)。
*   @返回值 : 如果转换成功并且文件被成功写入,则返回1;如果发生错误,则返回0。
*   @日期   : 2024/05/22
*   @作者   : sanjiudemiao@163.com
*   @版本   :
*             1. 2024/05/22 - 初始版本,实现了从BMP到JPEG的基本转换功能。
*
*   @注意   : 此函数使用libjpeg库进行JPEG压缩。确保在调用此函数之前已经安装并配置了libjpeg。
*             函数不会对输入的BMP图像进行缩放或裁剪,所以输入图像的尺寸应该与最终JPEG图像的尺寸相匹配。
*             质量参数会影响输出文件的大小和图像质量。
*
***************************************************************************************/
int write_JPEG_file (char * filename, int quality)
{
//unsigned char  * image_buffer;	/* Points to large array of R,G,B-order data */
 int image_height;	/* Number of rows in image */
 int image_width;		/* Number of columns in image */

//1.打开待显示的BMP图像  fopen
  FILE * bmp_fp = fopen("10.bmp","rb"); //转换10.bmp
  if (NULL == bmp_fp)
  {
    return -1;
  }

//2.读取BMP文件的图像信息,获取BMP的宽和高
	BITMAPFILEHEADER *fileinfo = malloc(14);
	BITMAPINFOHEADER *headerinfo = malloc (40);


//读取bmp的头信息
  fread(fileinfo,14,1,bmp_fp); //读取14字节
  fread(headerinfo,40,1,bmp_fp); //读取40字节
  printf("bmp bfSize = %d\n",fileinfo->bfSize);
  printf("bmp width = %d,height = %d\n",headerinfo->biWidth,headerinfo->biHeight);
//备份宽和高
	int width=headerinfo->biWidth;
	int height=headerinfo->biHeight;
  int width_th=(width*24/8)+((4-(width*24/8)%4)%4);  //字节补齐

  image_width=width;
  image_height=height;

//读取RGB信息
// 为 image_buffer 分配内存
unsigned char *image_buffer = malloc(width * height * 3);
unsigned char *rgb_buffer = malloc(width_th * height * 3);
printf("----------------------1");
fread(rgb_buffer,1,width_th*height*3,bmp_fp);
printf("----------------------2");

fclose(bmp_fp);

//把BGR转换成RGB
//bmp是小端存储 自下往上
//jpeg是大端存储 自上往下
//FILE * jpeg = fopen("jpegrgb","wb");
char temp;
/*************************************************************************/
// for(int i = height-1 ; i >= 0 ; i--)
// {
//     for(int j = 0 ; j < width ; j++)
//     {
//       temp = image_buffer[width_th * i * 3 + j * 3];
//       image_buffer[width_th* i * 3 + j * 3] =image_buffer[width_th * i * 3 + j * 3 + 2];
//       image_buffer[width_th* i * 3 + j * 3 + 2] = temp;
//     }
//     printf("----------------------%d\n",i);
// }
/*****************************bmp格式**************************************/
for(int i = height-1,k=0; i >= 0 ; i--,k++)
{
    for(int j = 0 ; j < width ; j++)
    {
      image_buffer[width * k * 3+ j * 3] = rgb_buffer[width_th * i+ j * 3+2];
      image_buffer[width * k * 3+ j * 3+1] = rgb_buffer[width_th * i+ j * 3+1];
      image_buffer[width * k * 3+ j * 3+2] = rgb_buffer[width_th * i+ j * 3];
    }
    printf("----------------------%d\n",i);
}

    free(fileinfo);
    free(headerinfo);
  /* This struct contains the JPEG compression parameters and pointers to
   * working space (which is allocated as needed by the JPEG library).
   * It is possible to have several such structures, representing multiple
   * compression/decompression processes, in existence at once.  We refer
   * to any one struct (and its associated working data) as a "JPEG object".
   */
  struct jpeg_compress_struct cinfo;
  /* This struct represents a JPEG error handler.  It is declared separately
   * because applications often want to supply a specialized error handler
   * (see the second half of this file for an example).  But here we just
   * take the easy way out and use the standard error handler, which will
   * print a message on stderr and call exit() if compression fails.
   * Note that this struct must live as long as the main JPEG parameter
   * struct, to avoid dangling-pointer problems.
   */
  struct jpeg_error_mgr jerr;
  /* More stuff */
  FILE * outfile =fopen(filename, "wb");		/* target file */
  printf("%s\n",filename);
  JSAMPROW row_pointer[1];	/* pointer to JSAMPLE row[s] */
  int row_stride;		/* physical row width in image buffer */

  /* Step 1: allocate and initialize JPEG compression object */

  /* We have to set up the error handler first, in case the initialization
   * step fails.  (Unlikely, but it could happen if you are out of memory.)
   * This routine fills in the contents of struct jerr, and returns jerr's
   * address which we place into the link field in cinfo.
   */
  cinfo.err = jpeg_std_error(&jerr);
  /* Now we can initialize the JPEG compression object. */
  jpeg_create_compress(&cinfo);

  /* Step 2: specify data destination (eg, a file) */
  /* Note: steps 2 and 3 can be done in either order. */

  /* Here we use the library-supplied code to send compressed data to a
   * stdio stream.  You can also write your own code to do something else.
   * VERY IMPORTANT: use "b" option to fopen() if you are on a machine that
   * requires it in order to write binary files.
   */
  if ((outfile) == NULL) {
    fprintf(stderr, "can't open %s\n", filename);
    return 0;
  }

  jpeg_stdio_dest(&cinfo, outfile);
  printf("jpeg stdio\n");

  /* Step 3: set parameters for compression */

  /* First we supply a description of the input image.
   * Four fields of the cinfo struct must be filled in:
   */
  cinfo.image_width = image_width; 	/* image width and height, in pixels */
  cinfo.image_height = image_height;
  cinfo.input_components = 3;		/* # of color components per pixel */
  cinfo.in_color_space = JCS_RGB; 	/* colorspace of input image */
  /* Now use the library's routine to set default compression parameters.
   * (You must set at least cinfo.in_color_space before calling this,
   * since the defaults depend on the source color space.)
   */
  jpeg_set_defaults(&cinfo);
  /* Now you can set any non-default parameters you wish to.
   * Here we just illustrate the use of quality (quantization table) scaling:
   */
  jpeg_set_quality(&cinfo, quality, TRUE /* limit to baseline-JPEG values */);

  /* Step 4: Start compressor */

  /* TRUE ensures that we will write a complete interchange-JPEG file.
   * Pass TRUE unless you are very sure of what you're doing.
   */
  jpeg_start_compress(&cinfo, TRUE);

  /* Step 5: while (scan lines remain to be written) */
  /*           jpeg_write_scanlines(...); */

  /* Here we use the library's state variable cinfo.next_scanline as the
   * loop counter, so that we don't have to keep track ourselves.
   * To keep things simple, we pass one scanline per call; you can pass
   * more if you wish, though.
   */
  row_stride = image_width * 3;	/* JSAMPLEs per row in image_buffer */

  while (cinfo.next_scanline < cinfo.image_height) {
    /* jpeg_write_scanlines expects an array of pointers to scanlines.
     * Here the array is only one element long, but you could pass
     * more than one scanline at a time if that's more convenient.
     */
    row_pointer[0] = & image_buffer[cinfo.next_scanline * row_stride];
    (void) jpeg_write_scanlines(&cinfo, row_pointer, 1);
  }

  /* Step 6: Finish compression */

  jpeg_finish_compress(&cinfo);
  /* After finish_compress, we can close the output file. */
  fclose(outfile);

  /* Step 7: release JPEG compression object */

  /* This is an important step since it will release a good deal of memory. */
  jpeg_destroy_compress(&cinfo);

  /* And we're done! */
  return 1;
}
gif显示
