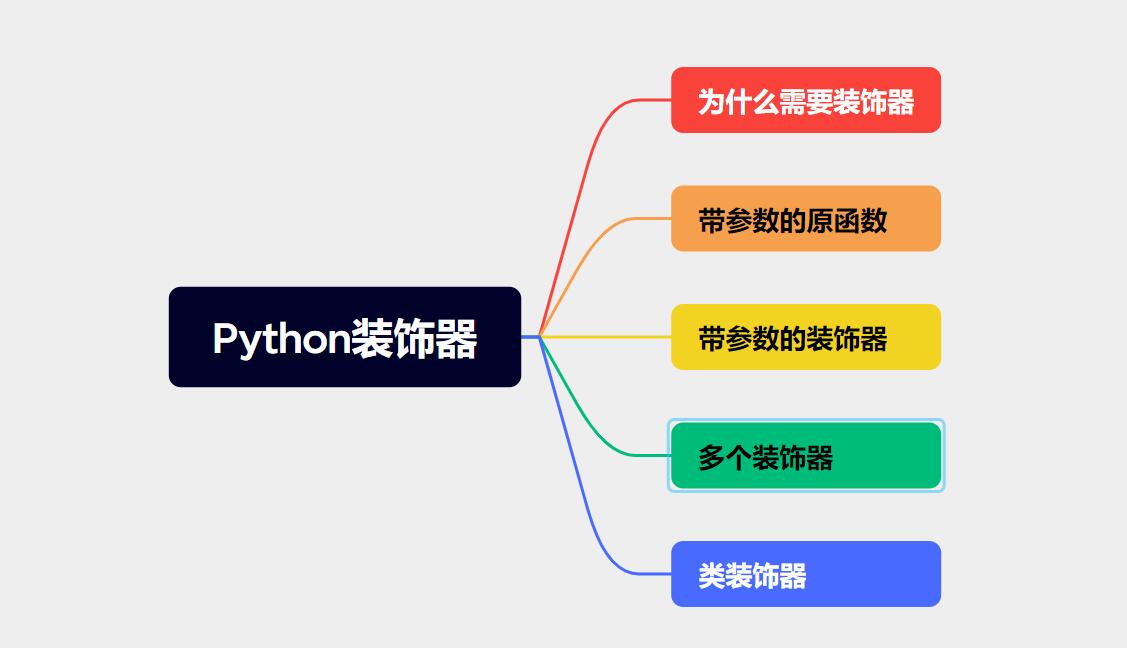
Python装饰器是一种特殊的函数,它接收一个函数作为参数,然后返回一个新的函数,用于扩展或修改原始函数的行为。装饰器提供了一种便捷的方式来在不修改被装饰函数源代码的情况下,增加、修改或包装函数的功能。通俗点说就是尽量不修改原有功能代码的情况下,给原有的功能添加新的功能。
装饰器的基本语法是使用@符号将装饰器函数应用于目标函数。
@decorator
def target_function():
    # 函数体
在这里,decorator是一个装饰器函数,它接受一个函数作为参数,并返回一个新的函数。target_function是目标函数,即需要被装饰的函数。
当你在目标函数上使用装饰器语法时,它等效于以下调用方式:
def target_function():
    # 函数体

target_function = decorator(target_function)
换句话说,装饰器函数将会接收目标函数作为参数,并将其替换为返回的新函数。这样,每当你调用target_function时,实际上调用的是装饰器返回的新函数。

为什么需要装饰器
前面说装饰器的好处就是尽量不修改原有功能代码的情况下,给原有的功能添加新的功能,道理虽然都懂,但是如何在代码上体现出来呢?现在假设我们有一个函数say_hello用于打印"Hello, world!",这个say_hello函数可以理解为业务上需要扩展的函数。
import time

def say_hello():
    time.sleep(1)
    print("Hello, world!")

say_hello()
现在,我们希望在每次调用say_hello函数时,都能在控制台打印出相应的日志,包括函数的名称、开始执行的时间和执行耗时。一种方法是直接修改say_hello函数的代码。
import time

def say_hello():
    start_time = time.time()
    print("Hello, world!")
    end_time = time.time()
    execution_time = end_time - start_time
    print(f"Function say_hello executed in {execution_time} seconds")
这样做确实可以实现我们的需求,但是这种改法第一太侵入式(修改原有的代码)了,第二如果有很多类似的函数需要添加相同的功能,或者后续需求变化需要删除或修改这个日志功能,那么修改每个函数的代码将变得非常繁琐和冗余。
所以我们写个新的函数log_decorator进行封装一下,这样子就可以避免太侵入式修改了,不修改原有函数say_hello的功能。
import time

def log_decorator(func):
    start_time = time.time()
    func()
    end_time = time.time()
    execution_time = end_time - start_time
    print(f"Function {func.__name__} executed in {execution_time} seconds")

def say_hello():
    time.sleep(1)
    print("Hello, world!")

log_decorator(say_hello)
但是这样子的改法却改变了原有代码逻辑,因为原有的代码逻辑是调用say_hello,现在却变成调用log_decorator,虽然也可以,但是改变了逻辑,不够简洁明了,不够优雅。
这时,装饰器就能派上用场了。我们可以通过定义一个装饰器函数,将统一的日志功能应用于多个函数:
import time

def log_decorator(func):
    def wrapper():
        start_time = time.time()
        func()
        end_time = time.time()
        execution_time = end_time - start_time
        print(f"Function {func.__name__} executed in {execution_time} seconds")
    return wrapper

@log_decorator
def say_hello():
    time.sleep(1)
    print("Hello, world!")

say_hello()
现在,每次调用say_hello函数时,实际上会调用wrapper函数,从而实现了在函数执行前后打印日志的功能。这种方式不仅避免了直接修改say_hello函数的代码,还可以轻松地将同样的日志功能应用于其他函数,只需要使用@log_decorator装饰器语法即可。上面调用相当于以下这样,当然前提要把装饰器@log_decorator去掉或者注释掉。
say_hello = log_decorator(say_hello)
say_hello()
所以可以看出装饰器的写法@log_decorator这个就相当于say_hello = log_decorator(say_hello),此处函数返回值命名,不一定非要命名为say_hello,这样是也可以的。
result = log_decorator(say_hello)
result()
带参数的原函数
如果原函数是带参数的话,那么装饰器需要怎么写呢?
我们需要把参数写到log_decorator里面的那个函数实际上wrapper,下面我们可以通过使用*args和**kwargs来接收和传递参数下面是一个示例,演示如何创建一个适用于带参数的函数的装饰器:
import time

def log_decorator(func):
    def wrapper(*args, **kwargs):
        start_time = time.time()
        func(*args, **kwargs)
        end_time = time.time()
        execution_time = end_time - start_time
        print(f"Function {func.__name__} executed in {execution_time} seconds")
    return wrapper
在上述示例中,log_decorator是一个装饰器函数,它接收任意类型和数量的参数,并使用*args和**kwargs来接收和传递参数。在wrapper函数内部,使用func(*args, **kwargs)来调用原始函数,并将参数传递给它。
现在,我们可以使用@语法来应用这个装饰器,无论带有参数还是不带参数的函数都可以。
@log_decorator
def say_hello():
    print("Hello, world!")

@log_decorator
def greet(name):
    print(f"Hello, {name}!")

say_hello()  # 执行带装饰器的say_hello函数
greet("Alittle")  # 执行带装饰器的greet函数
@log_decorator分别为say_hello和greet函数应用了装饰器。无论是不带参数的say_hello函数还是带参数的greet函数,装饰器都能正常工作。
带参数的装饰器
当需要给装饰器传递参数时,可以使用装饰器工厂函数来创建带参数的装饰器。装饰器工厂函数实际上是一个闭包函数,它接收参数并返回一个真正的装饰器函数。比如我们需要为不同的业务逻辑添加不同的日志等级,就需要在装饰器中添加参数了。
import time

def log_decorator_with_params(log_level):
    def log_decorator(func):
        def wrapper(*args, **kwargs):
            start_time = time.time()
            result = func(*args, **kwargs)
            end_time = time.time()
            execution_time = end_time - start_time
            print(f"{log_level}: Function {func.__name__} executed in {execution_time} seconds")
            return result
        return wrapper
    return log_decorator
如上所示,这种写法可以称为闭包的闭包,log_decorator_with_params是一个装饰器工厂函数,它接收一个参数log_level,用于指定日志的前缀。它返回一个真正的装饰器函数log_decorator,该装饰器函数在函数执行前后打印带有指定前缀的日志。
现在,我们可以使用@语法来应用带参数的装饰器。
@log_decorator_with_params(log_level="INFO")
def say_hello():
    print("Hello, world!")

@log_decorator_with_params(log_level="DEBUG")
def greet(name):
    print(f"Hello, {name}!")

say_hello()  # 执行带装饰器的say_hello函数
greet("Alice")  # 执行带装饰器的greet函数
上述示例中,@log_decorator_with_params("INFO")和@log_decorator_with_params("DEBUG")分别为say_hello和greet函数应用了带参数的装饰器。运行代码时,会分别打印日志等级。
在定义装饰器函数wrapper时,使用了*args和**kwargs作为参数,这样能够适配任意类型和数量的参数,并将其传递给原始函数。这样可以确保带参数的函数装饰器适用于不同的函数签名。通过使用装饰器工厂函数,我们可以轻松创建带参数的装饰器,提供更大的灵活性,让装饰器可以根据不同的场景和需求来定制其行为。
多个装饰器
在Python中,我们可以使用多个装饰器来装饰同一个函数,每个装饰器可以为函数添加不同的功能。
使用多个装饰器的顺序非常重要,因为它们按照从上到下的顺序应用。最上层的装饰器最先应用,然后是下一层的装饰器,依此类推。下面是一个示例,演示了使用多个装饰器来装饰同一个函数:
def decorator1(func):
    print("decorator1 before")
    def wrapper():
        print("Decorator 1")
        func()
    return wrapper

def decorator2(func):
    print("decorator2 before")
    def wrapper():
        print("Decorator 2")
        func()
    return wrapper

def decorator3(func):
    print("decorator3 before")
    def wrapper():
        print("Decorator 3")
        func()
    return wrapper

@decorator1
@decorator2
@decorator3
def say_hello():
    print("Hello, world!")

say_hello()
在上面的示例中,decorator1,decorator2和decorator3分别是三个装饰器函数。say_hello函数先被decorator3装饰,然后再被decorator2装饰,最后被decorator1装饰,也就是说执行顺序是从下到上的,上面的装饰器的执行就和下面这样一样:
# 执行顺序是从下到上的
result = decorator1(decorator2(decorator3(say_hello)))
但是因为每个装饰器返回的是函数名,函数名是不会被执行的,只有函数名加上括号(),函数才会被执行。decorator3(say_hello)返回一个函数名,并不会被执行,所以多个装饰器就等同于下面这样:
result3 = decorator3(say_hello)
result2 = decorator2(result3)
result = decorator1(result2)
result()
所以运行上述代码,输出结果为:
decorator3 before
decorator2 before
decorator1 before
Decorator 1
Decorator 2
Decorator 3
Hello, world!
从结果可以看出,装饰器的顺序是从下到上依次应用的,但是内部的闭包函数是从上往下执行的,有点类似出栈入栈的过程。
在实际开发中,我们可以将多个装饰器结合起来,实现更复杂的功能。但是,需要注意的是,装饰器的顺序可能会影响功能的实现逻辑。因此,在使用多个装饰器时,需要仔细考虑装饰器的顺序以及它们的影响。
类装饰器
除了函数装饰器,Python还支持使用类来实现装饰器,这被称为类装饰器。类装饰器通过将装饰器逻辑封装到一个类中,使得装饰器更加灵活和可复用。
要创建一个类装饰器,我们需要定义一个类,并实现以下两个方法之一:__init__和__call__。
__init__方法会在装饰器创建时调用,可以用来初始化装饰器的参数。__call__方法会在装饰器应用于被装饰的函数时被调用,可以用来包装并修改函数的行为。
class Logger:
    def __init__(self, func):
        self.func = func

    def __call__(self, *args, **kwargs):
        print(f"Logging: Calling function {self.func.__name__}")
        return self.func(*args, **kwargs)

@Logger
def say_hello():
    print("Hello, world!")

say_hello()
如上所示,Logger是一个类装饰器。它的__init__方法初始化了被装饰的函数,并将其保存为self.func。__call方法在装饰器应用于函数时被调用,在这里我们输出了日志信息并调用了原始函数。
运行上述代码,输出结果为:
Logging: Calling function say_hello
Hello, world!
从结果可以看出,装饰器的逻辑被执行,并在调用函数前后打印了日志信息。类装饰器相对于函数装饰器提供了更多的灵活性,可以在初始化阶段接收额外的参数,并在__call__方法中灵活地定制装饰器的行为。使用类装饰器可以更好地组织和重用装饰器逻辑,使代码更具可读性和可维护性。
标签:24,教程,函数,Python,hello,say,time,装饰,log From: https://www.cnblogs.com/kiwiblog/p/17963524更多精彩内容,请关注同名公众:一点sir(alittle-sir)
